EVGA Z170 FTW ATX Motherboard Review
EVGA Z170 FTW Layout
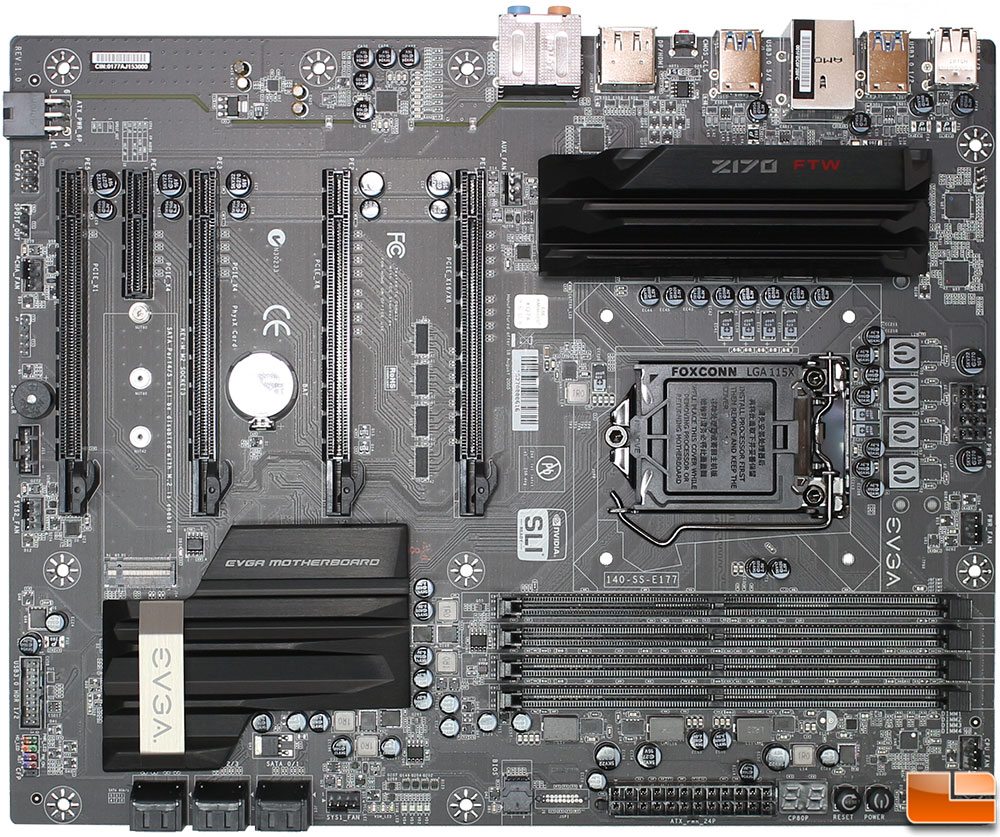
Be sure to remove all the little information tags and protective covers before installing the EVGA Z170 FTW. Most of these come off very easy, just be sure to get all the pieces as they are perforated along the edges. This did pose a little issue on the plastic cover for the Z170 chipset, it came apart just behind the SATA ports, causing me to get a pair of tweezers to take off the little piece between the heatsink and the SATA ports. Overall, the EVGA Z170 FTW has a solid black theme, no colors that can cause issues in making sure your system follows a color scheme.
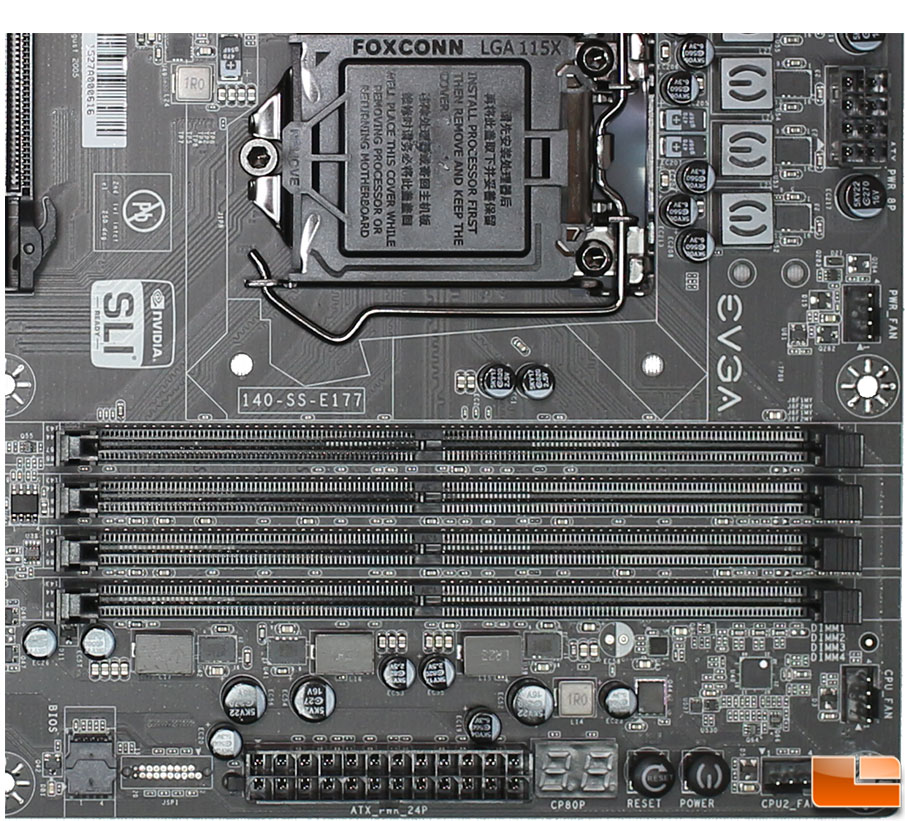
The EVGA Z170 FTW supports up to 64GB of DDR4 memory in its four memory slots, with speeds over 3200MHz, these are all running in a dual channel configuration. Other than the four DDR4 memory slots, in the lower corner, we can find three of the seven fan headers; PWR_FAN, CPU_FAN, CPU2_FAN. There is also the Reset and Power switch if you are doing testing and do not have a front panel to connect to. Next to the 24-pin main power connector is also the Dr DeBug LED, which also provides an overview of the CPU temperature once the system is up and running.
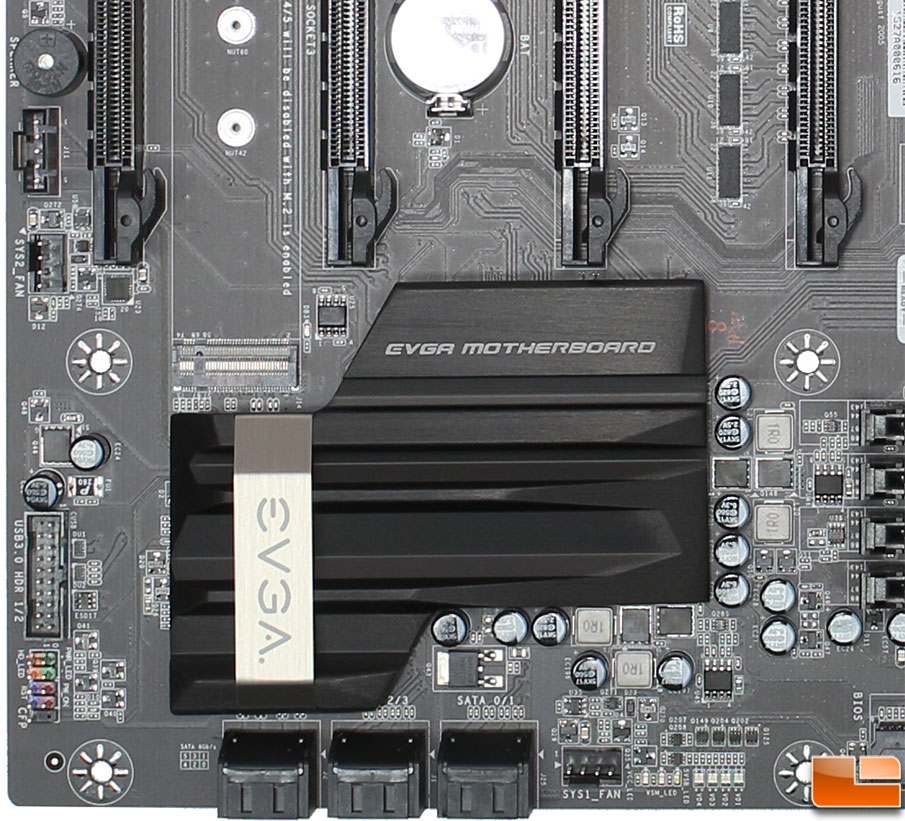
The other corner on this side contains the Intel Z170 chipset, which is covered by an oversized black heatsink that has a silver band with EVGA’s logo on it. A couple other features on this section is the SATA ports that are horizontal to the motherboard, to the right of those is the SYS1_Fan header, and the LED Status Indicators for Power, Memory and Standby mode. Moving to the left edge is the front panel connectors, USB 3.0 internal header, SYS2_FAN and finally the Thunderbolt GPIO connector.
For storage, the EVGA Z170 FTW is fairly light on support. There is the single M.2 slot, and six SATA 6GB/s ports along the front edge of the board. All six of the SATA ports are controlled by the Z170 PCH. If you need SATA Express, the Z170 FTW is not a good choice for you, instead take a look at the EVGA Z170 Classified; let’s be honest most people won’t be using SATA Express. The SATA ports are numbered from the right 0/1, 2/3, and 4/5 on the left.
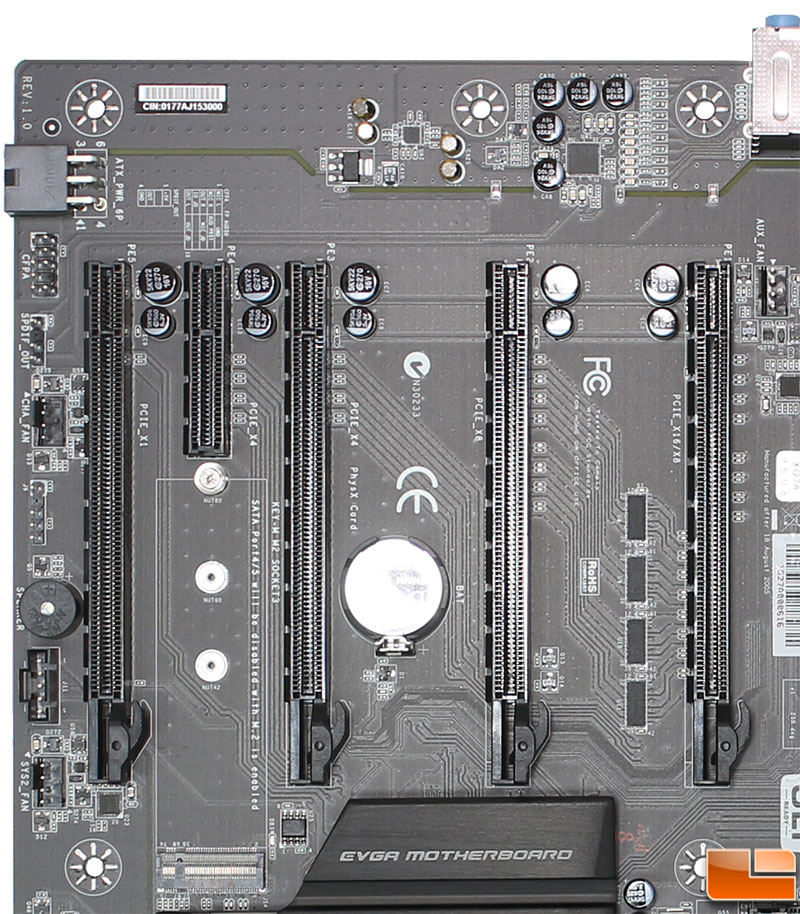
Moving up the motherboard to the PCI-E slots, here we have a total of four x16 length slots, and one x4 length. Going from the slot on the left, there is an x16, x4, x16, x8, and x16/x8 on the far right slot. All of the PCI-E lanes are supported through the CPU and PCH, not through PLX, which means there is no lane replication. Nestled between the two x16 PCI-E slots is the M.2 slot which is capable of up to 32GB/s. There is a note on the motherboard that utilizing the M.2 slot, you lose SATA ports 4 & 5 when M.2 is enabled. No mention of lose any PCI-E lanes though. Going up the left edge of the motherboard we have a few connections, just above the little onboard speaker is the EV Gauge which is a physical gauge of the speed of the processor Next is the CHA_Fan header, S/PDIF out, and front audio connector. If running in SLI, there is an additional six pin power connector as well. All the way to the right of the first PCI-E connector is an AUX_FAN header, making the grand total of seven on-board fan connections.
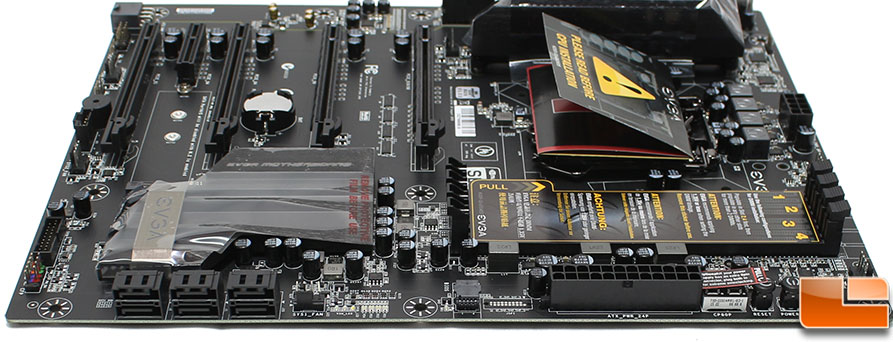
One thing that is hard to tell at this point, is that EVGA split the audio section from the rest of the motherboard to help reduce potential interference. This is indicated by a back-lit LED, which comes through as a yellow line on the motherboard once it’s turned on. This is becoming a common feature. I’m not a true audiophile, so I won’t attest whether this is really necessary, however it does look nice once the motherboard is powered up.
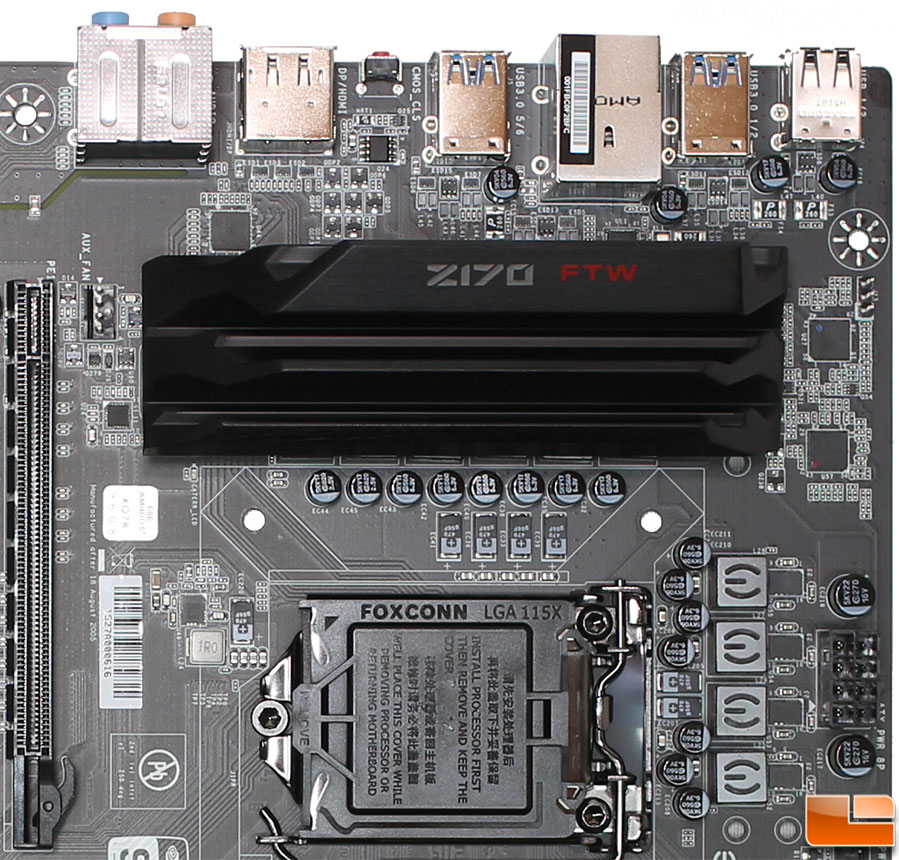
Nothing too exciting in the last section of the motherboard. The Intel socket 1151 has a standard cover to protect the fragile pins. There is a large heatsink to help cool the MOSFETS and VRM. Just to the right of the CPU socket is the standard 8-pin Aux motherboard power connector.

The Rear I/O panel doesn’t give us anything unusual or new that is supported on the Z170 chipset. The first two clusters are two USB 2.0 and two USB 3.0 ports. The third cluster is the Intel Gigabit Ethernet, and two more USB 3.0. The next cluster of two USB 3.0 ports rounds the USB 3.0 ports to eight total. A little red CMOS clear button is provided on the back panel next to the two on-board video connections; DisplayPort 1.2 and HDMI 1.4. Finally the standard audio cluster of five 3.5mm audio jacks and the optical SPDIF out. Sadly, EVGA didn’t include USB 3.1 or a Type-C connector on the Z170 FTW.