ASUS P9X79 Pro Intel X79 Motherboard Review
ASUS P9X79 Pro Intel X79 Motherboard System UEFI BIOS
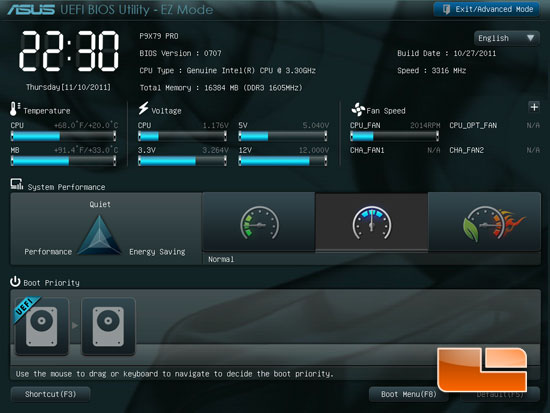
The ASUS P9X79 uses the same great UEFI BIOS that we have come to love since the first ASUS first introduced it on their Intel P67 series of boards. There haven’t been a whole lot of changes to the layout of the ASUS UEFI BIOS as they have worked great from the start. Above we can see the image of the ASUS EZ mode. Here we can see the general information about the system with regards to temperatures and voltages. We also have a couple of tweaks we can make to the system. The first is the system performance; we can set it to an energy saving setting, normal, or performance. For our testing we will be leaving it in ‘normal’ mode. The performance mode will give the system a quick overclock to the system. It will be conservative but safe. We can also change the boot order of the connected devices, in our case we only have our Kingston SSDNow connected. One change that has been added to the ASUS UEFI BIOS is a shortcut key.
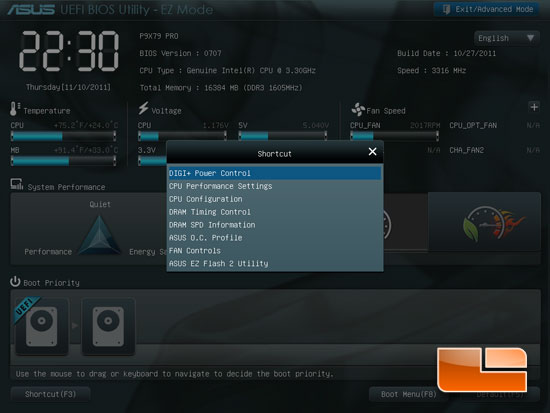
Once you press the shortcut key (F3) it will bring up a menu that will allow you to quickly navigate to a number of pages. Each of these pages can be found in the advanced portion of the ASUS UEFI BIOS, but this makes it much easier to jump quickly to the needed page. A number of pages are available through the shortcut and they include DIGI+ Power Control, CPU Performance Settings, CPU Configuration, DRAM Timing Control, DRAM SPD Information, ASUS O.C. Profile, Fan Controls, and the ASUS EZ Flash 2 Utility.
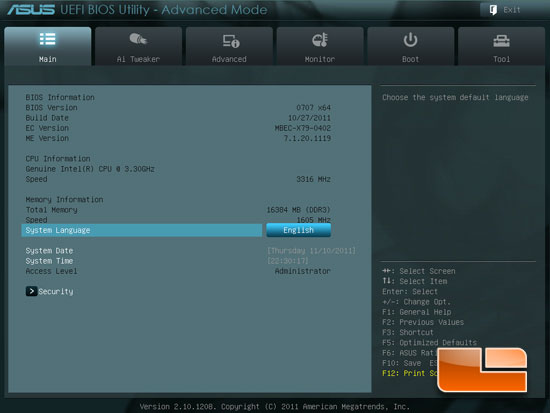
If you prefer to navigate your way through the ASUS UEFI and switch over to the Advanced version of the UEFI BIOS, this is the page you will be presented with first. We can see the information about the BIOS Version, system language, date and time, as well as security that will allow you to password the BIOS.
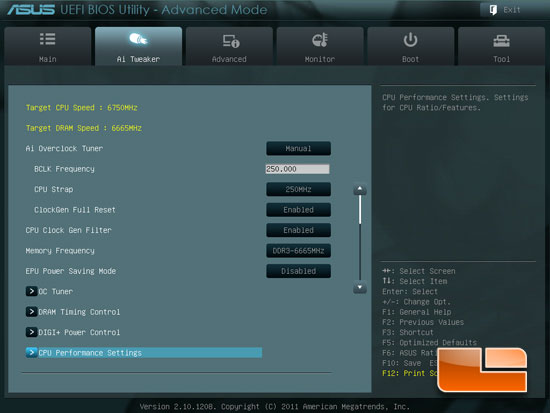
The second tab of the Advanced ASUS UEFI BIOS is the AI Tweaker. Here we can find most of the settings that are used to overclock your choice of Intel’s second generation of Core i7 processor.
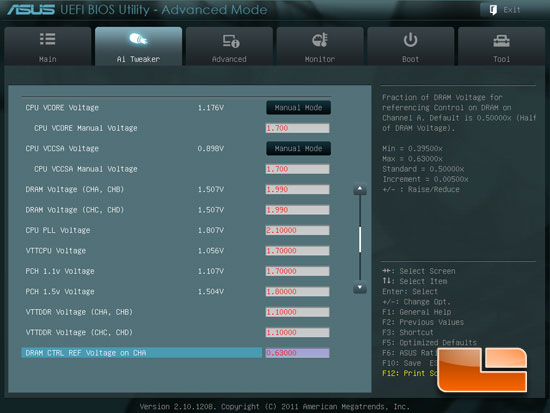
Scrolling down in the AI Tweaker we can see the maximum voltages on the ASUS P9X79 Pro should be more than enough to satisfy 99% of the enthusiasts out there.
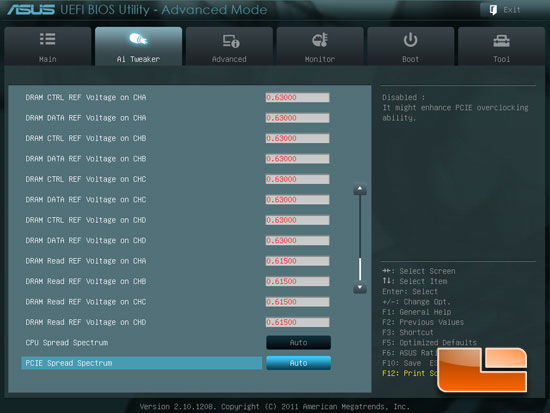
Just a few more voltage options on the ASUS P9X79 Pro motherboard.
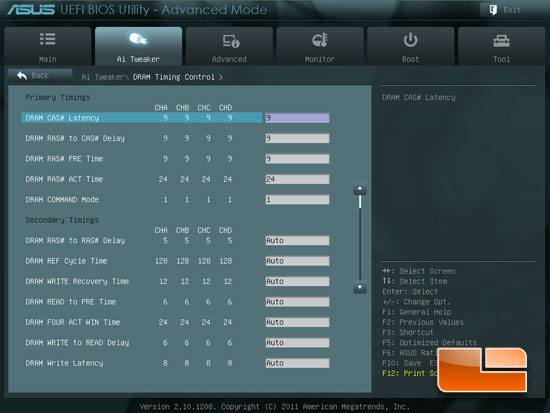
The DRAM Timing Control sub page in the AI Tweaker lets you tweak all the memory timings of your memory.
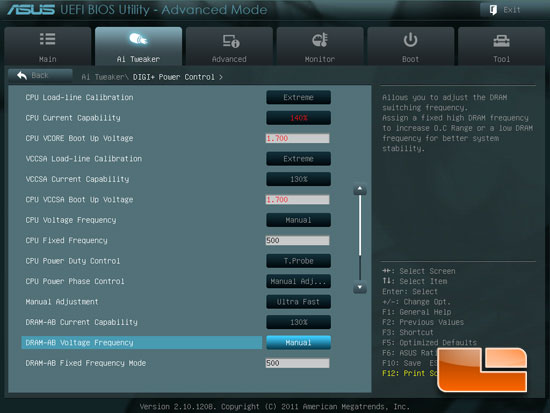
Above we have an image of the DIGI+ Power Control. The DIGI+ Power control is where we can find the options for CPU Load-Line Calibration, the various Current Capability options, and phase controls.
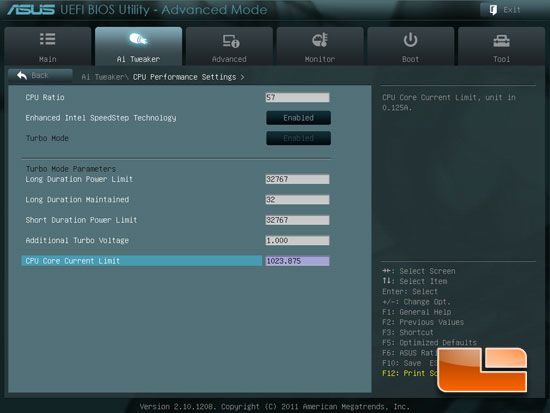
The CPU Performance settings has options for the Turbo Mode. We can set the power limits, Additional Turbo Voltage, and CPU Core Current Limit.
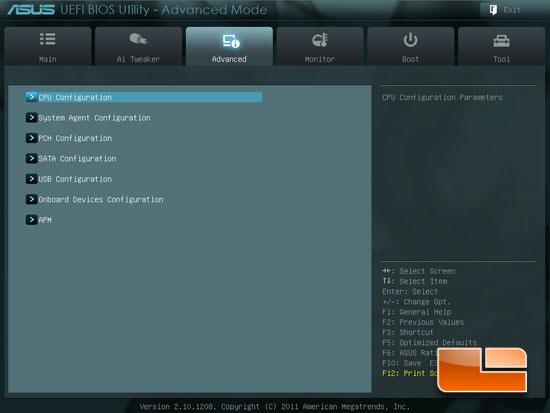
The Advanced tab of the Advanced UEFI BIOS will bring up the options for additional sub-pages which include; CPU Configuration, System Agent Configuration, PCH Configuration, SATA Configuration, USB Configuration, Onboard Device Configuration, and APM.
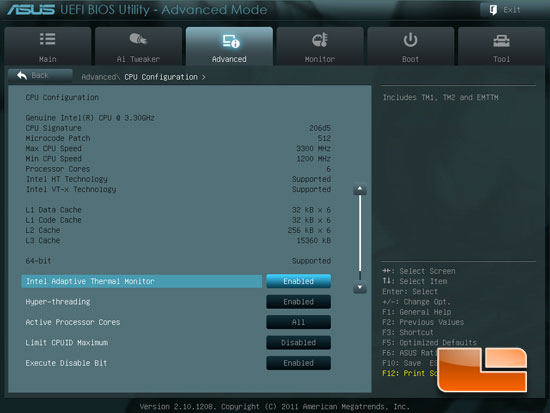
The CPU Configuration page shows the information about the CPU. We also have some options for the CPU settings. We can enable or disable the Intel Adaptive Thermal Monitor, Hyper-threading, active processor cores, Limit CPUID Maximum, Execute Disable Bit, Intel Virtualization Technology, and we have access to the CPU Power Management Configuration page.
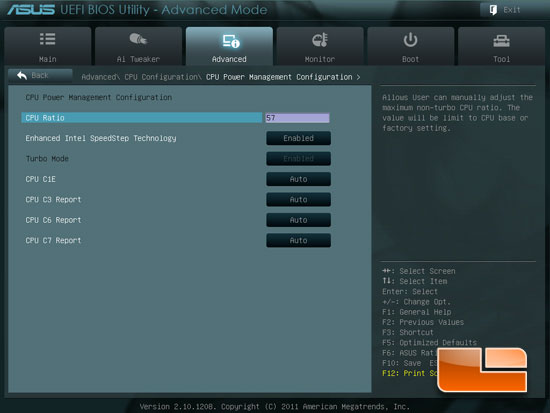
The CPU Power Management Configuration page will allow us to adjust the CPU Ratio, Enhanced Intel SpeedStep Technology, Turbo Mode, and the various C-States.
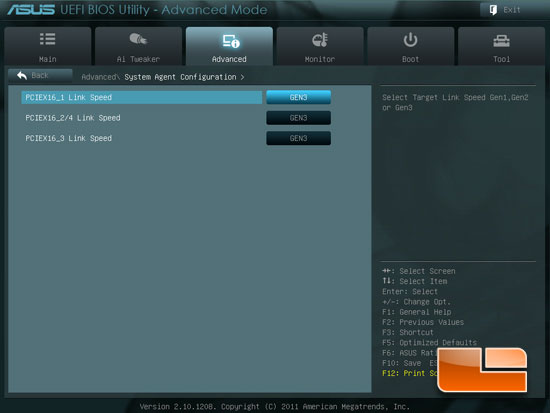
The System Agent Configuration page will allow you to switch your PCIe X16 slots between Gen1, Gen2, and Gen3 link speeds.
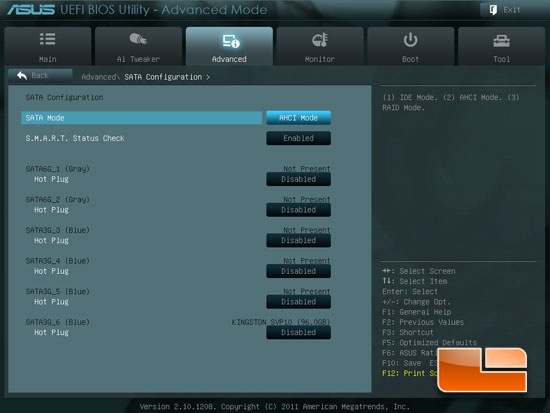
The SATA Configuration page lets you switch your SATA mode between IDE mode, AHCI Mode (Default), or RAID mode. You can also disable it if you plan on running a third party SATA Controller card.
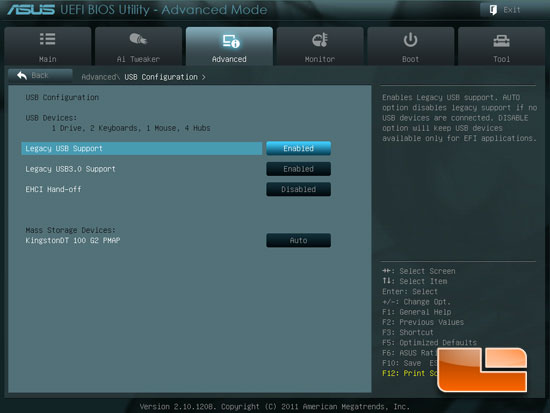
The USB Configuration page lets you enable or disable the legacy support on the ports. You can also see if you have a mass storage device plugged into the ASUS P9X79 Pro.
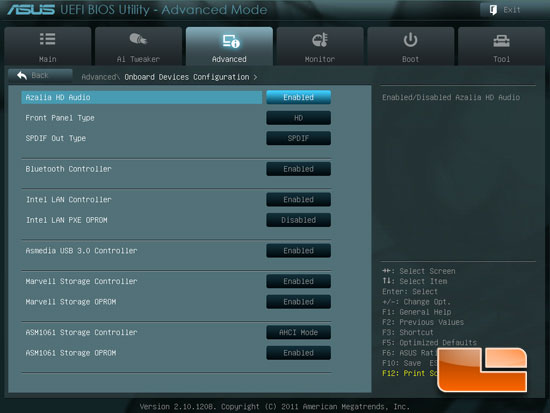
On the Onboard Device Configuration page we can enable or disable the various integrated peripherals of the ASUS P9X79 Pro.
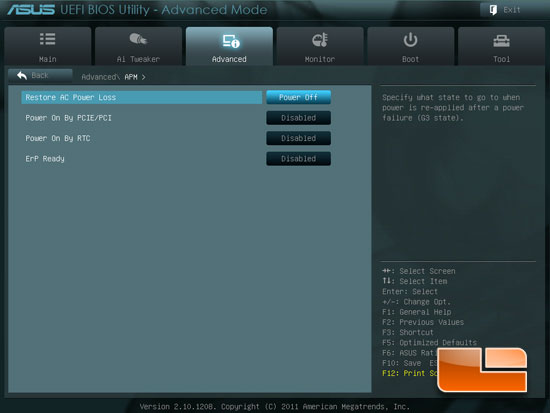
The APM page has a few options for the power management of the ASUS P9X79 Pro.
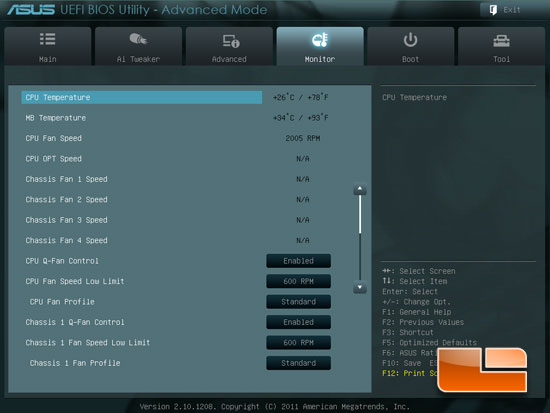
The Monitor page shows off all of the temperatures of the system as well as the various fan speeds. We can also control all of the system fans from this page.
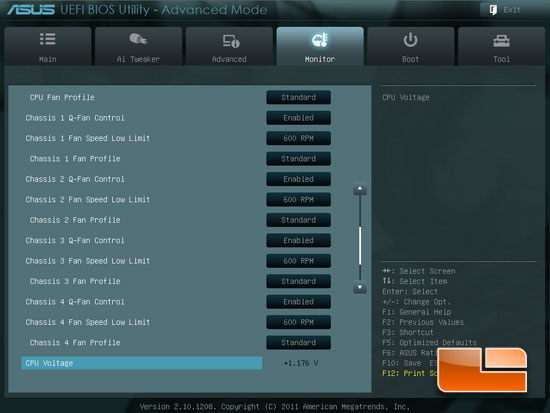
A few more fan settings on the ASUS P9X79. If we were to scroll down just a bit further we would see the system voltages as well as the ability to enable or disable the ASUS P9X79 Pro Anti Surge Support.
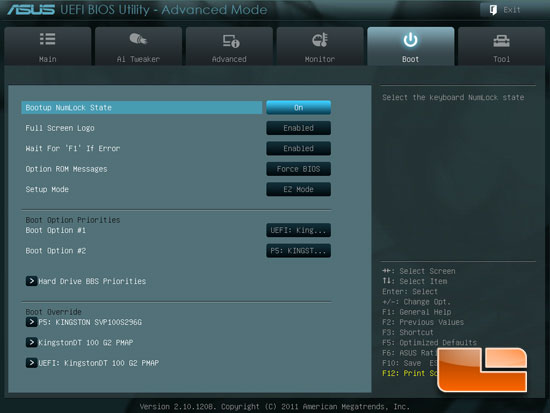
The Boot page of the ASUS P9X79 Pro UEFI BIOS lets us change the various boot options of the system.
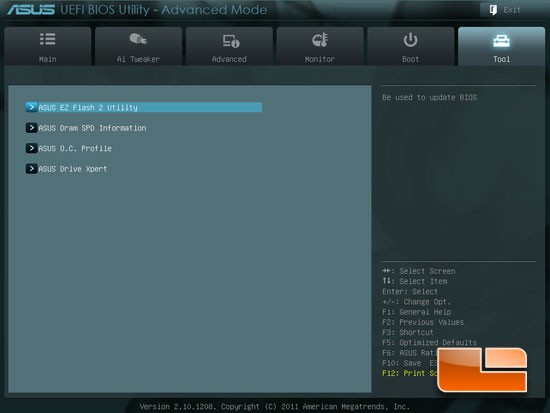
The Tools tab of the P9X79 Pro UEFI BIOS gives us access to the ASUS EZ Flash 2 Utility, ASUS DRAM SPD information, ASUS OC Profile, and the ASUS Drive Xpert.
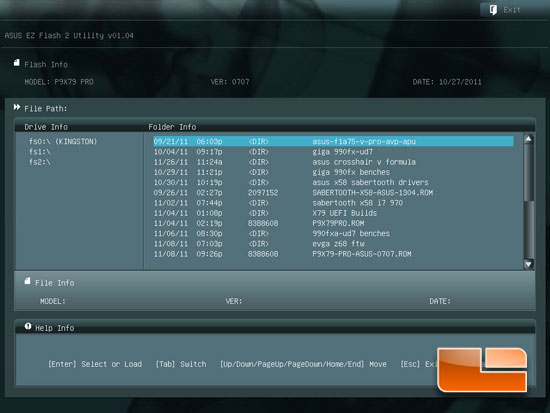
In the ASUS EZ Flash 2 Utility we can easily flash the BIOS from a USB drive, hard drive, or a CD.
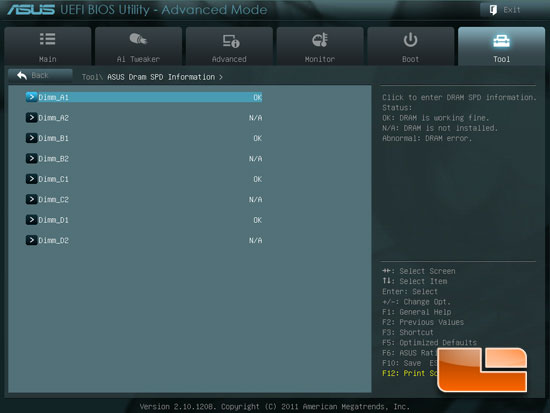
The ASUS DRAM SPD information lists out each of the 8 DIMM slots individually; it will also let you know if it detects an abnormal operation in any of the slots.
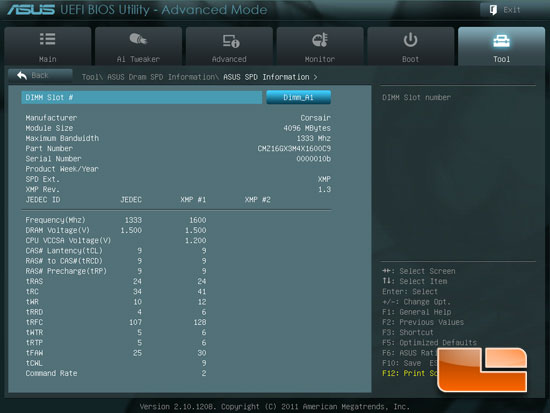
Clicking one of the DIMM slots on the previous page, you can check out the JEDEC and XMP profiles of the memory you choose to use.
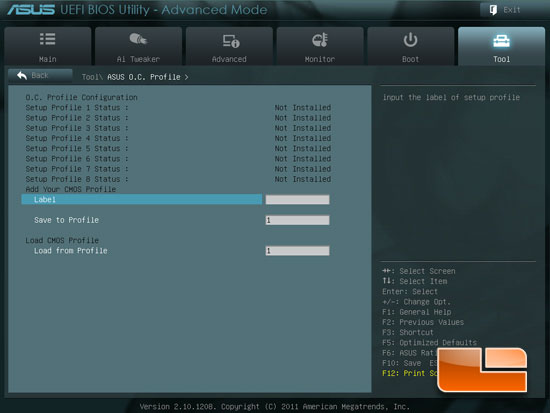
The OC Profile page will allow you to save up to eight different profiles for the BIOS.
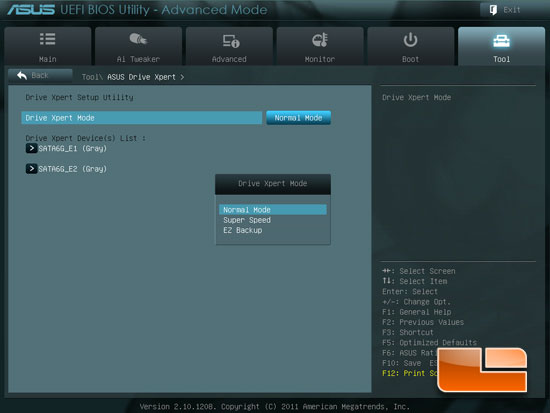
Above we can see the options for the ASUS Drive Xpert page.
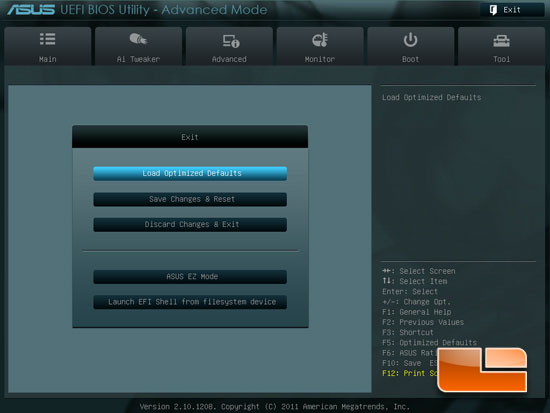
The final page of the ASUS P9X79 Pro UEFI BIOS is the Exit page. Here we can load the optimized Defaults, Save Changes and reset, Discard the changes and exit, switch to the ASUS EZ Mode, or launch and EFI Shell.

Comments are closed.