Cooler Master Cosmos SE Full Tower Case Review
Cosmos SE Interior Impressions
Full tower cases generally provide the benefit of a lot of room to work with inside, as well as a lot of room for alternative cooling options. We already know that the Cosmos SE is a smaller sibling in the Cosmos series, so lets see what it has to offer on the inside!
Popping the side panel off, I noticed that is was very light weight. I did expect this to an extent with the Plexiglas window, but I noticed right away that the steel is very thin in comparison to the original Cosmos 1000.
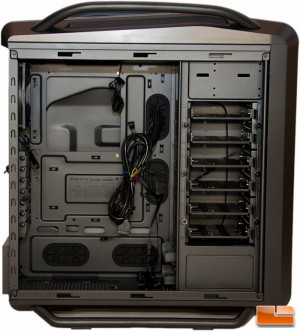
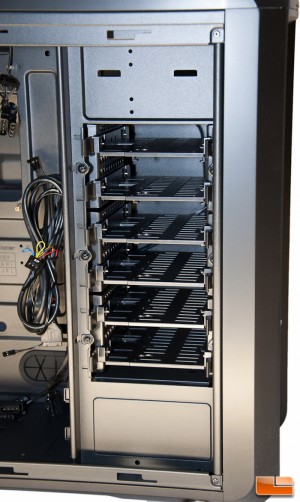
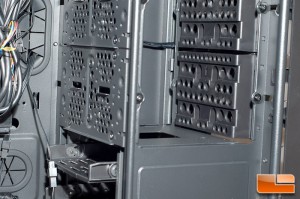
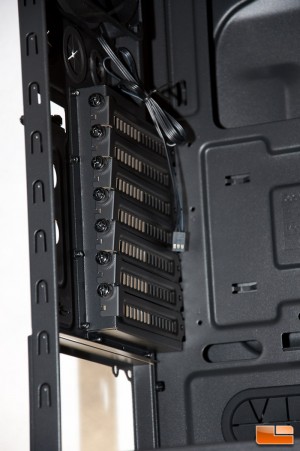
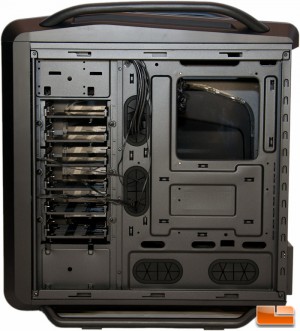
On the right hand side, I couldnt help but notice the large amount of hard disk storage space. That was one thing that attracted me to the original Cosmos 1000, and Im happy to see the Cosmos SE carried that quality over. There are six perpendicular slots here, and dont forget about the two below that which ride parallel to the depth of the case. This is also where Cooler Master says you can install up to 16 of 18 SSDs. You can reconfigure the orientation of these slots by simply unscrewing them and turning the bracket 90 degrees.
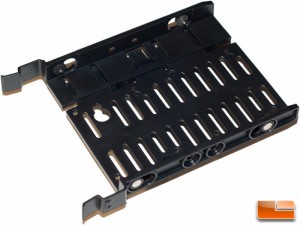
Pulling one of these trays out to see how drives mount, I have to say that I think Cooler Master did a good job with these. It may look like you have to bend the trays to fit a drive in, but actually you just simply push a tab in and pull the sides. These trays just simply expand to allow you to slip a drive in and then clip back in place. In the below picture, the square tab in question is on the top center.
Now should you want to install a longer video card, up to 395mm long, you can just simply remove several of the HDD trays. Also, to install that extra long 360mm radiator up front, all of the trays will need to be removed. This does look slightly tedious due to having to remove several screws.
On the subject of cooling, this particular case has room for 120mm+280mm+360mm radiators all installed at the same time, and even supports CPU coolers up to 175mm tall. That should help this case be an enthusiasts dream!
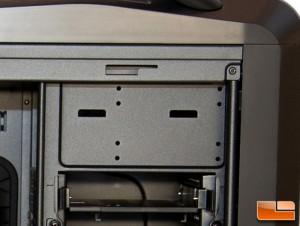
To mount any 5.25 devices, Cooler Master only included a standard screw; no tool-less option here.
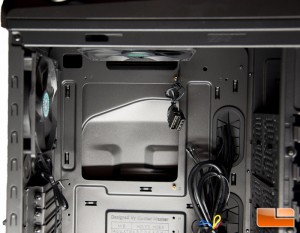
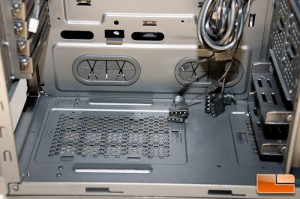
There are four quite large grommet holes visible here to route wires behind the motherboard tray. They look to be fairly well thought out, though overly close to the motherboard, but they should still help make wire routing easier. The only concern hole is the one on the bottom left, as that will end up being covered by your PSU. There are a couple other small holes below where the motherboard sits to help you install cables to places like the bottom USB headers, etc.
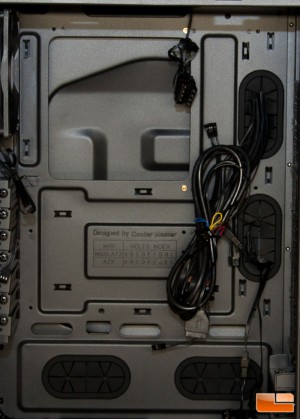
On the motherboard tray, Cooler Master made a nice large cutout behind the CPU socket to assist with back plate installation for larger CPU coolers. Oddly enough, there are only two standoffs mounted and Im not quite sure how they came up with that. If you look above the cutout, up here is where another pass-through is located for wire routing, but this one doesnt have a rubber grommet in place.
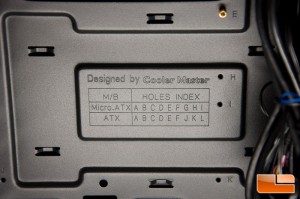
Who needs instruction manuals when Cooler Master was kind enough to stamp the standoff locations on the motherboard tray? This guide will assist you with installing standoffs for both ATX and mATX boards.
On the bottom of the case is where the power supply is mounted. To reduce vibration, Cooler Master put rubber where the PSU will rest.
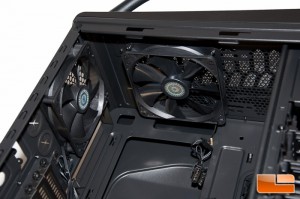
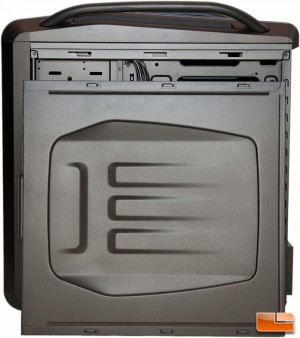
Moving up the backside is where youll find the seven expansion slots that can be utilized with thumb screws.
Just above the expansion slots are the two exhaust fans preinstalled in the case. The one on the rear is a 120mm fan, while the one mounted on the top is a 140mm fan.
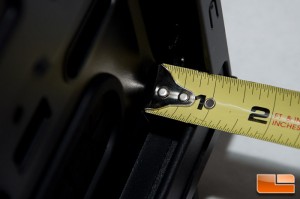
Flipping to the backside of the motherboard tray is where youll find 34mm of space to work with. Even the side panel itself has a bump out which should help you with cable/power connectors that are stubborn and want to stick out.
Here’s a full side profile shot of the right side of the case.
The one thing that I noticed on this case, is it isnt exactly geared towards silence like the Cosmos 1000. These panels also dont use a quick release system, but rather they utilize thumb screws. Installing and removing the panels were still super easy and Im happy about that.
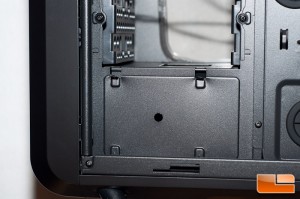
You might be asking yourself, what about the other two SSD mounting locations? Well, on the bottom left is where the 17th location is
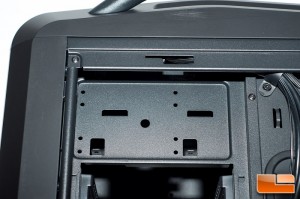
and the top left is the 18th.
Thats about all there is to the interior. There is a lot going on inside in terms of cooling potential and HDD/SSD storage compartments. The side panels were cheaper feeling compared to the original Cosmos, but they actually functioned quite well. It looks like there should be plenty of room to work with when installing hardware, but we can only find that out when we actually get a system built inside.
Lets move on and see how easy it is to install components inside this case!