Phanteks PH-TC12DX CPU Cooler Review
Phanteks PH-TC12DX Installation
Installation is pretty easy, with one exception, while I will get into shortly. The first thing to do is determine which of the brackets you will be using and prepare your system for the TC12DX cooler. I won’t get into this particular step as it will be different for each chipset. The system the TC12DX will be installed on is an Intel LGA 1155, so the Intel brackets will be used.
To prepare the cooler, the anti-vibration rubber strips need to be applied to the cooler. These are scored so they come apart pretty easily, however the scoring is on the sticky side so you have to begin peeling off the backing in order to separate them.

Next, the correct backplate will need to be installed on the motherboard. Use the custom backplate for Intel motherboards or the OEM backplate for AMD motherboards. There is no adhesive on the Intel backplate, so it’ll be easier to install if the motherboard is not in your case. However, even if it is the installation is still pretty easy. While holding the backplate in place, use your other hand to put on the support bracket and screw it down.
Now it is time to attach the CPU cooler to the support brackets. There are only two pre-attached spring loaded screws to secure the cooler to the support brackets, a few turns on each of them at a time is necessary to make sure you have consistent pressure and they go on evenly. Eventually, you’ll screw them all the way down until they stop; I found it easier to start the screws using my fingers, and then eventually switched to a Philips screwdriver about halfway down to finish the job.
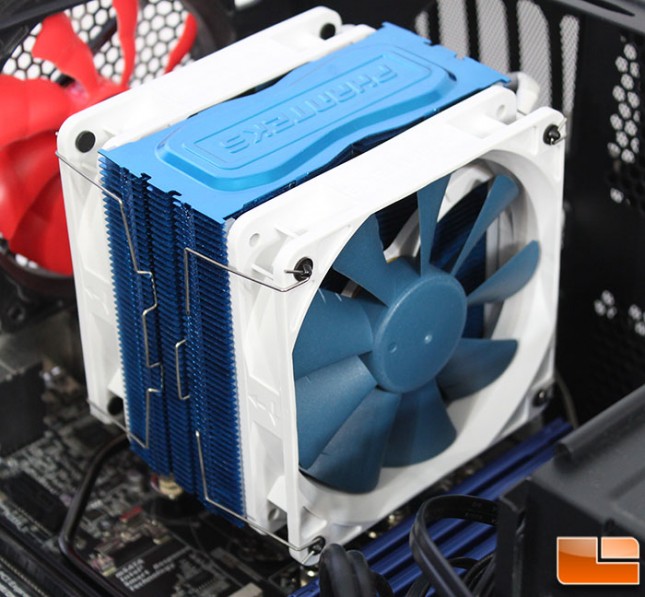
The final step is to attach the fans and provide power. Attaching the fan clips is a pretty simple process. The hardest thing is to make sure they clip onto the fan so they’ll attach to the CPU cooler in the proper direction for the desired airflow pattern. The little black fan clips go through the normal screw holes and will point away from the CPU cooler. The fan mounting wires should fold down with the little handle pointing towards the outside of the fan.
The instructions are great, they are detailed with both text and pictures and provide some tips to successfully install the PH-TC12DX. I ran in to a slight issue while following the instructions. I was tightening everything down as I went (per the instructions), and when I went to attach the cooler to the brackets, I couldn’t get one of the thumb screws to line up. After trying several different ways, I loosened one of the brackets so the bolt caps were just barely on. That provided enough give to allow the thumb screws on the cooler to line up with the bracket. Once the cooler was secure, I proceeded to tighten down the other bolts. So my recommendation is not to tighten down all the screws until the cooler is attached. Save yourself the headaches.
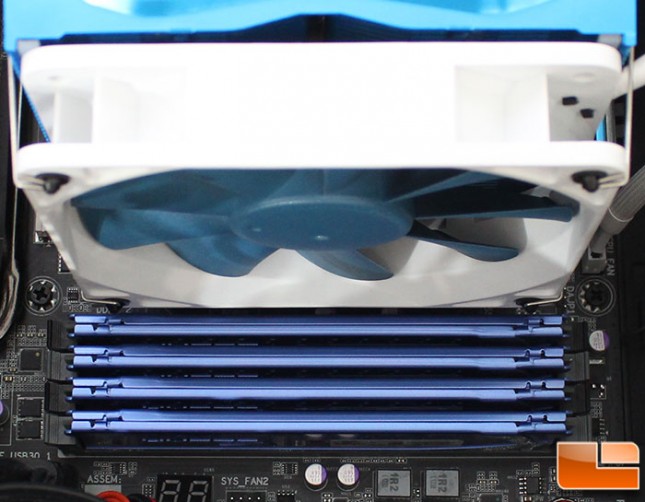
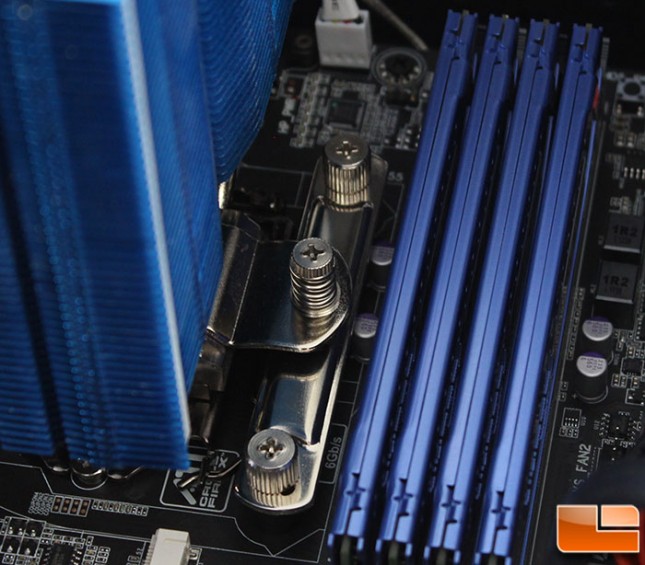
One of the concerns that many people have with the larger CPU coolers is whether it’ll fit with the enthusiast grade memory that has larger heatsinks. Taking a close look at the space between the fan and the first piece of memory, it looks like some of the taller memory will work fine; it will be a tight fit though. However, be aware that with these large coolers it is possible there will be clearance issues.