Corsair iCUE Nexus Companion Touch Screen Review
Corsair iCUE Nexus Software
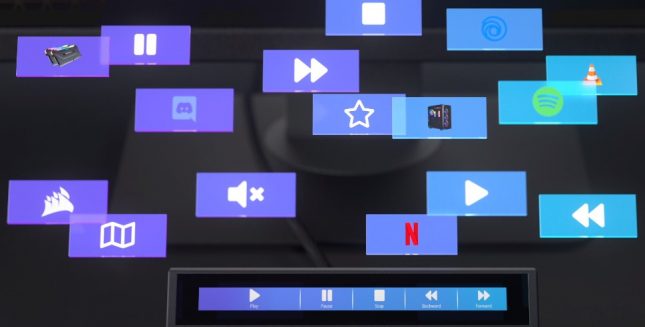
The new NEXUS from Corsair comes with a lot of customization inside the iCUE software allowing users to creativity with their screens and buttons as shown above. Given you the ability to make any keyboard have multi-media keys or it can make launching any application quickly. Would you like to be able to launch your favorite media player or open a website? What about being able to adjust any setting in iCUE quickly during a game without having to minimize your current application? Well NEXUS can do just that.
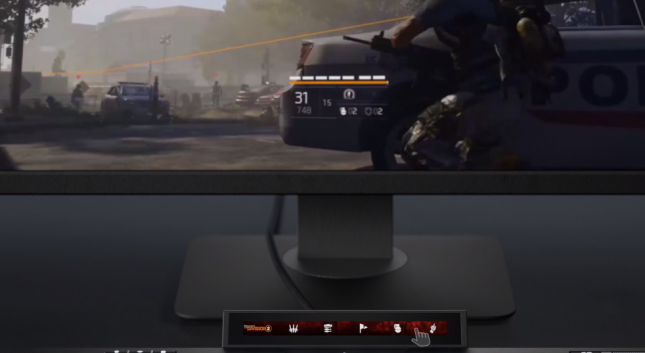
NEXUS can also be an additional assistant to your favorite games like Division 2 or Rainbow Six: Siege. You can quickly deploy your gadget such as a drone or throw a grenade. However, in it’s current form, it doesn’t work with many games but I assume that Corsair will be adding additional games in the future. This is the one feature that I think is somewhat pointless and it’s definitely not it’s party piece. The reason is because in competitive play, I don’t think it would be effective to use when milliseconds matter.
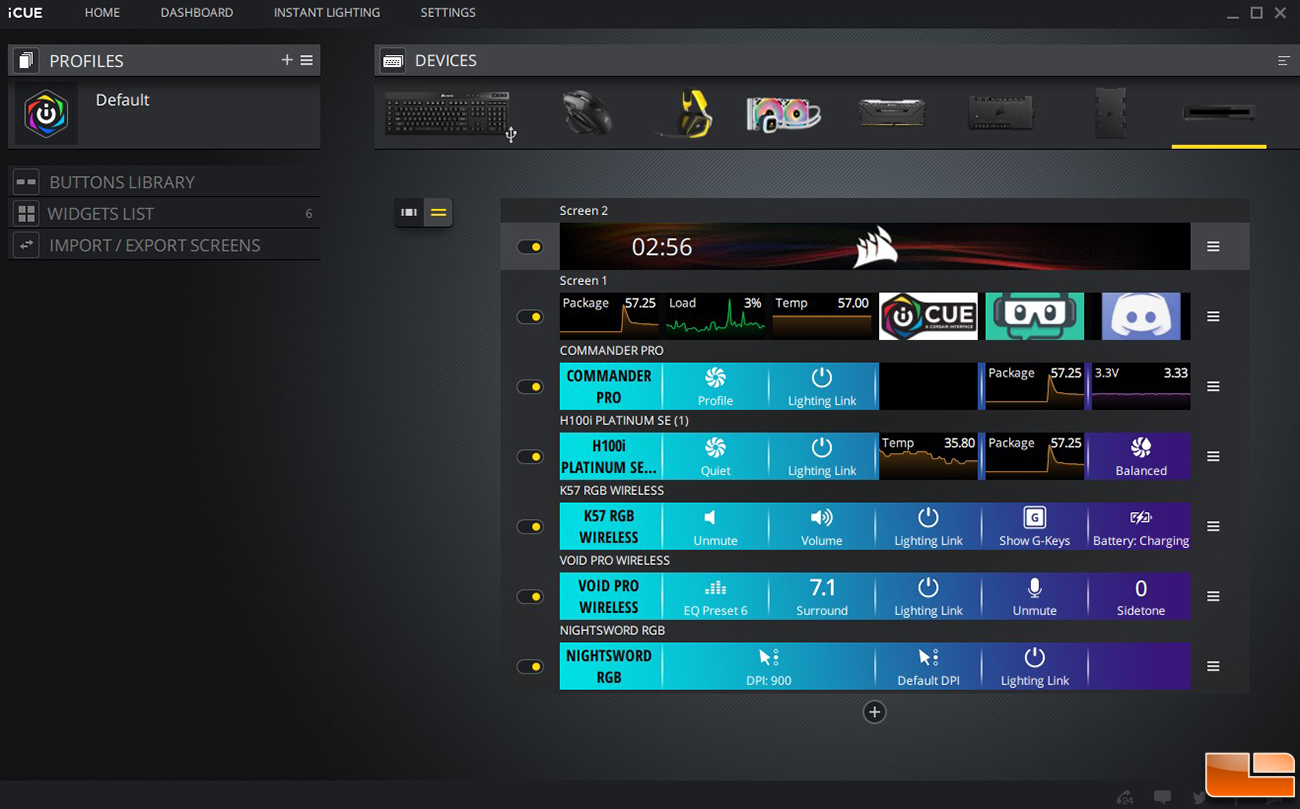

When you first open iCUE, you’ll notice that it shows the default screens for any iCUE compatible device that you already have linked to it. As you can see it automatically see that I have a Commander Pro, an AIO liquid cooler, keyboard, headset and my mouse. It gives you predetermined option screens set by Corsair, including an animated screen that shows the company logo. Even though they’re just some basic settings for now, hopefully in the future Corsair may add more options to be controlled by the NEXUS that are available through iCUE. The second from the top screen is one that I created within a few minutes to give a quick example of what can be added to the device at the swipe and touch of the screen. You can see my temps and load along with a button to open iCUE, Streamlabs and Discord using their respective logos. The bottom screenshot shows how to update the device’s firmware under the settings section on the top of iCUE of which you’ll need to do when you first connect your device to your computer so that is has the latest version.

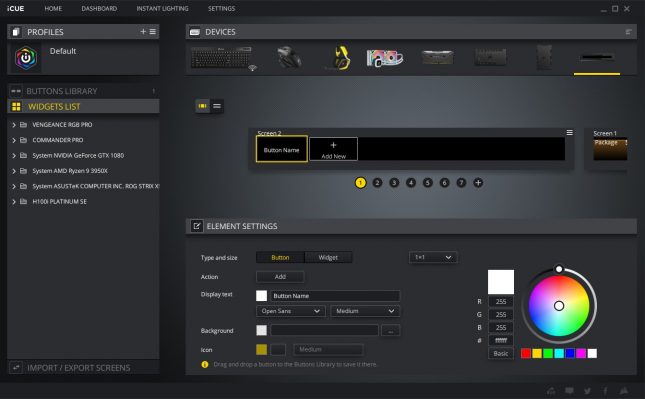
To add an additional screen, Corsair has made it very simple to do and keeping things simple. You just click the circular plus symbol to add more screens, up to 200 additional screen if you would like. After adding the new screen, you’re met with some simple options to add fonts, along with some options for the fonts such as size and color. You can also add backgrounds such as still images or any animated image such as a gif. You’re also given the options to add custom widgets or add custom actions like launching applications.
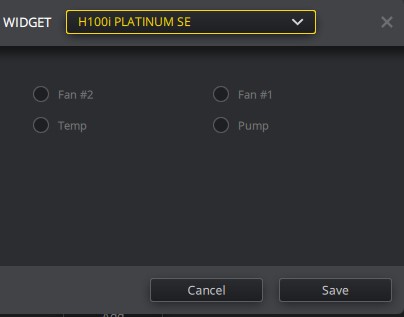
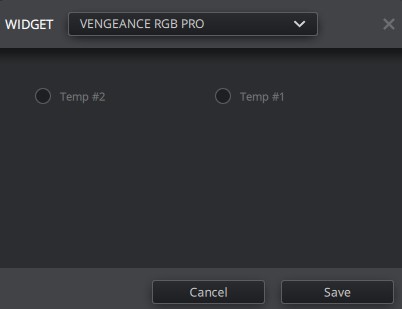
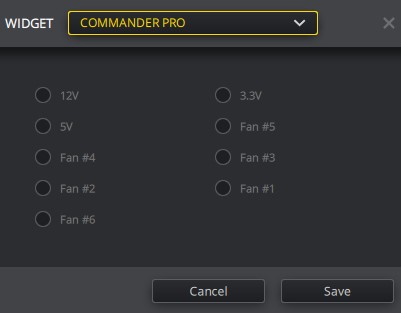
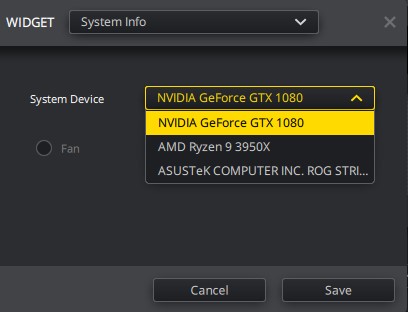
In the images above you can see the available options I have for setting up customer widget screens to the device for monitoring system information like temps, load values and fan speeds. There’s nothing special that I had to do to get this to work and works right out of the box. iCUE automatically detects all of these devices and relays their information to the NEXUS. Corsair really kept things simple for their customer when customizing the NEXUS. They put in the finger-work so that we don’t have to and we can really appreciate that.
 Here is the screenshot of the simply custom screen I made that I showed earlier in the images. It doesn’t do anything crazy. I can see my CPU temp, CPU load value and my GPU temp. I can also open iCUE, Streamlabs and Discord at the touch of a button. This will be convenient for user that have a lot of icons on their desktop and/or start menu like myself who has a lot of them.