NZXT Kraken G10 GPU Water Cooler Review on an AMD Radeon R9 290X
Installing the Kraken G10 on the Radeon R9 290X
 In order to install the Kraken G10 you’ll have to remove and prepare your video card to be water cooled. After removing a bunch of screws the AMD reference cooler on the Radeon R9 290X came right off. Our card is a retail card by Sapphire and you can see that the thermal compound was properly applied and making good contact with the base of the vapor chamber (some think that the thermal compound is partly to blame for performance variances on the Radeon R9 290X series). You just need to clean off the thermal compound and the card will be ready for water cooling!
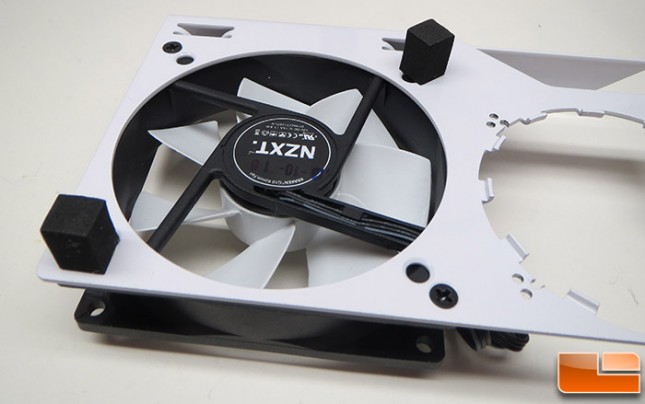
Next you should install the two foam bloacks to the inside of the GPU bracket. Where to put this ultimately depends on your cards layout, so be sure to dry fit the bracket to find out where to place the to pads. For the AMD Radeon R9 290X we picked opposite corners of the fan as there were no capacitors or VRM components to get in the way.
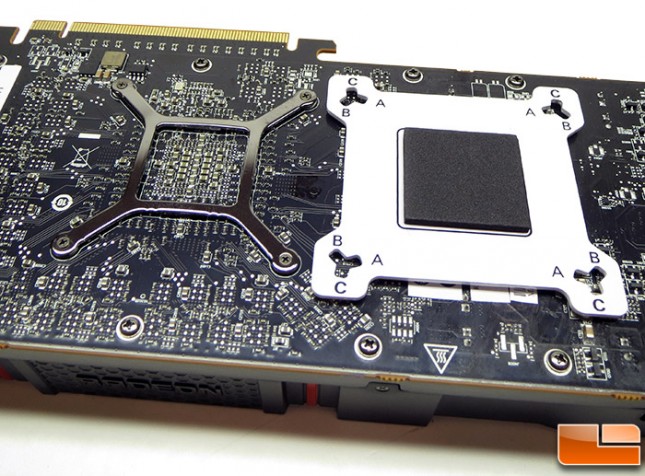
The next installation step is to get the GPU backplate ready to be installed. The GPU backplate is universal, so it has multiple screw mounting points on it in order to work with both AMD and NVIDIA graphics cards. If none of the supplied mounting holes work for your specific use card, you could always make your own backplate as it’s just a flat piece of steel with four holes and a foam pad on it.
- Option A: 53.2mm x 53.2mm for all AMD Radeon graphics cards
- Option B: 61mm x 51mm for NVIDIA GeForce GTX 560 Ti, 560, 560SE and others
- Option C: 58.4mm x 58.4mm for NVIDIA GeForce GTX Titan, GTX 700 series and GTX 600 series cards
Since we are using the AMD Radeon R9 290X graphics cards we used the ‘A’ set of mounting holes. We just put the screws in the right slots and then slid down the washers that also help hold them in place.
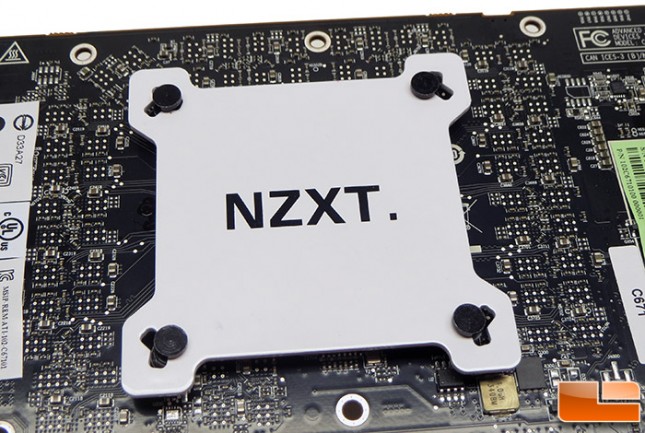
After that you can carefully put the assembled backplate through the GPU cooler mounting holes on the PCB. Be sure that you can read the NZXT logo when looking down at your card when it is installed in your case. At this point you can flip the card over and lay it down so the screws don’t fall out.
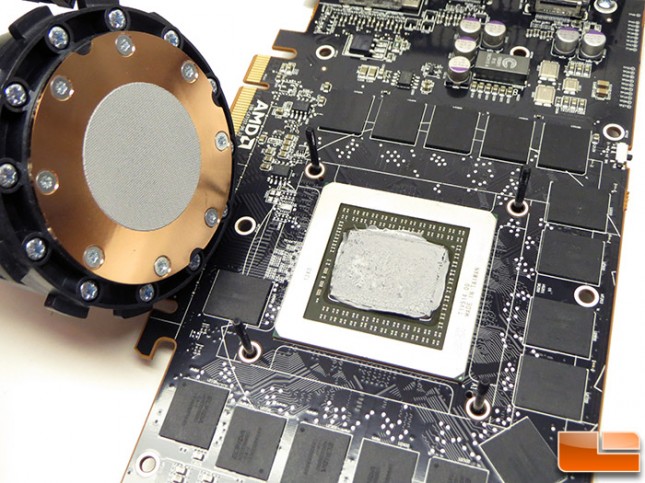
We stopped at this point to make sure the new NZXT Kraken X40’s pre-applied thermal paste would cover the entire Hawaii GPU that powers the Radeon R9 290X. It looks like it just barely does, so we got lucky as this is a pretty big GPU core. If you are using a used water cooler, you’ll need to have a tube of thermal compound and apply it now.

When testing fitting the GPU bracket to the video card we noticed that two of the screws would not fit in the four holes of the steel mounting plate. We took the plate off and found that NZXT drilled the holes to be 3/32 in diameter.
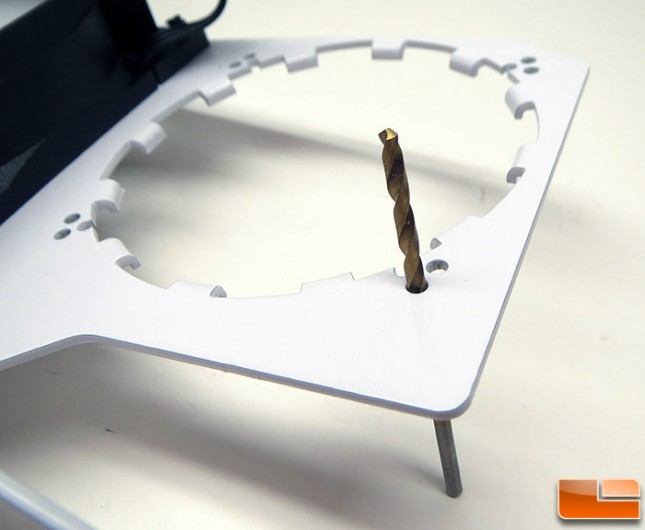
The ‘B’ and ‘C’ holes were able to accomadate the 3/32 drill bit and it looks like someone at the factory drilled out the holes after the bracket was painted. NZXT applied a thick application of glossy white paint, so all the holes had to be re-drilled after painting.
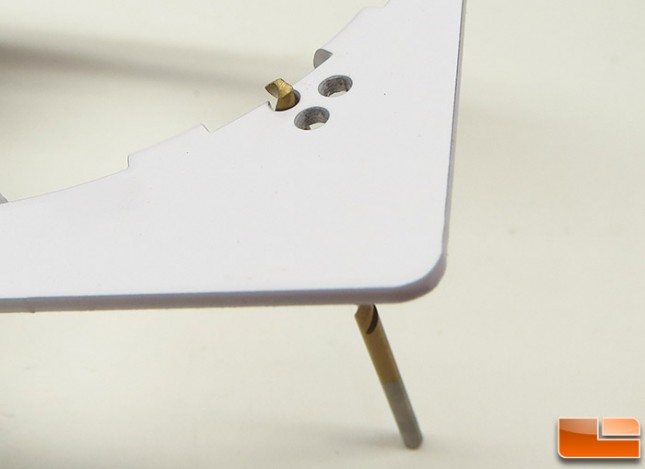
On our particular sample none of the ‘A’ bracket holes were drilled out and the 3/32 drill bit would not go through the two that were paint heavy. After hooking up our drill and drilling out the holes we were able to slide the bracket down over the GPU water block mounting screws. This is a simple fix, but it is a hassle and shows that NZXT needs to step up the game when it comes to quality control.
At this point you in time you can attach the water block to the mounting bracket and then slide the entire assembly together. There wasn’t much thread showing through the metal plate, but there was enough to get the nut threaded on and then we were able to tighten everything up. NZXT says to tighten in an X formation like you would a car wheel, so the GPU isn’t damaged. You really don’t want to overtighten this as you could quickly damage your GPU core and permanently ruin your graphics card. Some of you might also be worried about warranties and this very well might VOID the warranty on your graphics card. If you are concerned about your warranty you should contact your cards manufacture and ask about changing out the GPU cooler and thermal paste.
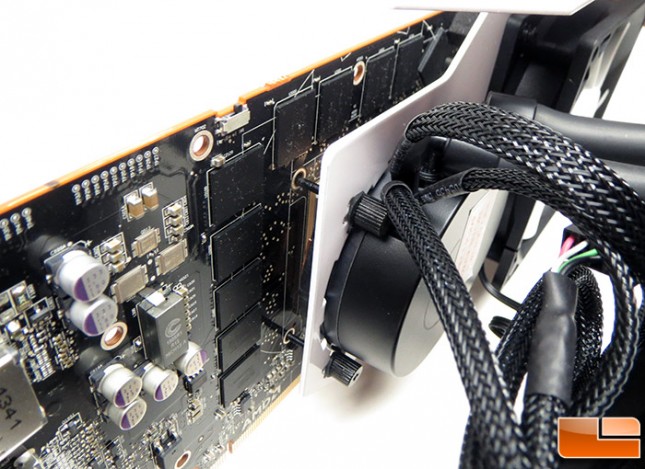
After tightening the four screws we took a look at the copper water block base and made sure it was level and that everything looked okay. As you can see there is plenty of space between the NZXT Kraken G10 and the video card itself, so you can should be able to quickly see if anything is awry.
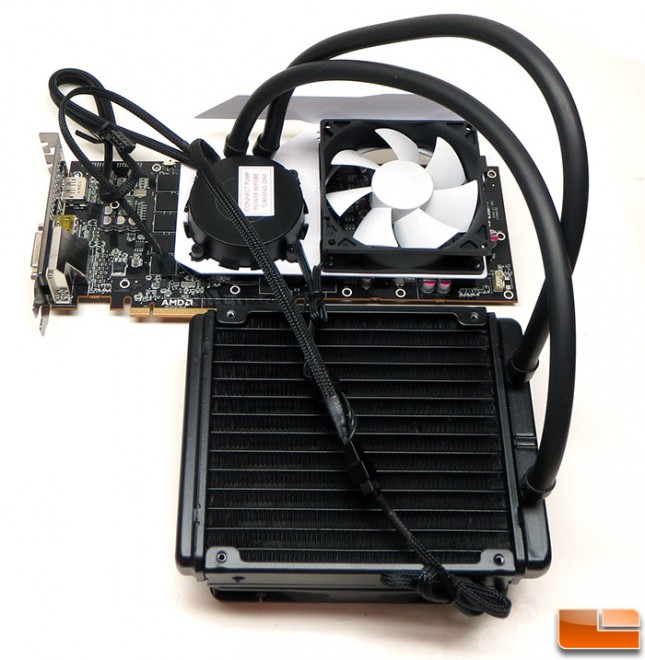
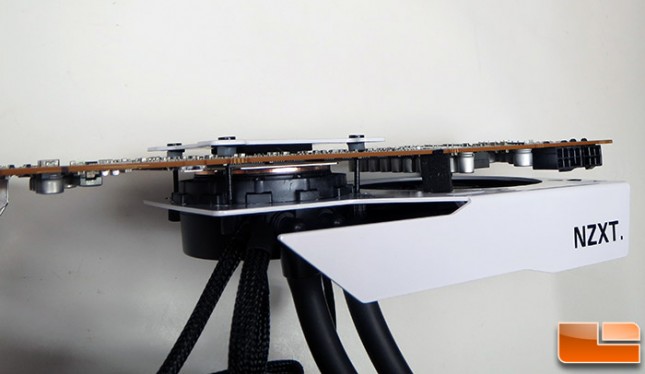
Fully assembled the AMD Radeon R9 290X and the NZXT Kraken G10 + Kraken X40 is pretty damn massive and awkward to handle. The only thing you need to do at this point in time is to assemble it into a PC case, wire it and then zip tie up all the wiring to make it look pretty and not messy. The only things that you need to wire for our setup is the 3-pin power cable for the pump housing (the fan plugs into the pump) and then a USB cable that lights the LED light in the pump housing and allows you to run the NZXT Kraken Control software utility. This little utility allows you to control the fan speed settings and LED lights with pre-configured settings or your own custom profile.

We will be testing on an open test bench, but here is a stock image from NZXT that shows what this setup looks like installed inside an NZXT Phantom full tower PC Case. It doesn’t look half bad when stuffed inside a full tower case that can front mount a 120mm or 140mm water cooler!
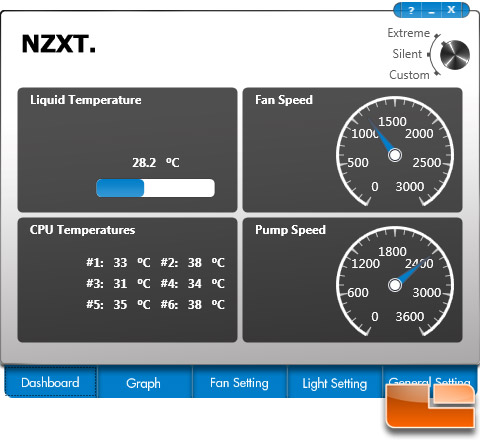 At this point in time you can download and install the NZXT Kraken Control utility on your PC and configure it how you want to. We use the pre-default setting of extreme for testing to make things simple.
Let’s take a look at the test system and then see how this card performs.