be quiet! Silent Base 800 PC Case Review
be quiet! Silent Base 800 Mid Tower ATX Case Build Overview
We wanted to build a relatively quiet system in the Silent Base 800 to help highlight it’s primary function, silent operation. When paired with zero-RPM parts like the Corsair RM750 PSU and eVGA GTX 960 SSC GPU’s we used during this evaluation, you could turn the system on with the panels closed and not know it was on until the monitor actually splashed. The only component we heard consistently was the fans and pump from the Corsair H100I GTX AIO cooler we used, as you could hear the faint whine of the fans and pump escaping from the rear of the chassis. The sound damping material throughout the case and design features to channel air really helped eliminate noise, as the system was barely audible from just a couple feet away.

Building into the Silent Base 800 was an absolute pleasure for a number of reasons. First of all, the quality and ease in which you can remove and replace the side panels need to be noted. The side panels sit on a track that lets you line it up perfectly with the case when sliding it on. This is great, as it lets you put the side panels on straight and with ease and also be able to take them off without them crashing down upon being released from their latch points. While not as convenient as some of the swivel doors I’ve worked with, it was really refreshing taking the panels on and off on the Silent Base 800.
All of our build hardware installed without issue and the case didn’t have any sharp edges or present any inconveniences. The IO shield of the Z97 Sabertooth fit the case perfectly and the motherboard lined up perfectly with the screw holes that are built into the tray. Our Corsair H100I GTX installed without issue due to the spacious top fan area provided by the Silent Base 800. We elected to install the radiator and fan within the chassis to help keep air turbulence down when running the H100I GTX on high, but be quiet! has cutouts on the top fan ports that allow AIO coolers to sit above the frame, so spacing shouldn’t be an issue with any of the 240MM/280MM AIO units currently on the market, though it’s always good to do additional research if you’re unsure.
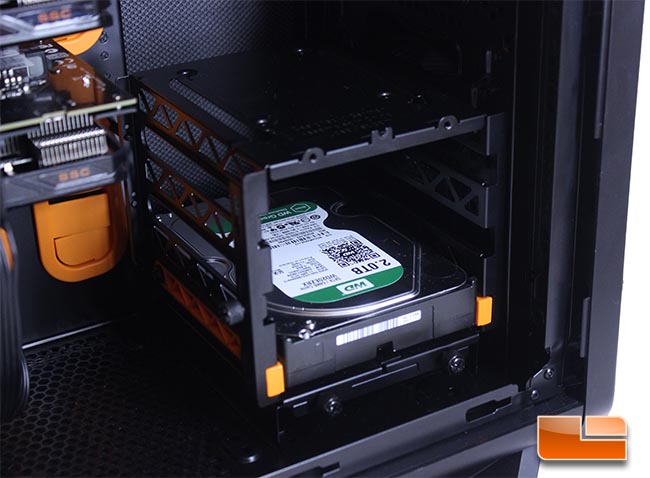
After removing the upper cage to suit our particular build, our 2TB Western Digital hard drive installed without issue and we could notice the drive vibration not transferring to the metal cage, but rather staying isolated to the drive. This indicates the rubber mounts are doing their job, as intended. Even without the middle cage removed, the Silent Base 800 would have had no problems clearing the graphics cards used, eVGA GTX 960 SSC’s.

With a Corsair RM750 PSU, which is pretty much a standard length unit, we see that installing a 140MM fan is simply not an option, as the PSU extends over the 140MM mounting holes. Installation of a 120MM is certainly possible, as the fan will be able to clear the PSU and its modular cables. While smaller PSU’s will allow for a 140MM fan to be installed, we think it’s not worth the compromise if you already own a nice PSU you want to use with the case. Another thing to consider is that since the PSU and 120MM fan would both be pulling air from the same area beneath the chassis, the 120MM fan may compromise the amount of air the PSU is able to pull in.
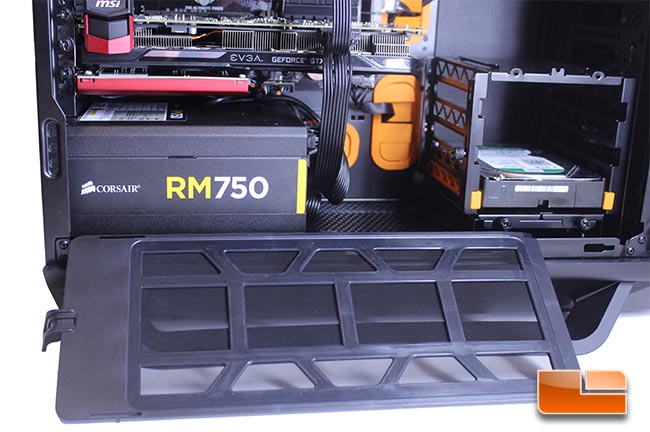
During the external portion of our review, we talked about the length of the filter in the Silent Base 800. A lot of people have their cases with the rear facing a wall, so I could see removal of this filter taking some time, but it’s hardly a nuisance and shouldn’t discourage users from keeping their filters cleaned. These filters are easy to clean. Take them out, rinse them out, and let them dry.
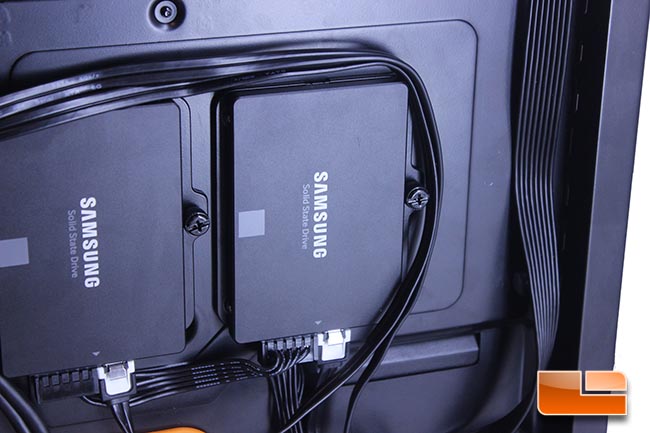
The dedicated 2.5″ SSD installation points on the rear of the motherboard tray that complement the other two SSD install points are excellent, though be quiet! should have thought out a solution that would allow SSD’s to be installed in the 3.5″ bays using the rubber installation strips. Perhaps they can address this on a future revision of the case, as the current SSD installation points could be potentially limiting, though four installation points should be enough for most users.
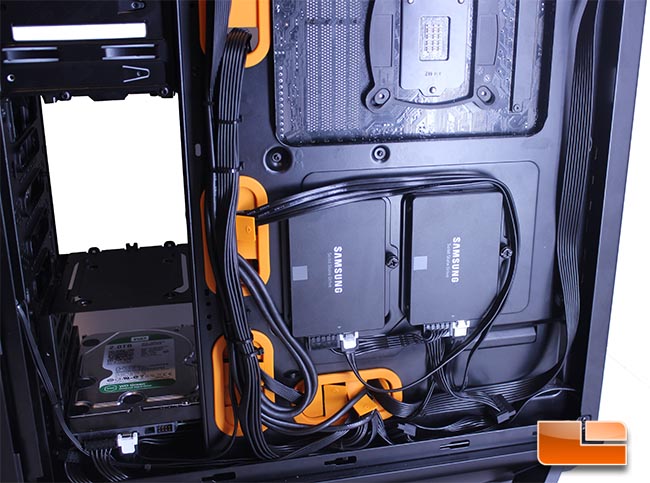
There is plenty of room in the rear of the chassis to route cables and we were able to clean things up pretty well. There aren’t any cable tie down points on the rear of the motherboard tray except for a couple running along the grommets, as previously noted. This is a major oversight and be quiet! should address it on future case revisions. For such a cleanly designed case that preaches aesthetics, limiting the end users cable management ability is a let down.
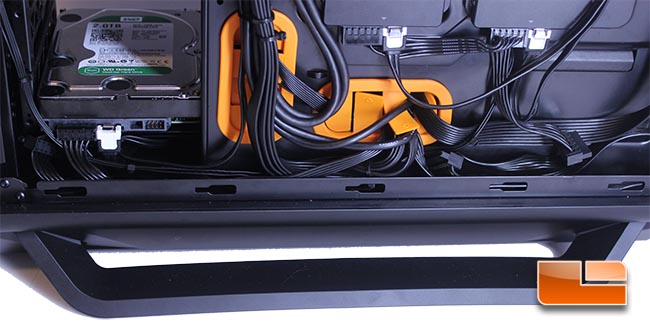
I had to spend more time with zip ties and folding cables than usual, but the case was very easy to work with and the side panel had no issue going on and closing. The lack of tie downs did make the build take several minutes longer than usual, as I had to bundle cables together and zip tie them more closely together. There is a lot of room behind the tray to tuck cables, as pictured and because the side panel sits on the rail, it won’t have issues going on if cables are sticking out a bit.
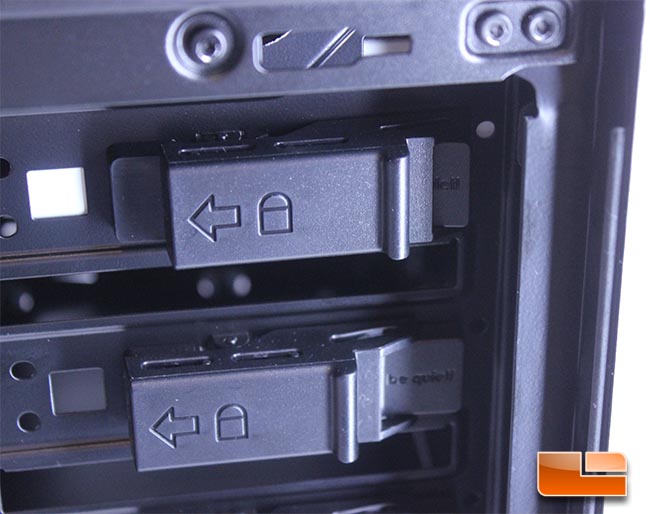
The sliding tool free locks for the optical drives work great and there are also screw holes available to further secure your drives. Here, we see the drive is unlocked. To lock it, we just slide the mechanism towards the lock arrow. Simple and effective. As we completed the build, we were forced to move the Blu Ray drive to the lowest bay, as using higher bays caused interference with our H100I GTX AIO coolers hoses. Changing the direction of the radiator on the Corsair cooler is possible, but this would cause the hoses to interfere with the rear Pure Wings 2 fan, so we chose this compromise.
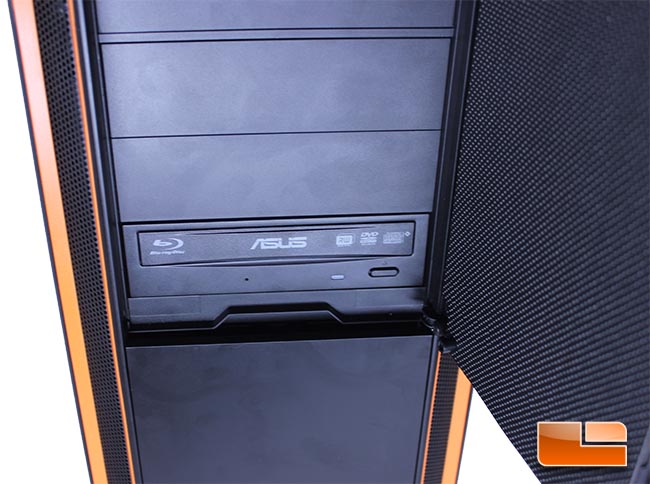
Optical drive bays seem to be going the way of the dinosaur, but I still prefer having at least a couple of them available on my personal system. We installed an Asus Blu Ray player into the Silent Base 800 without issue and found it lined up perfectly and without issue.
The Silent Base 800 allowed us to install our components without issue and build a very good looking, quiet system without any compromises being made beyond the way we had to situate the lines for our AIO cooler, which caused us to have to move our Blu Ray drive. I was thoroughly impressed with how quiet the case runs and anybody from a novice to experienced builder will have no problem building a nice system inside of the Silent Base 800, especially if they take extra time to plan out cable routing. While they aren’t deal breakers and didn’t cause any problems during our build, fixing the issues with the lack of cable ties on the motherboard tray and adding radiator support and ditching the unnecessary metal in the intake area would really help round out the Silent Base 800.
Let’s see go ahead and conclude this review with our take on how the case performs and compares against others in its market segment.