NZXT Source 530 Full Tower Computer Case Review
Source 530 Internal Impressions
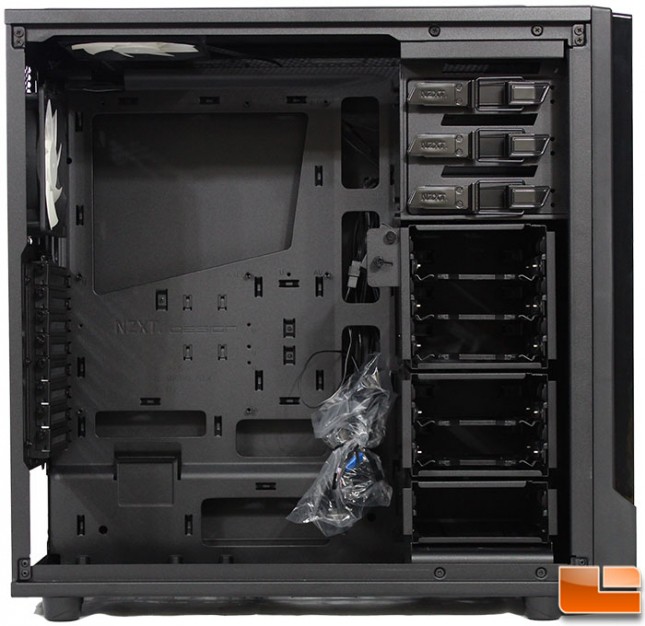
With the side panel is held securely in place by two thumbscrews on the back, with it removed, the interior of the Source 530 can be seen. The interior matches the exterior, which has become very common. The motherboard tray area is sunken in a little. The cable management holes on the right side of the tray are angled as they slope down towards the motherboard. Many of the motherboard risers are pre-installed on the review sample, which is why only two additional risers are included in the accessory pack. None of the eight cable management holes are protected by rubber guards like many cases do. Being a budget minded case, this makes sense.
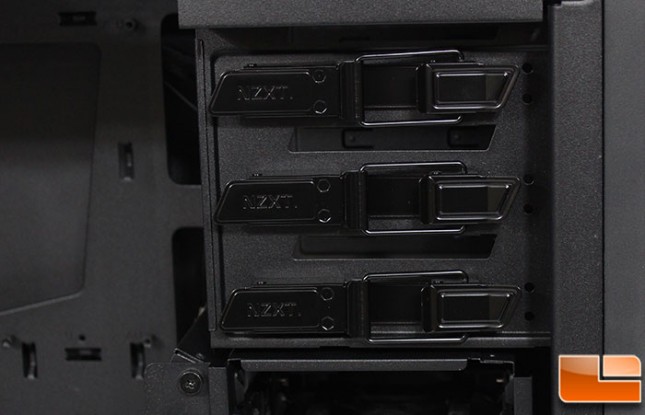
Using tool-less 5.25″ clips is nothing new, we have seen many different styles. The Source 530 uses a slightly different take on the latches, instead of being plastic, they are steel. Another difference is that the latch pins are in the back half of the latch. A light tug on the front latch releases it to install the 5.25″ devices.

There are three 3.5″ drive chassis in the Source 530. The largest supports three drives, the middle has two drives, and bottom only has one drive. This provides a total of six 3.5″ drive trays. Each of these drive chassis can be removed, allowing any configuration necessary.
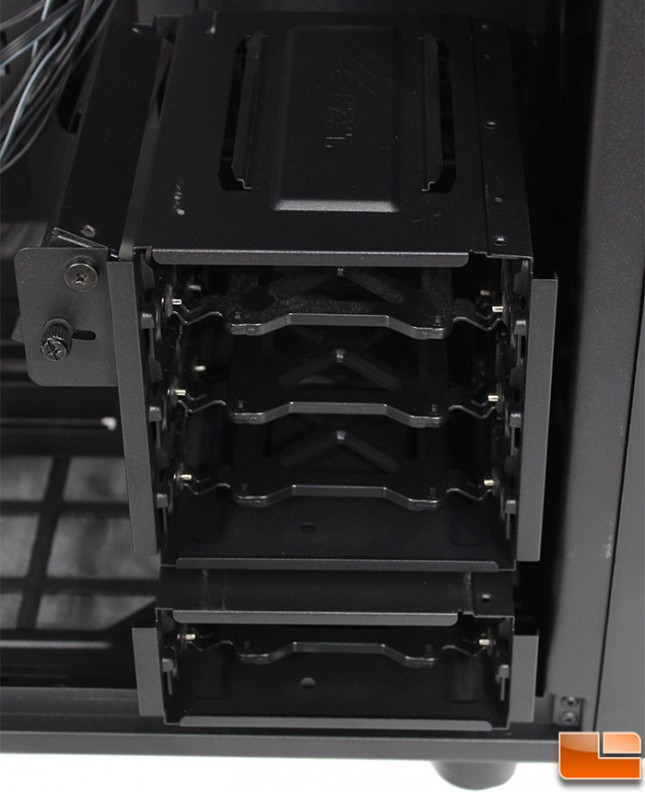
If only four 3.5″ drives are going to be installed, the user might decide to remove the middle chassis and only use the three drive and single drive chassis. The only restriction is that either a top or bottom chassis has to be installed in order to mount a chassis in the middle (if mounted correctly).
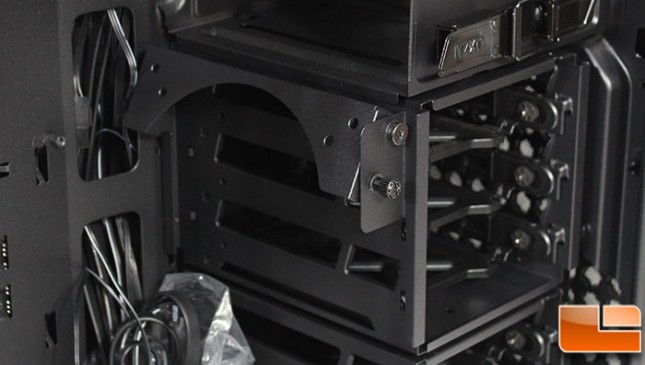
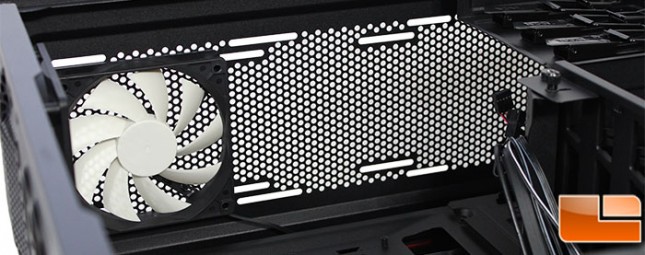
One unique feature is the ability to install a 120mm or 140mm fan inside the case. The large 3.5″ drive chassis has a hanging bracket to attach a fan, it swings to allow airflow to be directed in the desired area, towards the CPU or GPU for example.
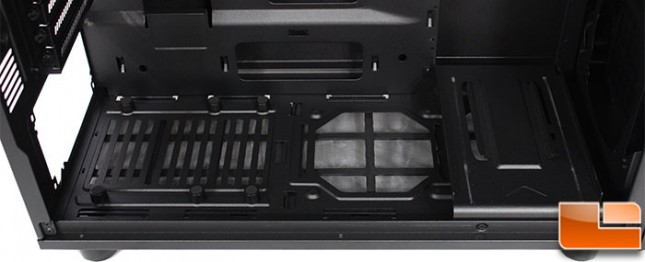
The front half of the bottom panel has room for two 120mm fans, which are filtered by the front removable bottom filter (remove the filter and a hole is left in the bottom). The 120mm fan closest to the front has a bit of a guard over it to support the 3.5″ drive chassis. The guard can be removed by four little screws (2 in the front, and 2 in the back), allowing for a liquid cooling radiator to be installed. For the power supply, NZXT has installed six raised feet, each of them is topped by a piece of rubber to absorb vibrations.

After taking a look at the exterior of the case, the inside view of the back panel doesn’t give any surprises. However, taking a close look between the exhaust fan and the PCI expansion slots, the LED that is controlled by the I/O button can be seen. Oddly enough it seems that the LED uses a SATA connection for power, I would have expected a fan type connector.
As previously mentioned the top panel is fully vented, with one 120mm fan installed as an exhaust. Two other fans can be installed, or if desired the top fan can be removed and a large liquid cooling solution can be installed. The liquid cooling solution can take a radiator up to 360mm (120mm x 3) in length; NZXT’s largest all-in-one cooler is the Kraken X60, a 280mm long radiator.

Removing the right side panel the back side of the motherboard tray is visible. The 3.5″ drive trays are installed from this direction, so installing drives the panel will need to be removed for drive management and cabling. Speaking the 3.5″ trays, the three drive chassis are secured by thumb screws on each side of the chassis. Looking at the cable management holes, we find each of the edges are rolled so there are no sharp edges to cause issues with cabling. With 20 locations (one cable tie per location is included) to secure the cables there shouldn’t be any reason to have messy cables.
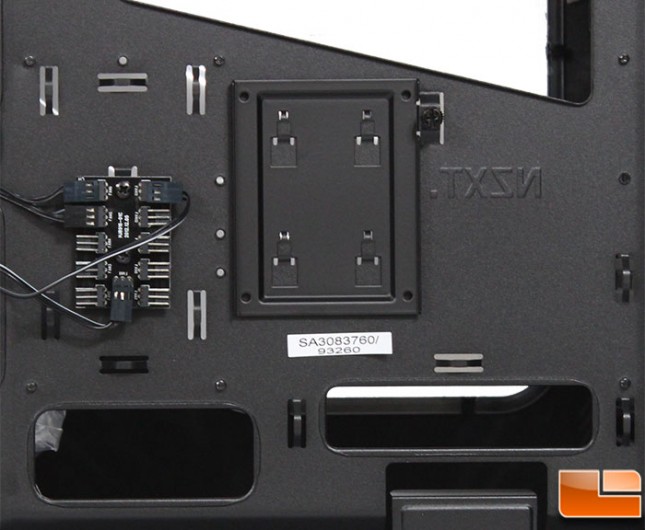
Below the CPU cutout on the tray is the 10 port fan hub, and a hidden 2.5″ drive chassis. This is a great use of space, allowing for six 3.5″ or 2.5″ drives to be installed in the trays, and one additional to be installed here, for a total of seven drive trays. Of course that can be expanded using the 5.25″ bays, however that is a whole different subject.
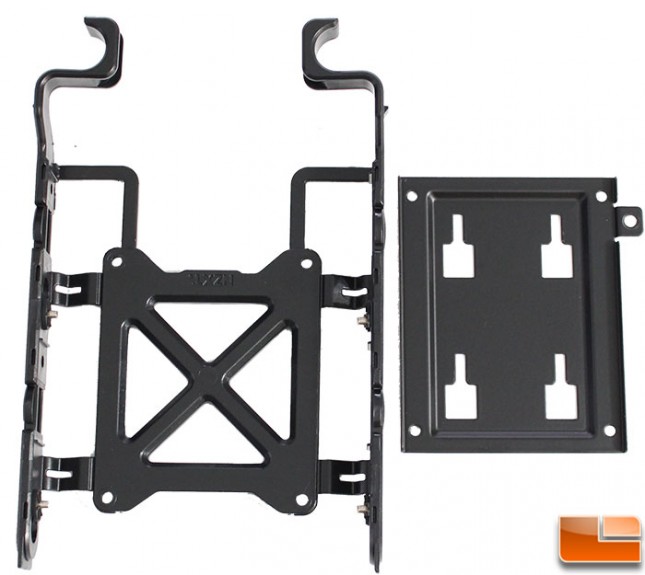
Nothing overly exciting about the drive trays, the 3.5″ drive trays will support a 2.5″ drive if necessary. For this tray, 3.5″ drive install tool-lessly either by slightly bending the tray or pulling the pins out a little. The 2.5″ drive tray behind the motherboard can be removed for drive installation. 2.5″ drive will need to be screwed onto the tray to be secure. In the middle of the tray are four holes to mount the tray to the motherboard tray, and then using a thumbscrew to make it secured.