NZXT Phantom 820 Full Tower Case Review
Installing in the NZXT Phantom 820 Full Tower Case
The Phantom 820 is a full tower case so installing gear was very simple with plenty of room. The only time we had to touch a screwdriver was to install the screws holding our SSD to the tray.

All the ports with grommets in the NZXT Phantom 820 Full Tower case really made it easy to run cables from anywhere to anywhere. Our ASUS GTX 670 card is 10.7 inches long and this case makes it look simply tiny with a full 14 inches of room before the internal fan mount. Even our ATX motherboard looks tiny in this case showing just how much room you have to install water cooling, additional lighting (if you really need it) or any other accessories. Airflow from the front, top, and side included 800 RPM 200mm intake fans was superb and dead silent. Providing all that filtered intake with only a single 140mm exhaust makes this case pressure positive which should significantly minimize the dust inside.

We did not bother to tidy up our cables for our test install but suffice it to say there were enough cable tie bumps and pass through holes to do whatever we wanted. In the top right corner you can see we used that included ATX power extender, thank you NZXT. The only challenge we had was our PSUs cables were not very long forcing us to make a few routing decisions that were messy. This is the only down side to installing in a full tower case with the vast space. Nothing some cable extenders couldn’t fix or a PSU with longer runs.
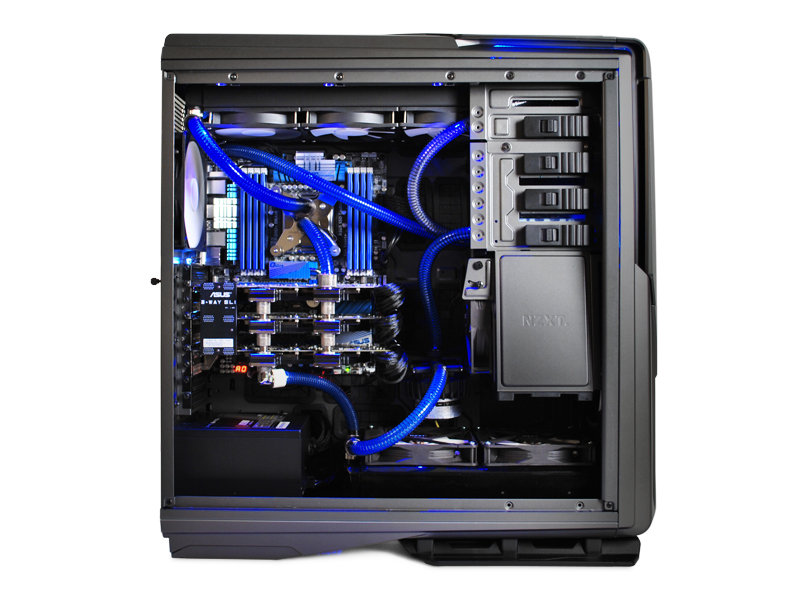
This marketing shot shows what is possible with water cooling a tri-SLI setup using a 360mm and 280mm radiator. The Phantom 820 still has a decent amount of room even with all that gear loaded.
Comments are closed.