Corsair Carbide 100R Silent Edition Chassis Review
Corsair Carbide 100R Silent Edition System Installation

The first step to installing the system into the Corsair Carbide 100R Silent Edition is to pop in a motherboard. I opted for an ASUS Z97-Pro WiFi which is a full ATX motherboard which is the largest form factor that the 100R Silent Edition will support. Despite the Corsair Carbide 100R Silent Edition retailing for only $59.99 the troubles found with low-cost cases weren’t an issue. Many times using a low-cost case it’s possible to run into misalignment issues. I was happy to be able to pop the I/O shield into place and find that it and the ASUS Z97-Pro motherboard fit and lined up perfectly.

The alignment of the LGA1150 socket and the cutout in the don’t quite line up as well as I would like to see.
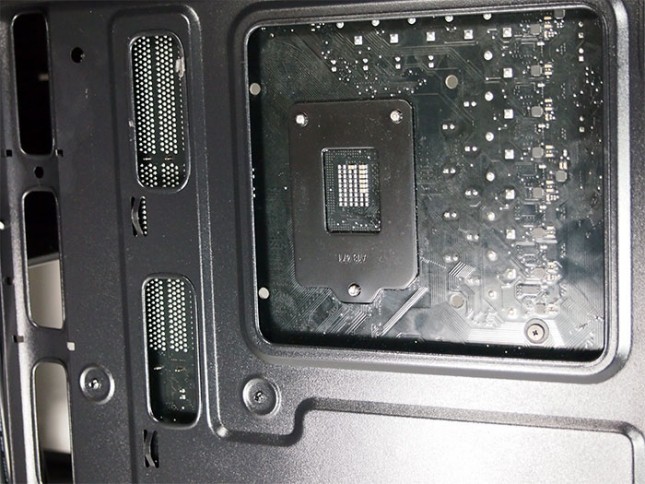
It’s still easy to get to the holes for the CPU cooler on the motherboard, just not a straight shot.

The Corsair Carbide 100R Silent Edition uses the same drive tray for either SSD’s or hard drives. This does limit the Carbide 100R to four drives, but should be plenty of space for most users.
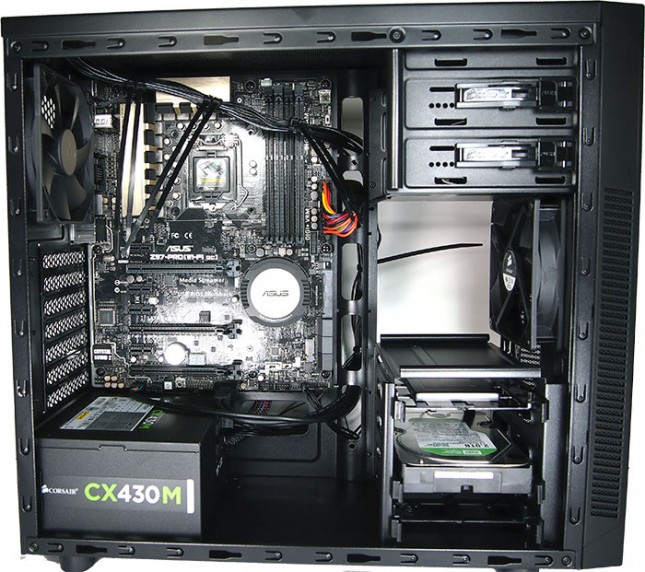
Once the ASUS motherboard, SSD, and hard drive are installed, it’s time to start wiring the system up. I installed a Corsair CX430M modular power supply as it should be enough to power this system. In the picture above I started routing the 8 pin CPU power to the back of the motherboard and back into the front up top. The top bundle of wires is zip tied together and has the fan speed selector wiring, exhaust fan, and the CPU power all tied together.
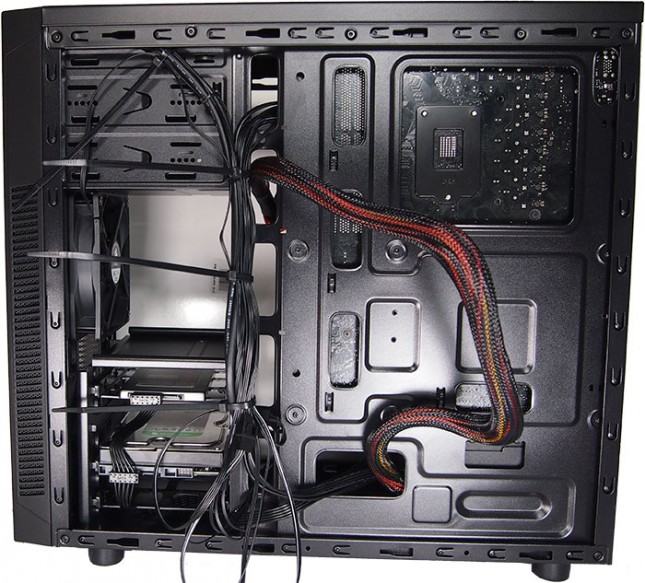 The wires behind the motherboard tray of the Corsair Carbide 100R Silent Edition don’t need to be quite as clean as the front, but I do prefer to keep them tied together, makes it a little easier to close the system up. Above most of the system is already wired up, still need to run the SATA cables for the SSD, and hard drive, as well as the cables for the optical drive.
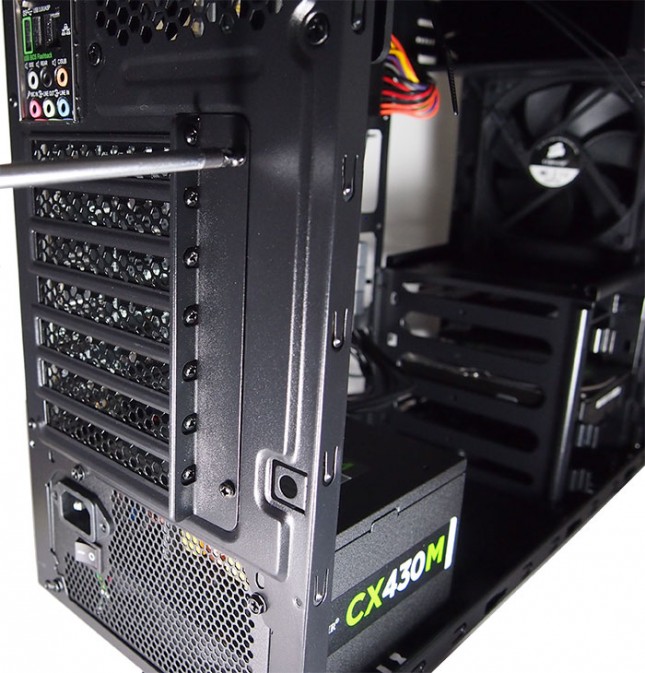
The Corsair Carbide 100R Silent Edition has plenty of space for todays graphics cards. To install a graphics card or three in to the Carbide 100R Silent Edition the panel over the expansion slots needs to be removed. That is as simple as popping out a couple of Phillips head screws and then the card(s) can be installed as usual.
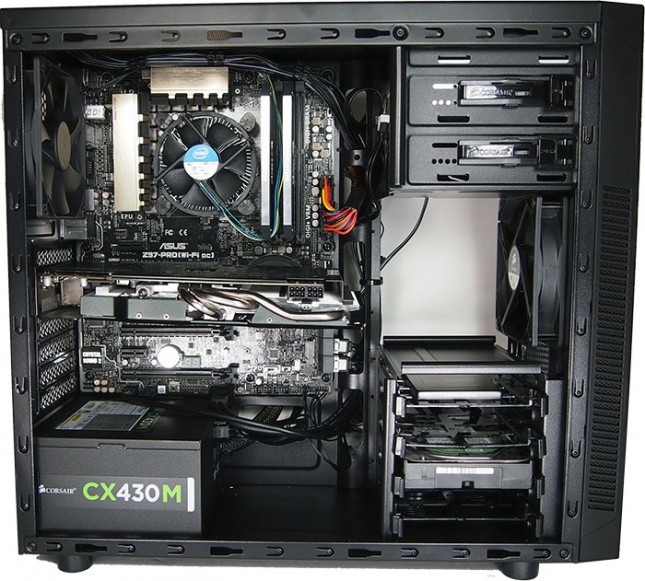
Running a single graphics card there is plenty of room for any card on the market. The ASUS Direct CUII measures 10.5 inches long, and there is another five inches between it and the intake fan. Aside from the wires for the ASUS Direct CUII, everything is wired up and ready to run. The top bundle is only tucked up over the heat sink, unfortunately there isn’t any way to really secure them up there to well.
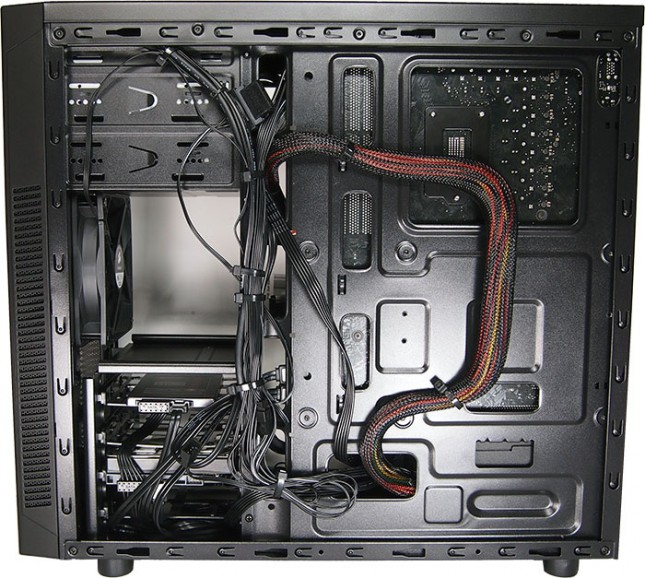
Once everything is setup and ready to go, I was able to clean up the back of the chassis a little bit more. Using a handful of zip-ties all of the cables were able to be either bundled together, or secured in place. The only cables that aren’t secured are the HDD and SSD cables. I left those with slack in them so that the trays can be removed and changed without having to take the back panel off.