Cooler Master N600 PC Case Review
N600 Internal Impressions
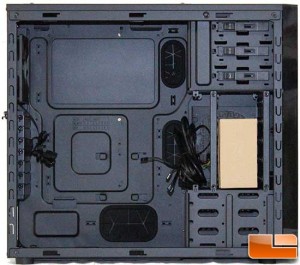
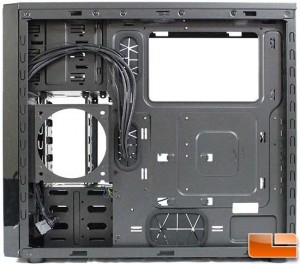
The side panel is easily removed after taking out two thumb screws on the back. Here we find the exterior paint has also been done internally as the entire surface area of the inside portion of the case is painted black. The three 5.25 drive bays are tool-less using push button type of clips. While the other drive bays use a drive rail system. The motherboard tray has a large hole to access the back of the motherboard to make it easier to change CPU coolers. There are three large holes which have rubber cable guards installed and two small holes which do not have rubber cable guards for cable management.
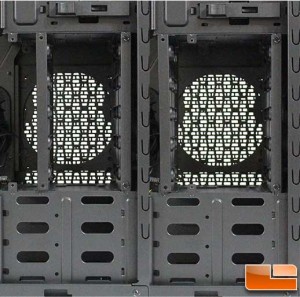
There are three full time 3.5 drive bays at the bottom of the case. The other four are user configurable to support either 2.5 or 3.5 drives. Three screws hold the left side support in place and is easily changed. A 240mm water cooling radiator could be installed on the left side support
At the bottom of the case, there is the standard power supply mounting location. Cooler Master has installed several rubber feet to help keep the vibration from the power supply fan from making noise. In addition, there is another 120mm fan mount in the bottom of the case.
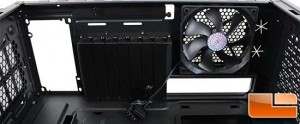
After looking at the back panel from the outside, the inside view looks as we would suspect. Each of the expansion slots have real covers and are secured to the case by thumbscrews. The fan can be removed and a water cooling radiator could be installed here.

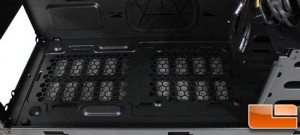
The top of the N600 we find another filter. This area will support two 120/140mm fans, in addition up to a 240mm water cooling radiator would fit here.
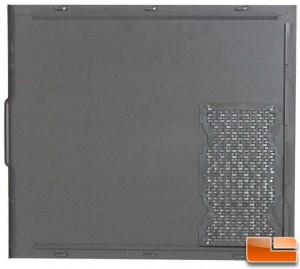
Removing the right side panel is just as easy as the left side panel; two thumbscrews and it slides off. Cooler Master has installed another filter here as a fan can be installed in this area.
On the back of the motherboard tray, located right above the bottom cable management hole is the location to install a 2.5 drive. This is the optimal way to install a 2.5 drive on the back of the motherboard tray, it allow the drive to be easily changed should it need replacing. Behind the 2.5/3.5 drive cage is a 120mm fan mount bracket.
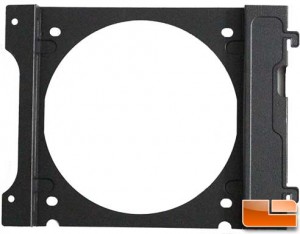
The 120mm fan mount bracket is removable so that it is easier install a fan. Putting a fan in this location will increase the airflow across any drives placed in the 2.5/3.5 drive cage.