The CoolIT Eliminator CPU Cooler Review
Installing The Eliminator
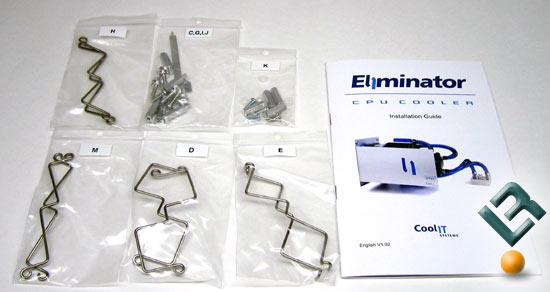
The CoolIT Eliminator comes with the chiller module, AMD retention bars, AMD AM2 retention bars, Intel 478 retention bars, Intel LGA775 retention bars, motherboard stand-offs, gigabyte motherboard stand-offs, four chiller module screws, four thumb screws, an installation wrench and the installation guide. We found that installing the CoolIT Eliminator is very simple and was straight forward process.
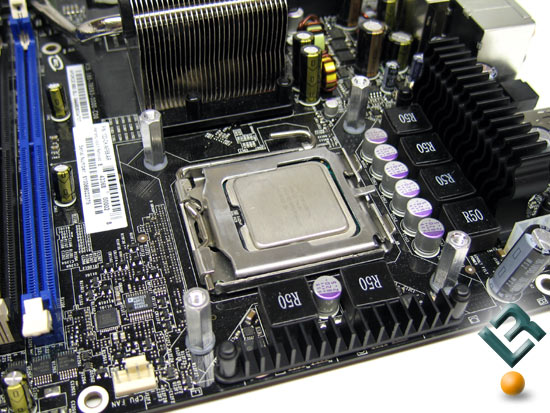
Unfortunately the CoolIT Eliminator doesn’t come with a back-plate and you have to fiddle with eight nylon washers, some machine screws and four #6-32 couplers to assemble the standoffs that are required for installation. A special wrench is included to tighten the couplers and it will require the removal of the motherboard as you’ll have to get on both sides!
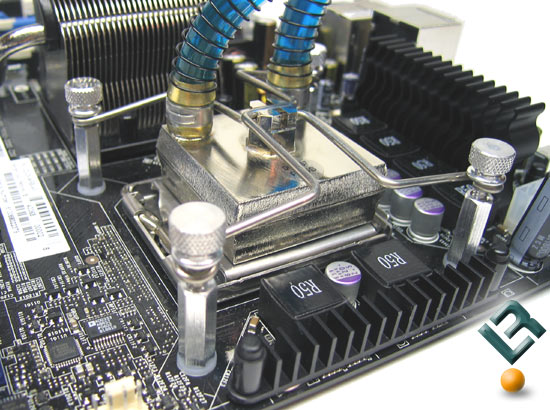
With the motherboard ready for the heat sink, we applied Arctic Silver Lumiere to the processor and set off to install the cooling system. We carefully placed the water block onto the processor and installed the correct mounting clips for our processor. Once the clips were lined up, we inserted the thumb screws and tightened them down accordingly like you would for a car wheel (in a cross pattern) to avoid damaging anything. The mounting hardware is comprised of low quality aluminum thumb screws and couplers, so be gentle and don’t tighten them all the way down!
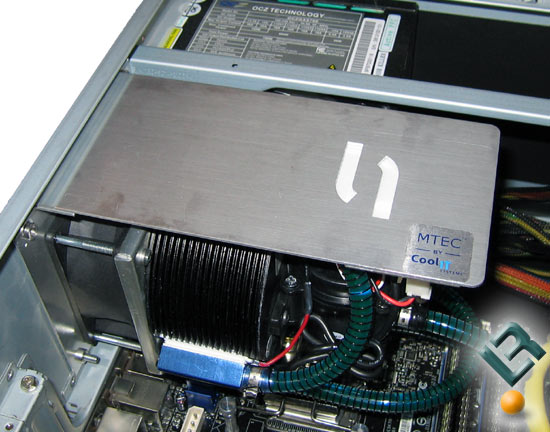
Once the water block was been secured, we removed the 120mm fan on the back of the case and installed the Eliminator with the four supplied mounting screws. This picture is of the CoolIT Eliminator installed on an Antec P150 case and if you look close you’ll notice that not all of the mounting holes would line up as the cross member in the case caused alignment issues. Not all cases we tried the cooler in had this issue, but it’s worth mentioning. Once the four screws were tightened, the installation was nearly complete!

Now you simply plug in a 4-pin molex power connector to the TCM that is located behind the cover on the Eliminator. The TCM has 3 settings – low, medium and high. “Low” is intended for very low power CPU’s in a multimedia setting where there is a desire for very low noise output. “Medium” will be more than adequate cooling for day to day activities as well as gaming for stock processor speeds. “High” is maximum cooling power and is the only setting that overclocking enthusiasts will ever use.
Now that the CoolIT Eliminator is installed let’s take a look at the performance numbers!
Comments are closed.