Intel NUC Kit D54250WYK Review – The NUC Gets Haswell Power!
Building The Haswell NUC
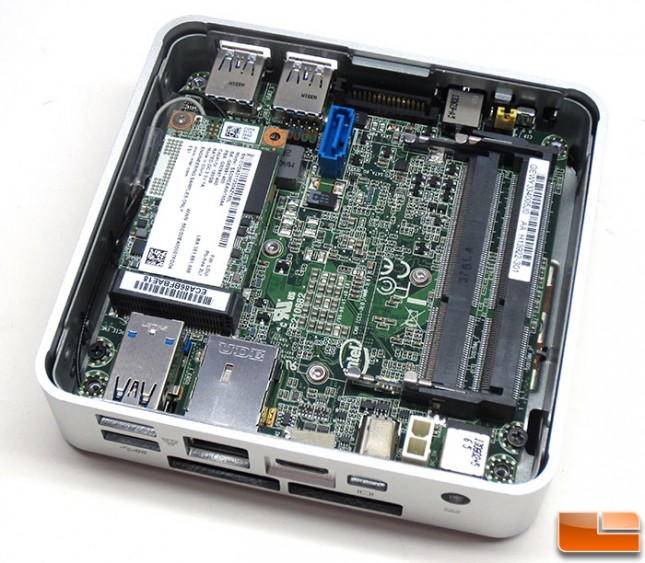
Since the Intel NUC is a barebone DIY kit we needed to add three major components before firing up the tiny little system for the first time.
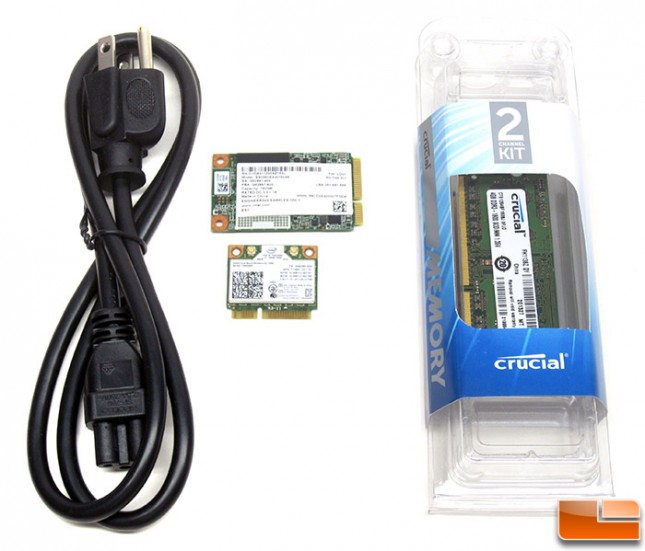
That would be the mSATA Solid-State Drive, DDR3L memory kit and a wireless adapter if you wanted to have WiFi and/or Bluetooth. The 3-pin Mickey Mouse power cable is also critical as you need that to turn it on!
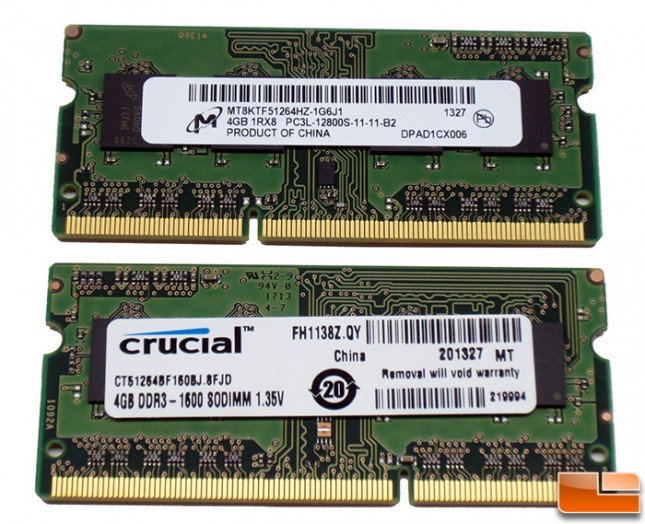
We are using an 8GB (2x4GB) 204-pin DDR3L 1600MHz SO-DIMM laptop memory kit from Crucial . This means we will be running 8GB (4GBx2) dual channel at 1600MHz with CL11 timings (11-11-11 w/ 1T command rate) at 1.35V. This laptop memory kit is sold under part number CT2KIT51264BF160B for $74.99 shipped.
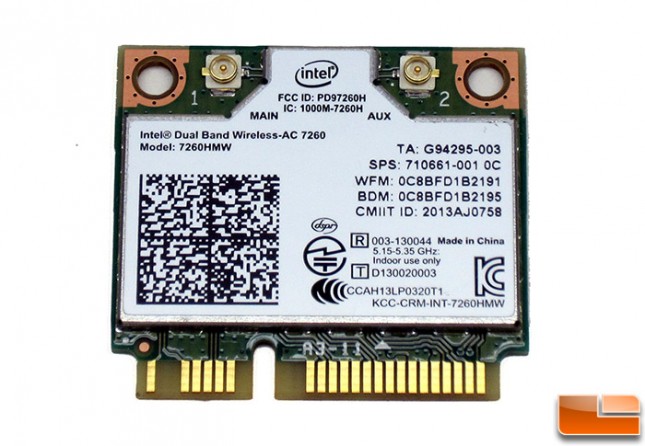
When it comes to wireless and storage responsibilities we turned to Intel. The Intel 7260HMW is the new flagship 802.11AC card from the folks at Intel. This tiny card offers dual-stream (2×2), dual-band, 802.11AC Wi-Fi plus Bluetooth 4.0 support for under $33.99 shipped. WiFi performance is rated up to 867Mbps (433Mbps per stream) and you get Intel Wireless Display support.
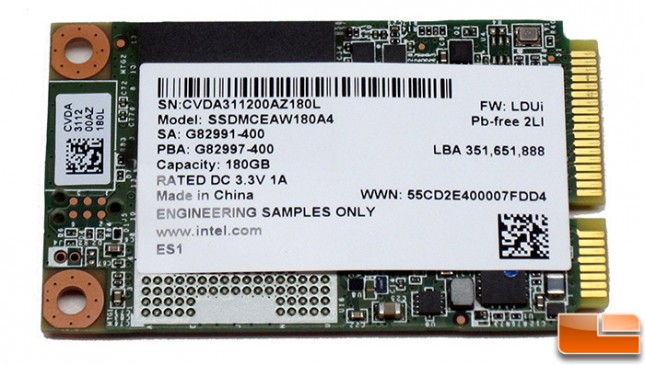
When it comes to finding a mSATA SSD there should be no problem finding one as Newegg currently offers 106 of them ranging from 30GB all the way up to 480GB. We went with the Intel SSDMCEAF180A4, which is listed as an Intel Pro Lite Series 1500 mSATA SSD according to Google. We asked Intel and it turns out that this is the new Intel 530 mSATA drive! This is basically an Intel SSD 525 series drive that uses newer 20nm MLC NAND Flash instead of the 25nm Flash used on the 525 series. This mSATA SSD isn’t available yet, but should be priced around the $199 price point.
- Intel Nuc – $360
- Intel 7260HMW Wireless Card – $33.99
- Intel Pro Lite Series 1500 180GB mSATA SSD – $199.99
- Crucial 8GB DDR3L SO-DIMM Kit – $74.99
- 3-prong notebook power cable (If Needed) – $3.00
- mini-HDMI to HDMI adapter – $3.75
After adding up the rough costs of all the components in the NUC you are looking at a hardware cost of right around $675 to build this exact system that we are building. Keep in mind that you still need to install an OS on it, so by the time you install Windows 8 or Windows 8.1 on it, you’ll be looking at a final build cost of over $700 and that is assuming you already have a keyboard, mouse, monitor and all that good stuff.
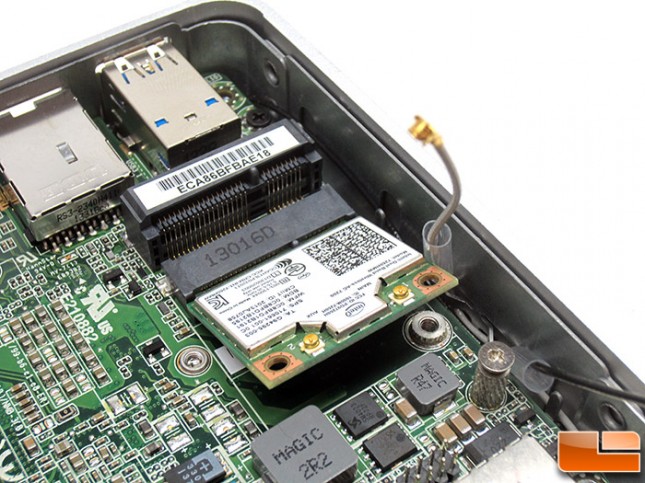
To install the memory, SSD and wireless card in the NUC you are looking at about five minutes of work. You first need to install the wireless card by placing it in the half-height mini PCIe slot and screwing it down. Once it’s tightened down you can pop on each of the wireless antennas and the wireless card has been properly installed.
To install the mSATA SDD drive you need to use the full-height mini PCI slot. Just like on the wireless card you put it in at an angle and then hold it down flat for the screw to be put in place. Once you get the screw slightly tight you are done installing the wireless card and the SSD.
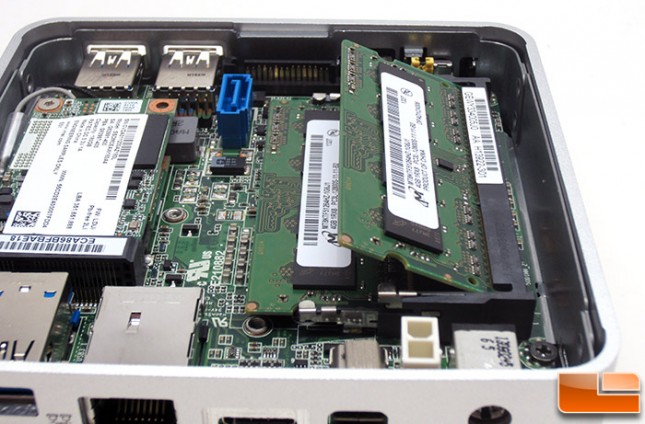
Next up is the 204-pin DDR3 SO-DIMM memory modules! The Crucial DDR3L modules easily slid into each SO-DIMM socket at an angle and then were easily laid flat and clipped into place with the retention mechanism. Installing the memory takes just a few seconds.
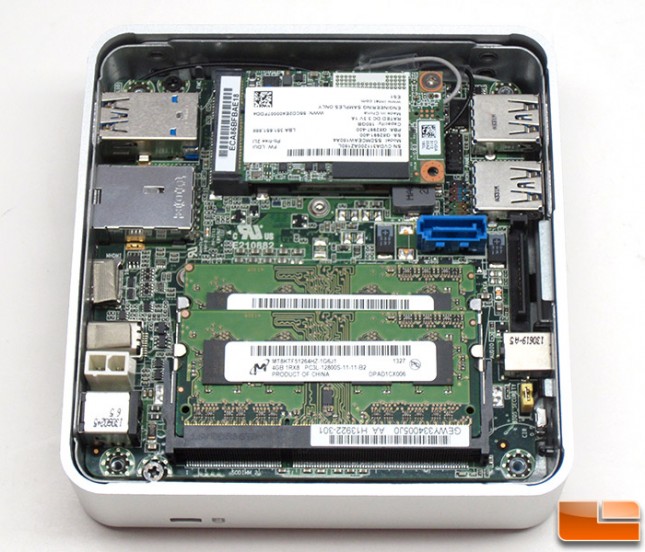
Once all the components are installed you’ll end up with a fully assembled NUC that looks like what is shown above. All that is needed is a #1 sized Philips screwdriver and about five minutes of time to get the job completed. Anyone that can use a screwdriver and has the ability to line things up can build a NUC!