Thermaltake SD100 mini ITX Home Theater Chassis
Installing Components
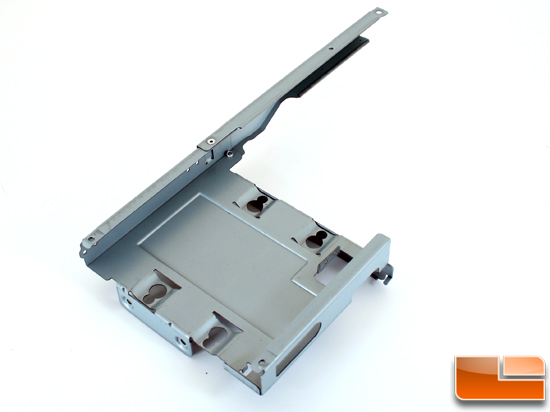
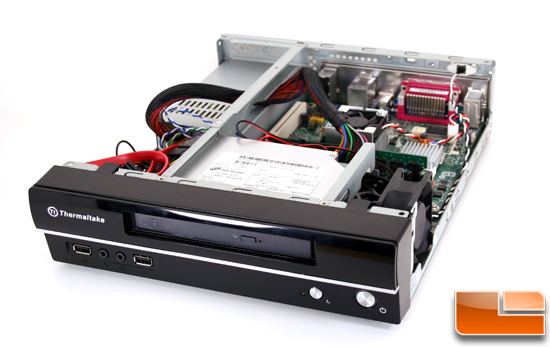
The first step in installing the computer components into Thermaltake’s SD100 was to remove the bracket that would hold both the slim optical disk drive and the 3.5″ hard drive. This was a simple matter of removing a few screws and pulling out the metal frame.
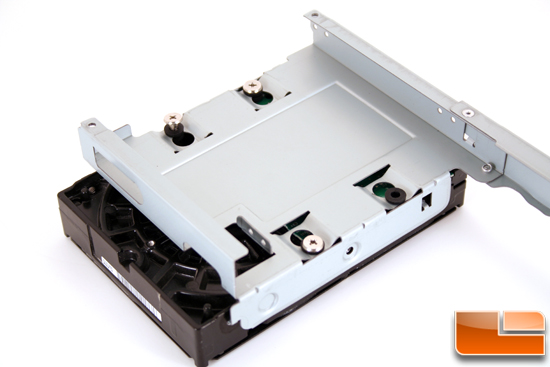
Installing the hard drive took a few moments of puzzling. As might be expected, the instruction manual that came with the case had scant details in a dozen different languages, so there was some fiddling to figure out exactly how they intended the hard drive to be installed. The metal tray had two metal barbs sticking out into the area where the hard drive went. At first I thought they might be some flaw in the manufacturing, but I quickly realized that the barbs lined up with the screw holes on the side of the hard drive and helped orient the hard drive correctly.
Thermaltake was also very thoughtful and included rubber standoffs to help limit vibration between the hard drive and the case. In the picture, I show the hard drive partly screwed in through these rubber standoffs. With the included screws, the hard drive was very firmly in place.
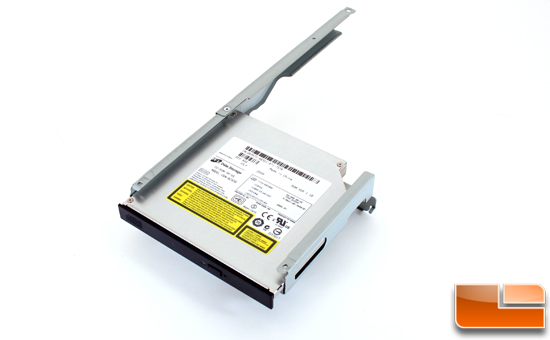
The SD100 does not support a standard size optical drive, so you have to use a slimline one that is more common in laptops (hence the special cable provided). Installation of the disk drive was even easier than the hard drive but for one caveat. Once all the components were installed, I had a difficulty sliding this bracket (with hard drive and optical drive) back into its position. The problem was that the optical drive stuck out just far enough that there was not enough clearance to squeeze the bracket into the correct position. The solution was to remove the drive and slide it in through the front of the case after the bracket was screwed back in. It’s not a big issue, just slightly annoying.
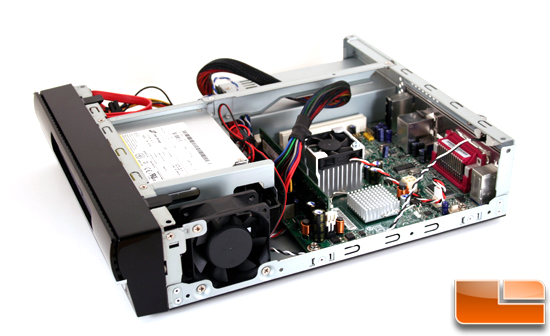
Installing the other components into the case was not a problem and went without any interesting details, which was nice. Notice that the SD100 includes an intrusion detection switch. Since the motherboard I had didn’t support such a switch, the wire (black and white) was left dangling loose. However, there’s enough room in the case alongside the motherboard to easily tuck this wire away. The other wires made management quite a task considering they had to be forced into a small area under the optical drive or in front of the power supply, but in the end everything fit quite nicely.
Remember the slick, pure black coloring of the outer case? It may happen that the disk drive you thought was black doesn’t appear quite so black once you get it installed. When you’re purchasing a drive to slide in this case, it may be worthwhile to do a little extra research on the exact color of the front bezel. It may be that I had a freak incidental discoloration, or maybe I’m just colorblind, but I wasn’t very satisfied with the apparent color mismatch. Fortunately, it only shows up when the lights are on, and who watches movies with the lights on?
In the event you’re dying to know my conclusions and final thoughts about this case, please read on!

Comments are closed.