Rosewill B2 Spirit Full Tower Case Review
Rosewill B2 Spirit Internal Impressions
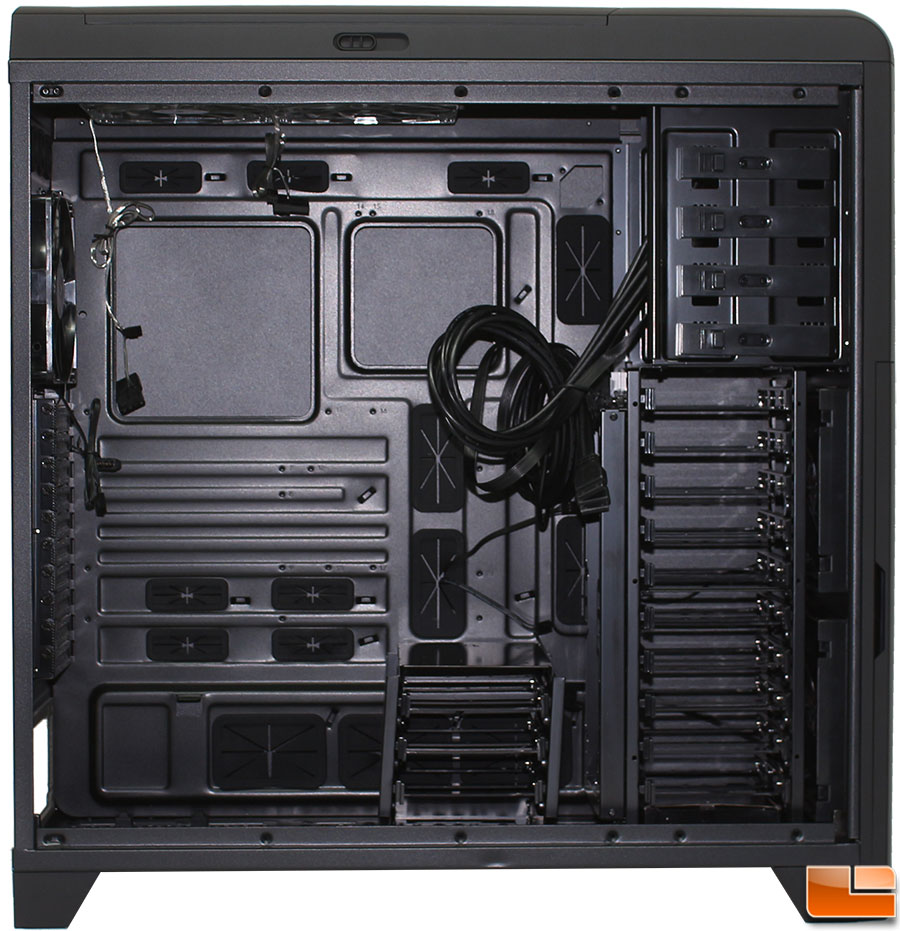
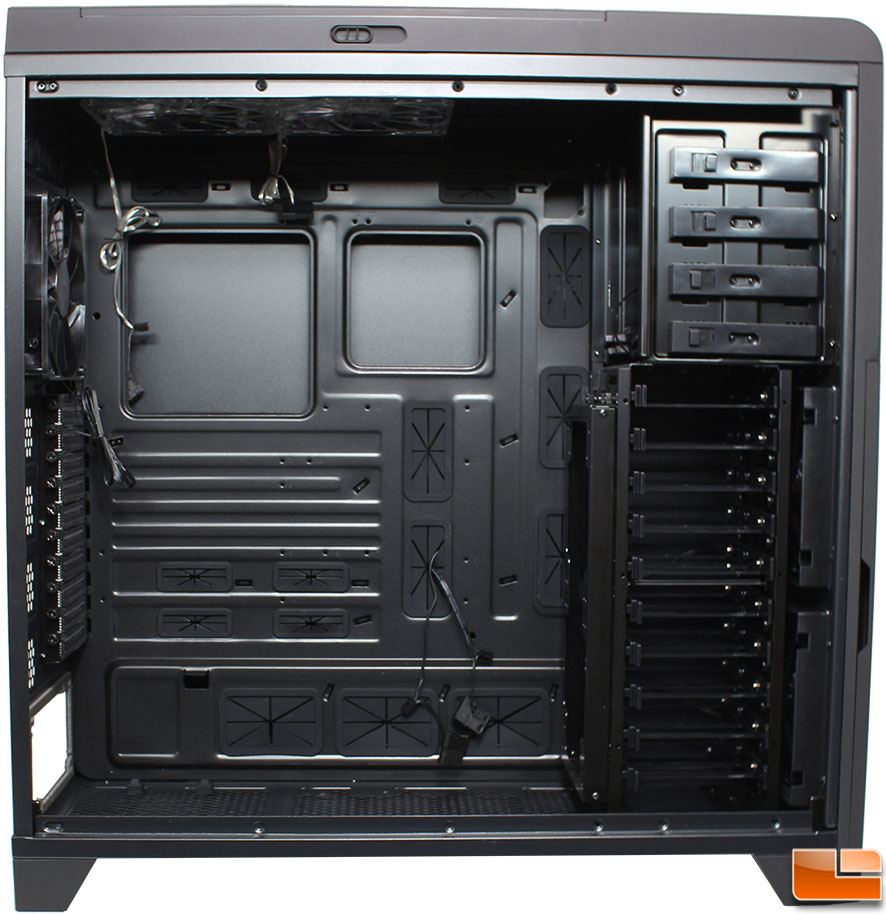
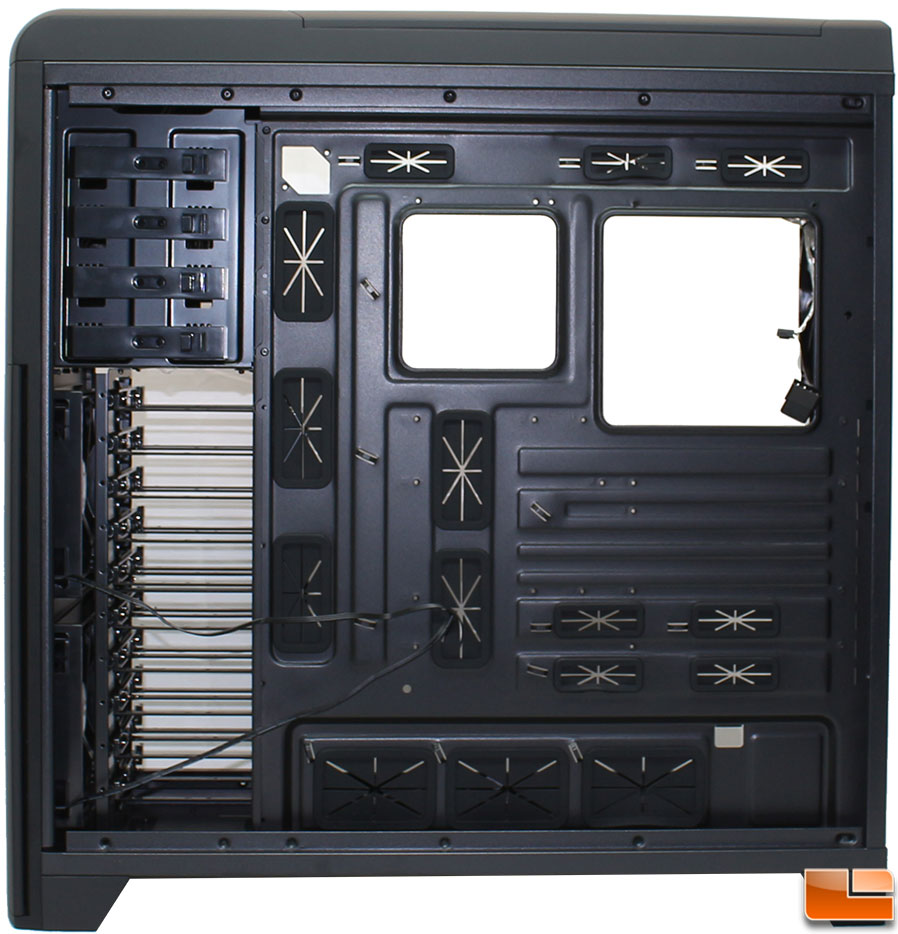
The side panel comes off pretty easy, simply remove two thumbscrews on the back of the case and the side panel slides towards the back of the case and away. With the panel off, we can take a look at the all black interior. At first glance, a couple of items jumped out, the dual CPU cooler cutouts that should work great for motherboards with dual processors, a large number of cable management holes, and the large amount of space available for installation; it is a full tower afterall. Taking a closer look at the motherboard tray, there are a large number of locations for motherboard standoffs, however there is no guide for where to install them, manual says to “Line the standoffs with the screw holes on the motherboard”, the spots are numbered, but no guide to which ones you need for which size of motherboard. It’s nice when you have a guide where to install the standoffs rather than having to try your motherboard several times to make sure they all line up correctly.
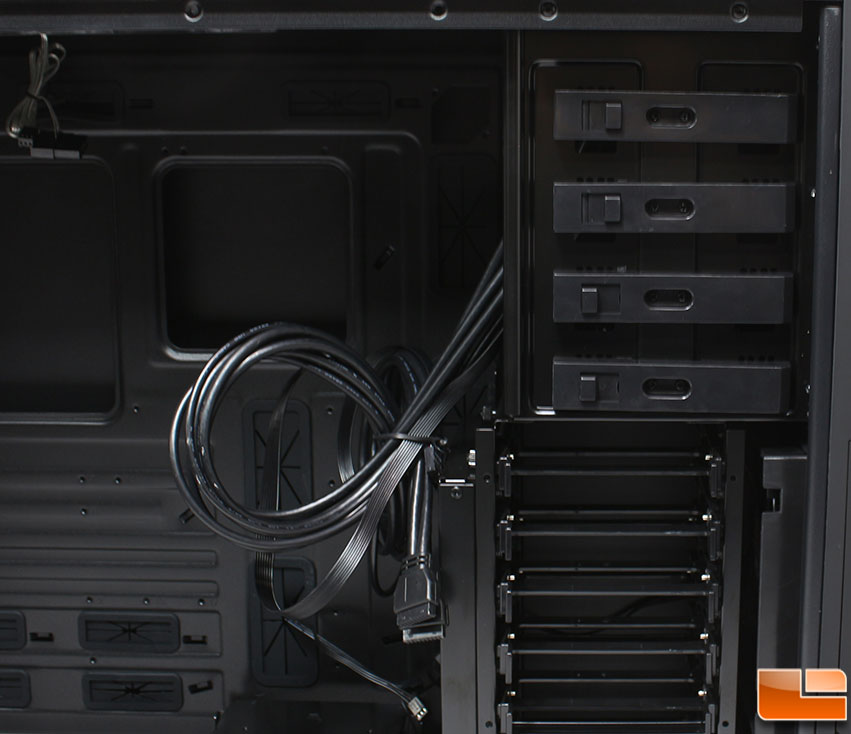
The 5.25″ device bays utilize a familar tool-less installation method. Once the devices are in place, you slide the lock (towards the back of the case), which secures the devices in the bay. Rosewill has secured all of the internal cables together, however they are hanging freely. A large number of them have rub spots on them, which goes to show what caused the damage to the side panel.
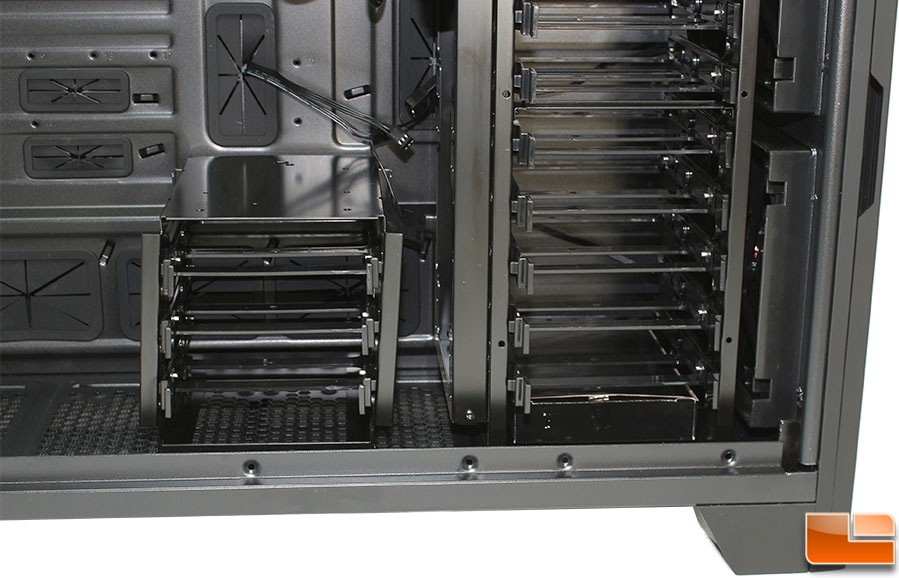
Seems to be a small issue with the extra 3.5″ drive cage. It is leaning slightly, which made me wonder how stable it was. I was easily able to move it back and forth; not as sturdy as I expected. Between the large 10 bay and the extra 3 bay cages is a place for two 120mm or 140mm fans, as well as a radiator.
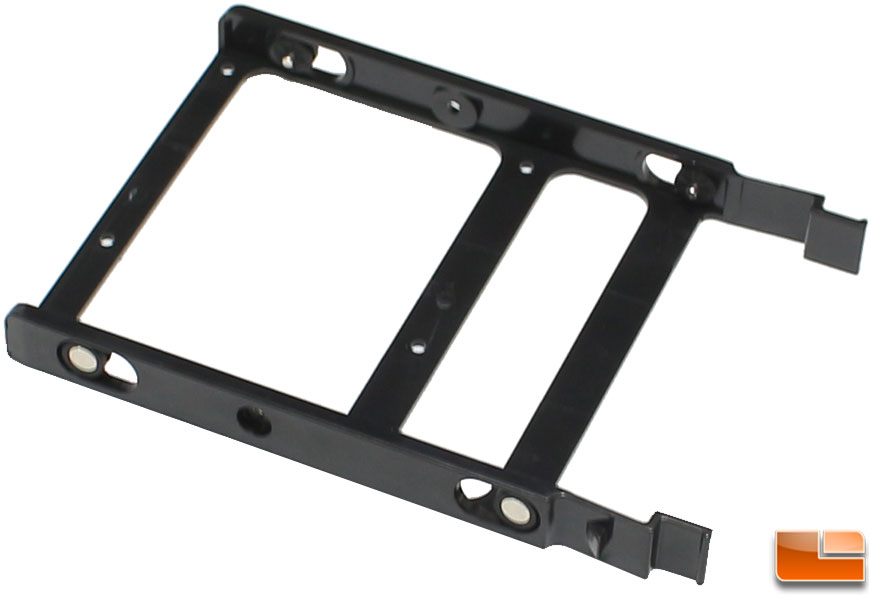
The 3.5″ drive trays are a familiar design, there are little metal pins to secure your 3.5″ drives to the tray, as well as holes in the bottom of the tray to support 2.5″ drives.
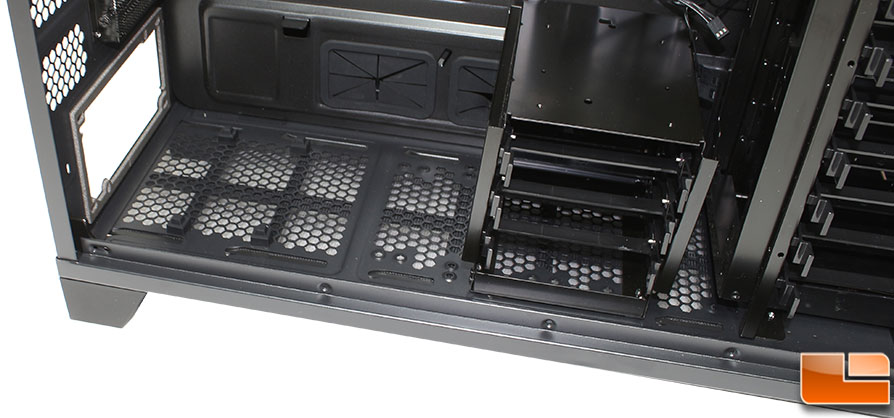
The bottom mounted power supply can support the longest of the power supplies, including those monster 1500W units. With the bottom 3.5″ drive cages, there is space for a 10 inch power supply, remove the bottom drive cage and you now have up to 16.5 inches of space. Supporting the power supply are four rubber feet to help reduce vibration. In addition, there is a foam bracket in place on the back of the case, that will also help reduce vibration noise.
The bottom drive cage is easily removed with four screws from the bottom; easy to do while the case is empty. With the cage removed we can see the full amount of space that is available within the inside of the B2 Spirit. The cable management rubber grommets are done really well, providing plenty of space to route cables to keep the interior clean. There are three across the top and bottom, five vertical ones, and four small ones that would be at the bottom of the motherboard.
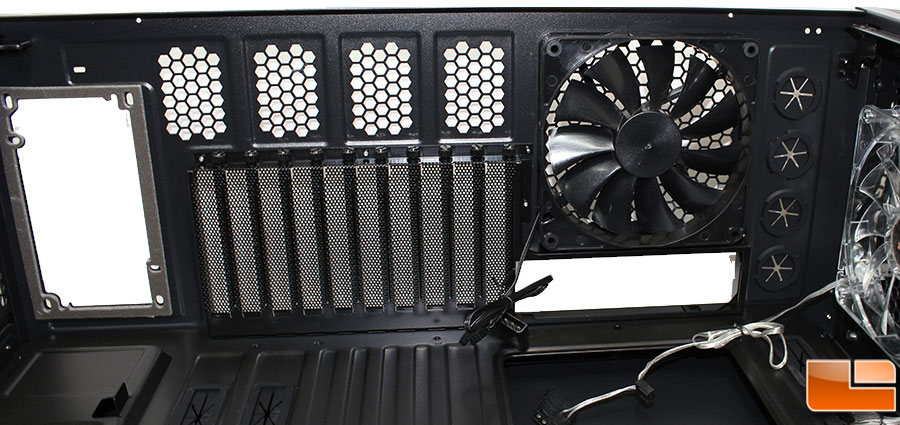
After taking a look at the back panel from the outside, nothing surprises us from the internal view. We can see that the 10 expansion slots, are all fully vented, and held in place with thumbscrews; there are extra vents above the slots. The rear 140mm fan is a normal black non-LED case fan. Four external liquid cooling tube holes at the top (to the right of fan and motherboard rear I/O port).
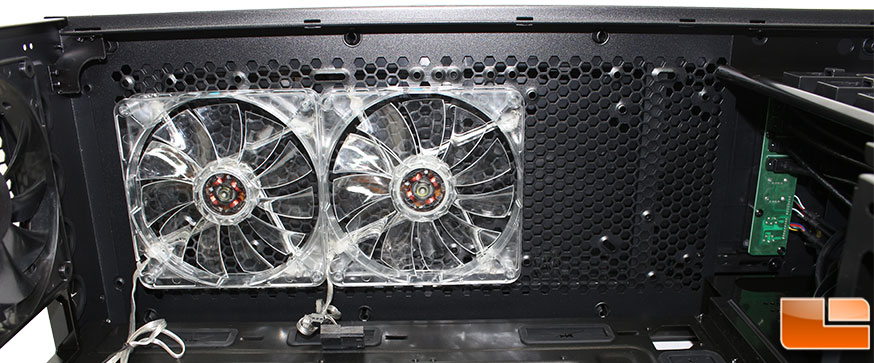
Taking a look at the top of the case from inside, we can see there is room for another 140mm fan. Rosewill specifies that the B2 Spirit will fit a 280mm radiator, however looking at the top panel it might fit up to a 420mm (3x140mm), or at least a 360mm radiator; especially since there is room for up to 3 140mm fans. The two included fans are blue LED fans, which will light the top half of the case in blue light.
The back of the motherboard tray, there isn’t much to look at. Rosewill took the time to install the 5.25″ bays are completely tool-less by including the tool-less locks on the back side as well. There are ten places to secure your cables, with the six cable ties. For spacing there is a good amount of space to route your cables with a little more than 1″ of space between the motherboard tray and the back panel.
Let’s move on to installing some hardware.