Pentium M on your Socket 478 platform: Part 2
Installing the ASUS CT-479 CPU Upgrade Kit
Installing the ASUS CT-479 is simple and should honestly take under 10 minutes for the average consumer. As always only install computer hardware if you feel comfortable doing it!
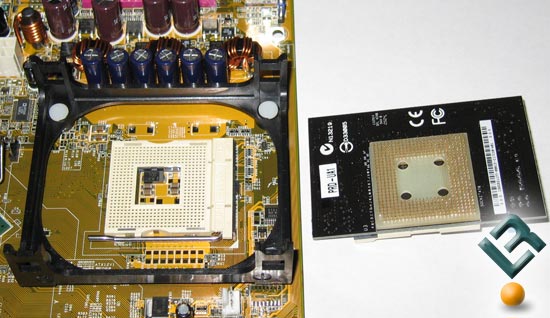
First make sure you line up the pins on the base to make sure you install it the right way and don’t bend any adapter pins. Once you know the way it needs to be placed in the socket lift the socket lever and insert the adapter. Simply close the lever on the motherboard socket and the adapter is locked into place.

Now that the card is locked into place it should like ours does in the above image. Next we need to set the blue Front Side Bus (FSB) jumpers for the type of Pentium M processor being used. (either 400MHz or 533MHz) Set the jumper labeled J1 to pins 1-2 & 4-5 for FSB 400 or pins 2-3 & 5-6 for FSB 533. Once you have this all done you are ready to insert the Pentium M processor of your choice in the new socket.

On our system we used the fastest retail Intel Pentium M processor on the market the Intel 770. Simply place the processor into the socket and secure it in place by turning the lock with a flat-head screw driver to the locked position. Now simply plug in the supplied power cable onto the adapter card and connect it to a 4-pin molex connector on your power supply.
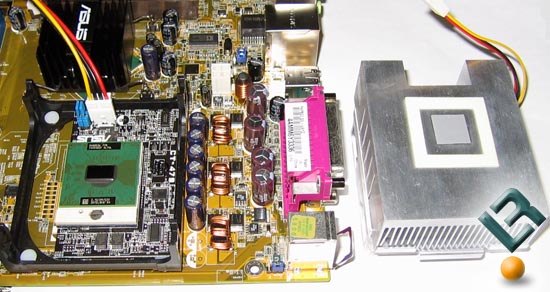
The last step to the installation is to put on the heat sink/fan. If you notice the HSF is unique because it has a special notch in it to avoid the jumpers and power header found on the adapter. The supplied thermal pad works just fine, but if you are going for the lowest possible temps then remove this now and apply your favorite thermal compound.
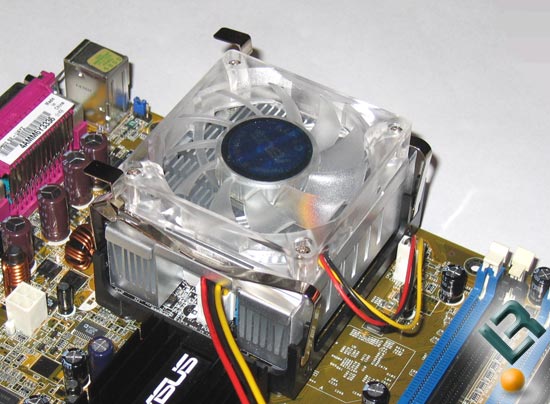
With the heat sink set in place go ahead and attach the clamps to the motherboard mounting rails and connect the fan power cable to the header found on the board. With this last step completed everything impacted by this adapter kit is done. Like I noted at the top of this page this installation is straight forward, simple, and something almost anyone can do.
Let’s see if our installation worked by powering up the system…
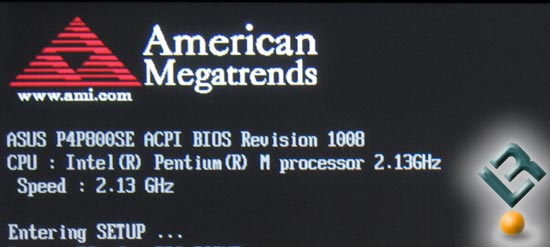
SUCCESS! Looks like the ASUS P4P800SE correctly identified the Pentium M processor and the system booted up just fine. Let’s move along and see what this “special” BIOS has to offer.
Comments are closed.