Kingston SSDNow M Series 80GB SATA 2.5 Bundle Kit
Cloning The Drive
With the drives now in the proper positions we can begin to clone the old hard drive over to the new Kingston SSD. This is done by inserting the Acronis True Image HD software CD into the system CD-ROM drive and restarting the system. The Acronis True Image HD CD is a bootable disk and will boot to the Acronis True Image HD screen. If the system does not boot to the Acronis True Image HD screen and instead boots to Windows or fails to boot at all, it is likely due to the fact that the optical drive is not in the boot order menu in the BIOS. To fix this you need to restart the computer once again, and the second it turns on enter the BIOS by pressing the required key for your system (usually: ESC, F1, F12 or DELETE).
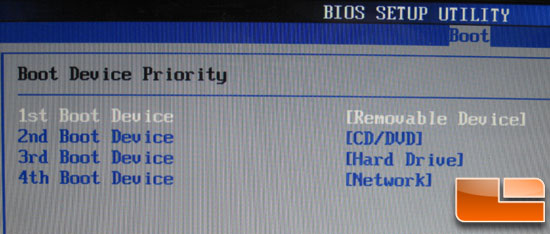
While in the system BIOS, change the boot order so that CD-ROM is before the hard drive in the boot order. As you can see from the image above the boot order for our ASUS notebook didn’t need any modifications, but if it did you can quickly and easily change it to work properly. Once you have made any needed changes in the BIOS be sure to save the settings and exit BIOS. Restart the computer and when the computer restarts, it should now boot to the Acronis True Image HD page shown below.

The home page for the Acronis True Image HD software is shown above. Since we want to run Acronis True Image HD to clone the SSD, we needed to arrow up and hit enter.
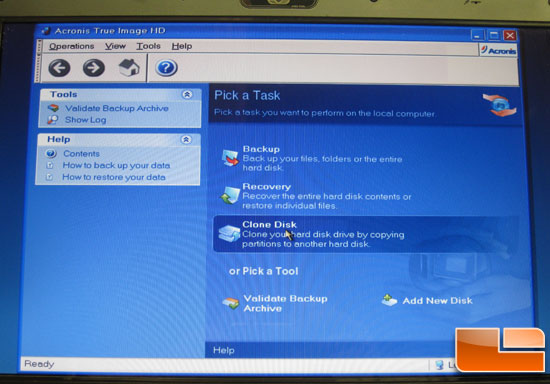
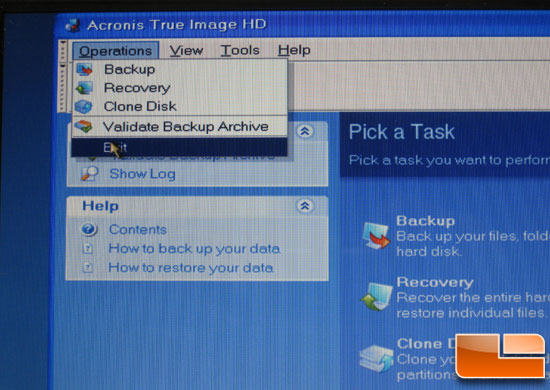
The next menu gives you several functions that the Acronis True Image HD software can do, but for now Select Clone Disk from the Pick a Task screen as shown by the highlighted selection shown above.
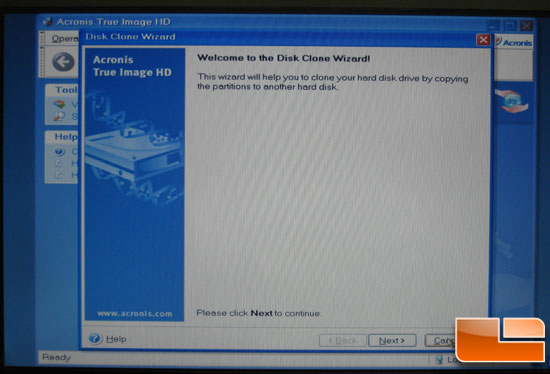
The Welcome to the Disk Clone Wizard! screen will appear and the wizard will guide you through the cloning process. Click Next to continue.
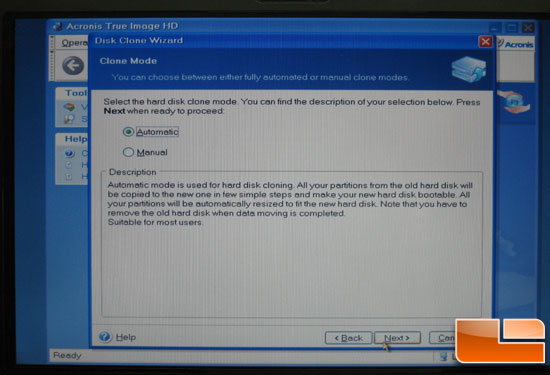
Select Automatic from the cloning mode options. DO NOT select Manual mode as it is not needed for a basic cloning operation. (Manual mode should be used by advanced users only.) Click Next.
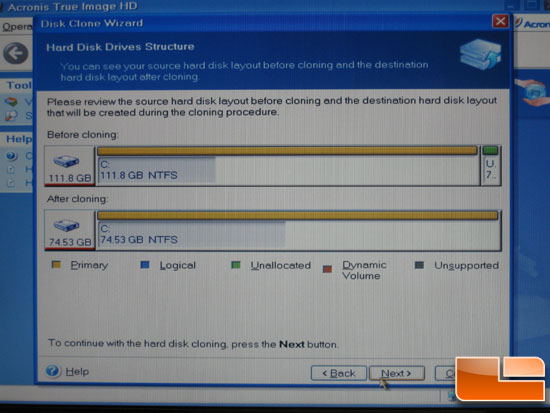
The Hard Disk Drives Structure screen will appear. The original partition sizes will be scaled according to the new drive size. If the new drive is smaller in size than the original drive, the partitions will shrink accordingly. If the new drive is larger than the original drive, the partitions will be enlarged proportionately.
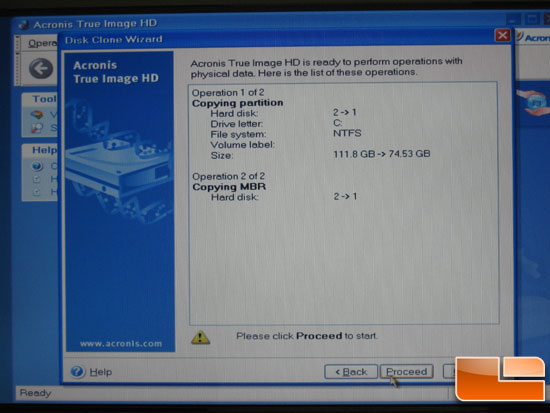
The next step allows you to review the Acronis True Image HD operations to be performed. Be sure that these settings are correct as this is the last chance to make any changes before cloning. Click Proceed to begin cloning.
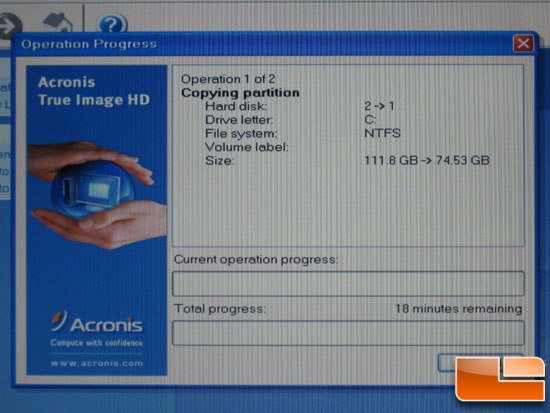
Now that the cloning has begun, an operation progress bar will indicate the data is being copied. Our 35GB of data on our old hard drive was estimated to take 18 minutes to be cloned to the new Kingston SSDNow 80GB SSD. This time proved to be true as it took under 19 minutes for the program to finish the process.
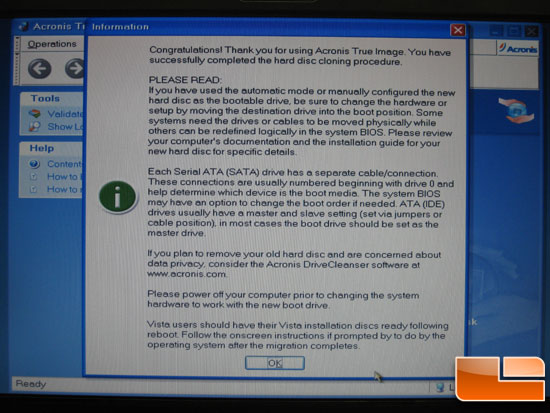
Once the cloning process is complete, a Disk Cloning Was Successful window will appear. Click OK.
At this point in time the cloning process is done and you can now remove the Acronis True Image HD software CD and exit the program. The system will automatically reboot to the new SSD drive. The original system hard drive, installed in the external drive enclosure, can now be used as a secondary storage device or as a backup for new SSD that is now the primary system drive.
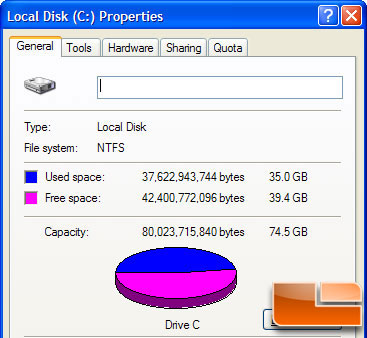
A quick check of the drive capacity shows that all 35GB made it over to the SSD from the HDD, which means everything worked correctly. Let’s take a look at some benchmarks to see if the 20 minutes of work and nearly $360 investment was worth it!
Comments are closed.