Kingston SSDNow M Series 80GB SATA 2.5 Bundle Kit
Using The Bundle Kit
If the SSD provided in this kit is smaller in capacity than the hard drive currently in your system then you’ll obviously have to delete some data in order for the drive cloning to work. If the SSD provided in this kit is larger in capacity than the hard drive currently in your system then you should be able to clone the drive and get extra storage space. To be sure that the kit will work on your system check the capacity of your system’s hard drive to be 100% certain that it is not larger than the capacity of your new SSD.
To determine the Used space on your hard drive, do the following:
1) Boot your computer to your desktop.
2) Double click on My Computer (Computer in Vista) located on your desktop or via the Start Menu.
3) Single right-click on the C: drive and select Properties. The Properties window for the C: drive will appear
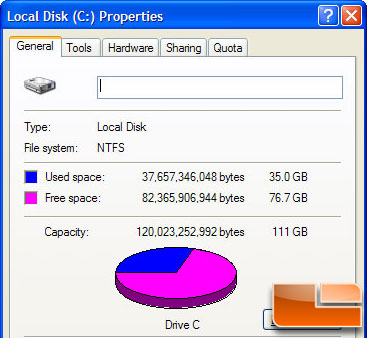
As you can see, the overall capacity is greater than what is found on the 80GB SSD, but the used capacity is less than the capacity of the SSD. If your system has a used space greater than the capacity of the SSD, it is required that you move some of your data such as pictures, movies, music, etc. off of the drive to an alternative data source (e.g., external hard drive or USB drive) until the used space is no more than 85% of your new SSD capacity. This will help to ensure that the imaging process is successful. The following chart may be useful as a guide as the real capacity on the SSDs are lower than their advertised size as we found the 80GB Kingston SSDNow is really 74.5GB in a recent article.
| SSD Capacity | Adjusted Drive Space Used |
| 80GB | 63.33GB or less |
| 160GB | 126.65GB or less |
Our ASUS S62J notebook has a 120GB hard drive in it, but only 35GB of space is being used. This means we are well below the 85% capacity cap for the software to operate and can begin to clone the drive. If your are slightly over the capacity cap you can move some files off the drive and then move them back to their original location on the hard drive after the cloning process.
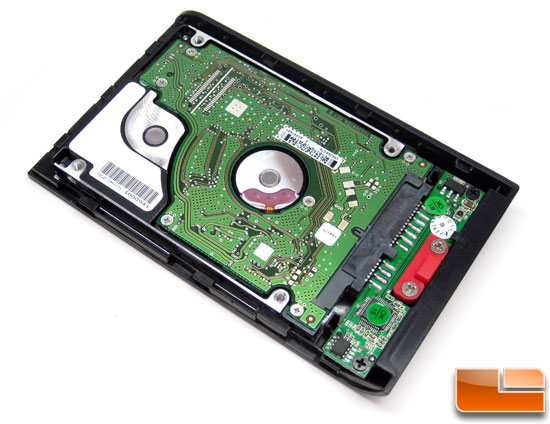
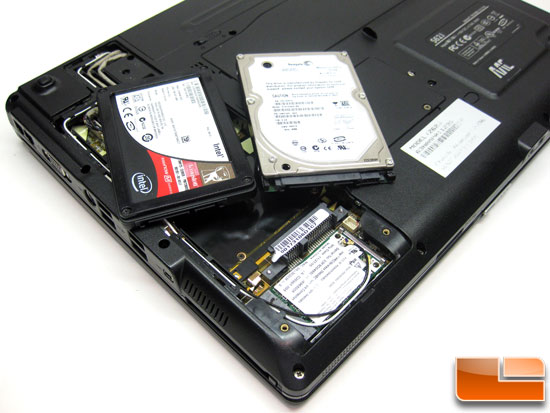
With the system powered down you can now transfer the hard drive that you want to clone to the external drive enclosure as shown above. To open the external drive enclosure, press down on the release button (the red button shown above) and slide the two panels apart.
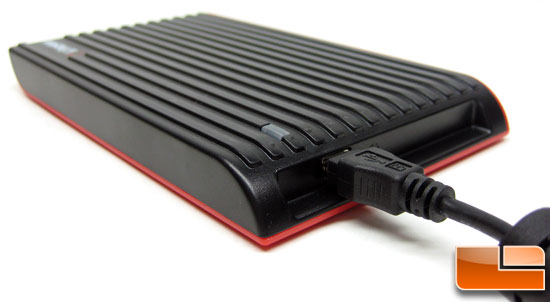
Once the drive is in the enclosure, the two halves can be snapped back together and the USB cable can be connected between the enclosure and your computer.
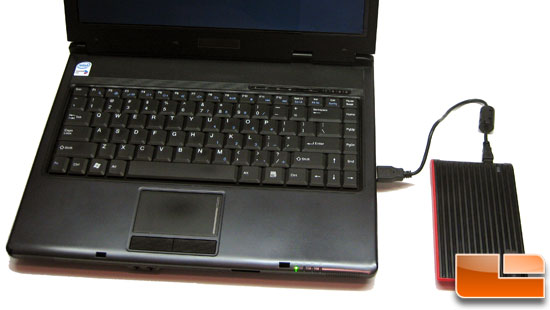
Using the USB cable provided, attach the original system hard drive (installed in the provided external drive enclosure) to your notebook via any USB port. You are now ready to copy your data from the system hard drive to the SSD using the cloning software CD provided.
Comments are closed.