GIGABYTE P67A-UD7-B3 Motherboard Review
GIGABYTE P67A-UD7-B3 Motherboard Layout and Features
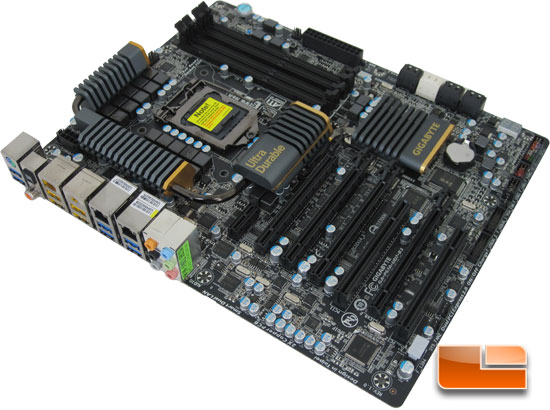
The GIGABYTE P67A-UD7-B3 has the same blacked out appearance that we saw first on the GIGABYTE P67A-UD4. Though the blacked out appearance has been done time and time again, it is still a classic look. GIGABYTE has accented the heat sink assemblies with gold trim, this breaks up the all black board and gives it a great look. Though performance always trumps looks!
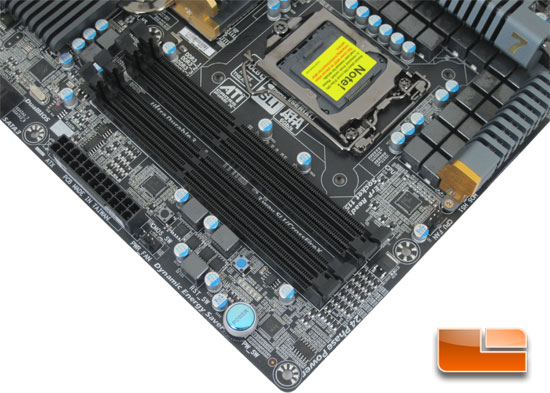
The GIGABYTE P67A-UD7-B3 will support up to 32 GB of memory and memory modules up to 2133MHz in dual channel. GIGABYTE placed the onboard power button in this corner of the board as well. Many of the boards that have come across my bench have the power button located along the same edge as the expansion slots. There is an issue with that location though, installing a graphics card in the last PCIe X16 slot will typically block buttons in that location. All I have to say; well played GIGABYTE.
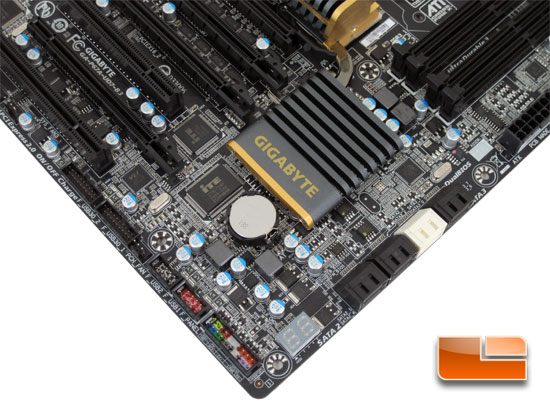
Swing the GIGABYTE P67A-UD7-B3 around we can see that this particular corner of the board is packed. Starting along the right edge we can take note of the eight SATA ports. Working our way from top to bottom of the SATA ports, the single set of Black SATA ports are SATA III 6Gb/s controlled by the Marvell 88SE9128 chip just behind the ports. The set of white SATA ports are the native SATA III 6 Gb/s ports from the Intel P67 chipset, following the native SATA III 6 Gb/s ports is four native SATA II 3Gb/s ports. Running our eyes just a bit further down the edge of the GIGABYTE P67A-UD7 we come across the Debug LED. Working our way up from the corner along the left edge of the P67A-UD7-B3 we come across the front panel header, a pair of front panel USB 2.0 headers, 3 pin fan header, and a pair (that’s right two seperate) USB 3.0 headers
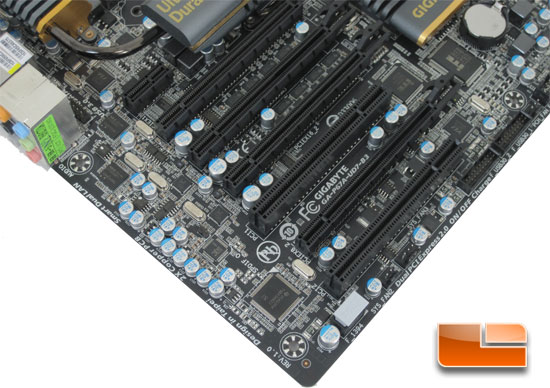
Bringing the GIGABYTE P67A-UD7-B3 around once again, we can get a good look at the expansion slots. The GIGABYTE P67A-UD7-B3 has a total of four PCIe X16 slots. Thanks to the NF200 chip, we have a total of 32 PCIe lanes divided among them. The PCIe lanes can be divided in one of two ways, if all of the PCIe X16 slots are populated they will run at X8. If only the first and third PCIe X16 slots are populated the will run at a full X16 each. Working our way around the edge of the board we have a pair of 3pin system fan headers along with a front panel header for IEEE1394a (Firewire). Following the edge of the P67A-UD7-B3 around the corner we have the Texas Instruments TSB43AB23 IEEE 1394a controller. We can also catch a glimpse of the Realtek ALC889 Audio Codec and the pair of Realtek RTL8111E Gigabit Ethernet controllers. Immediatly to the right of the audio jacks is a series of three chips, the first two are a pair of Renesas D720200 Super Speed USB 3.0 controllers. The third is a VLI VL810, the VL810 essentially works like a hub for USB 3.0 allowing you to connect multiple USB 3.0 devices to a single controller.
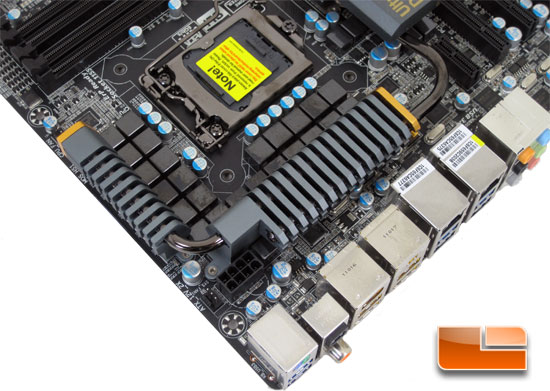
Spinning the GIGABYTE P67A-UD7-B3 motherboard around for the last time today we can see the Marvell 88SE9128 SATA III 6Gb/s controller between the heat sink and the back panel. We also have the 8pin CPU power plug here. Surrounding the Intel LGA1155 socket is the 24 wonderful little pieces of technology that supply us with 24 power phases.

The GIGABYTE P67A-UD7-B3 features a total of 10 USB ports on the back panel, six of them are Super Speed USB 3.0 while two are USB 2.0/1.1 and two of them are combination eSATA/USB 2.0/1.1. There is also a single PS/2 keyboar/mouse port, optical/coaxial S/PDIF out connectors, a pair of IEEE 1394a (firewire) ports, two Gigabit Ethernet ports controlled by Realtek RTL8111E IC’s, and the audio jacks.

Comments are closed.