Corsair Carbide Spec-Omega Mid-Tower Case Review
Corsair Carbide Spec-Omega Exterior Overview
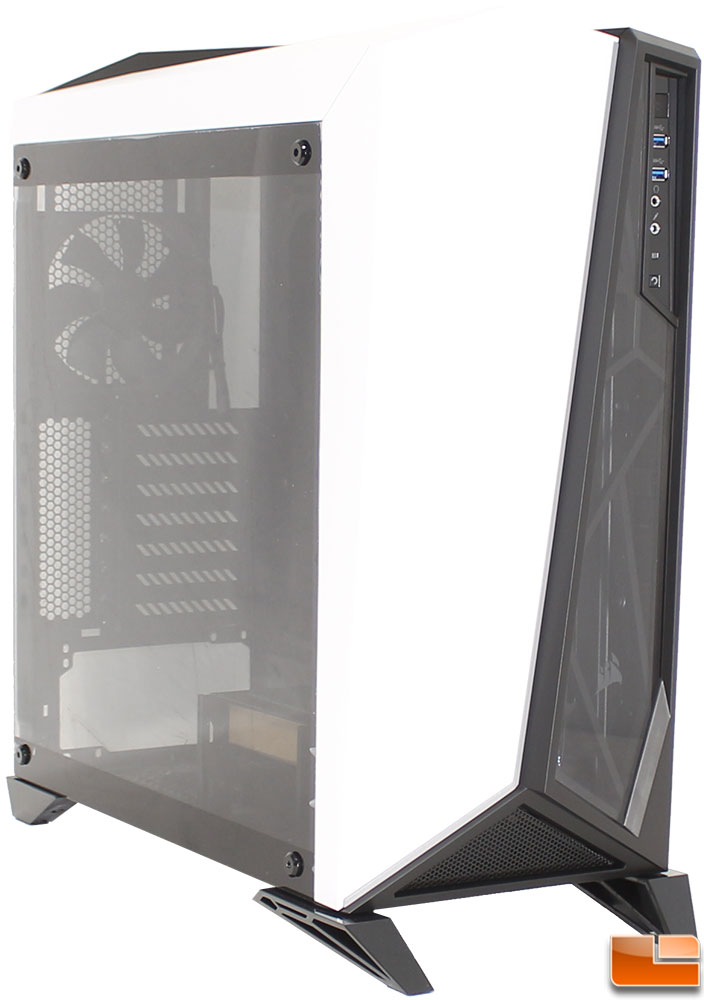
Overall, the Spec-Omega is a nice looking case with it’s unique design. The unique shape of the front panel is not the only uniquely designed features on the Spec-Omega. The legs and top panel also implement the angular design to give them a different look as well. We quickly see why Corsair included a hex wrench with the Spec-Omega and the reason it was the first time you see when you open the case. The Tempered Glass side panel is held in place with hex screws rather than thumbscrews. This will be a matter of preference, however I personally prefer to use thumbscrews on the side panel as I tend to open my cases frequently.
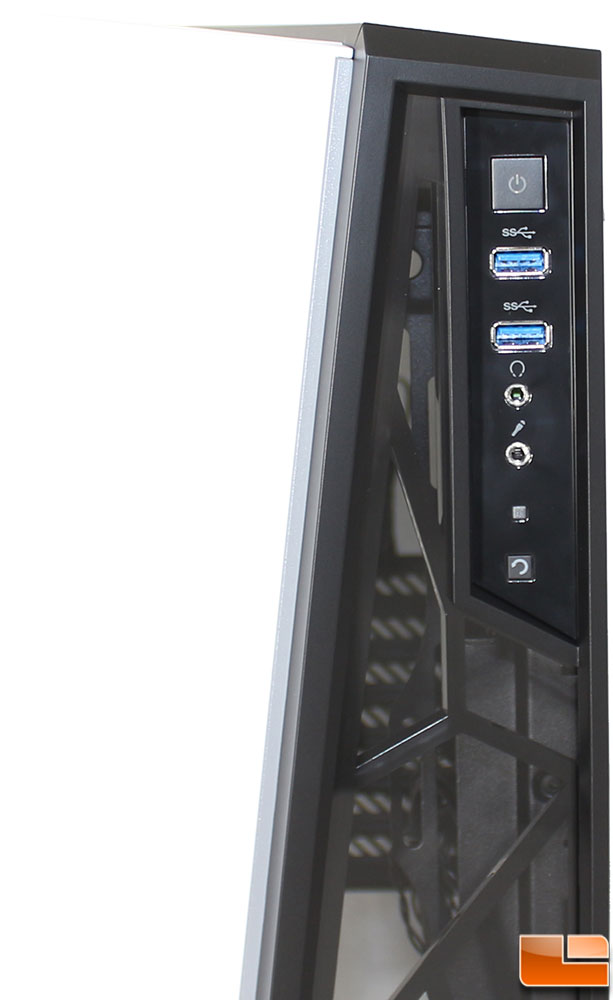
The front I/O cluster is actually on the front panel, which for me is one of the best places for it. The front I/O cluster includes all standard features, a power button, dual USB 3.1 Gen 1 ports, headphone, microphone, hard drive activity indicator and a reset button; no big surprises.

The front panel is made up of two sections, in our review model the white side is solid, while the black side has a solid clear acrylic panel. Airflow into the front intake fans is provided by a little vented section at the bottom of the case. Other than this little area, the front panel is solid from top to bottom.
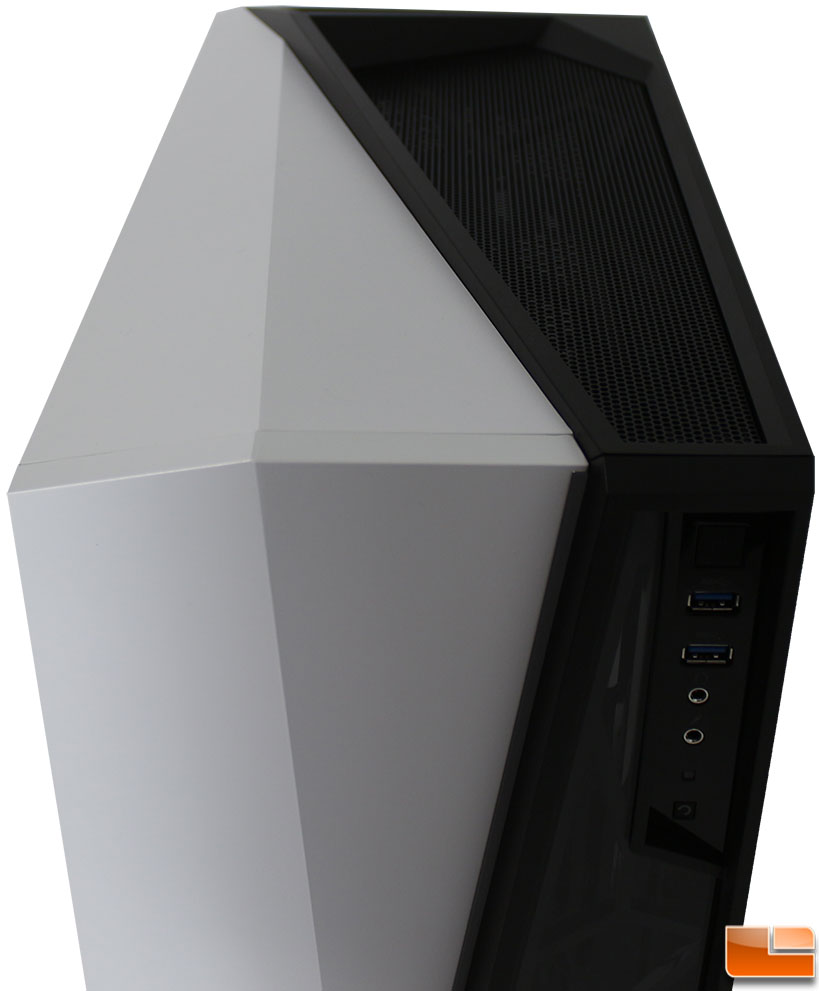
The top panel is design is similar to the front panel, where half of it is solid white, while the other half is black. One big difference here is the black portion is all vented.

Taking a look at the Tempered Glass side panel, the first time we notice are the hex screws holding it in place rather than the thumbscrews we are used to seeing from Corsair. Next we can see that the side panel is lightly smoked, but not enough that it would obscure showing off your components. The Tempered Glass side panel also rests on the bottom feet, which makes it easier to install onto the support pegs, which have a rubber gasket to keep the Tempered Glass from chipping on the metal support posts and to reduce vibration. The unique “angular” design of the front and top panel is easily noticed when looking at the case from the side.
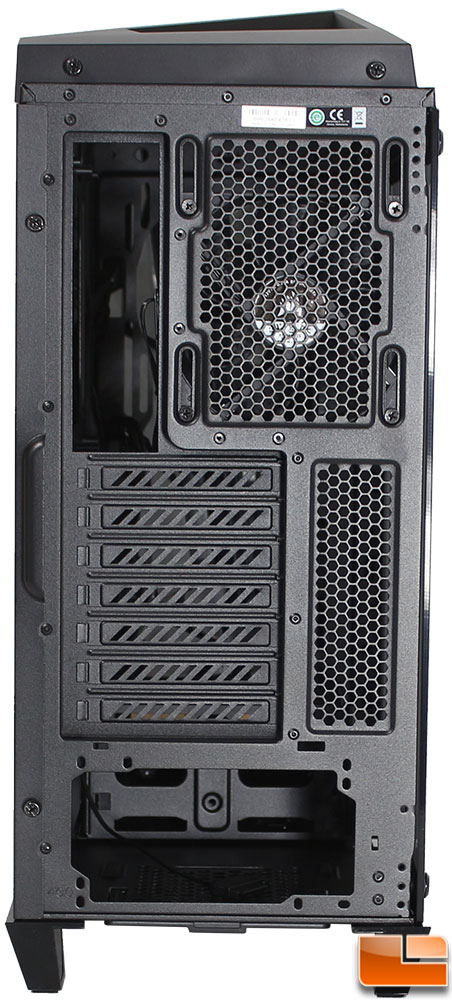
On the back of the case, we can see that the top panel is held in place with two thumbscrews. Other than that, everything else is exactly as we’d expect. The rear exhaust fan, motherboard port key slot, and seven expansion slots. The expansion slot covers are vented to help with airflow, while the space above the expansion slots is also vented. At the bottom of the case is the bottom mounted power supply hole. None of this should be any surprise.
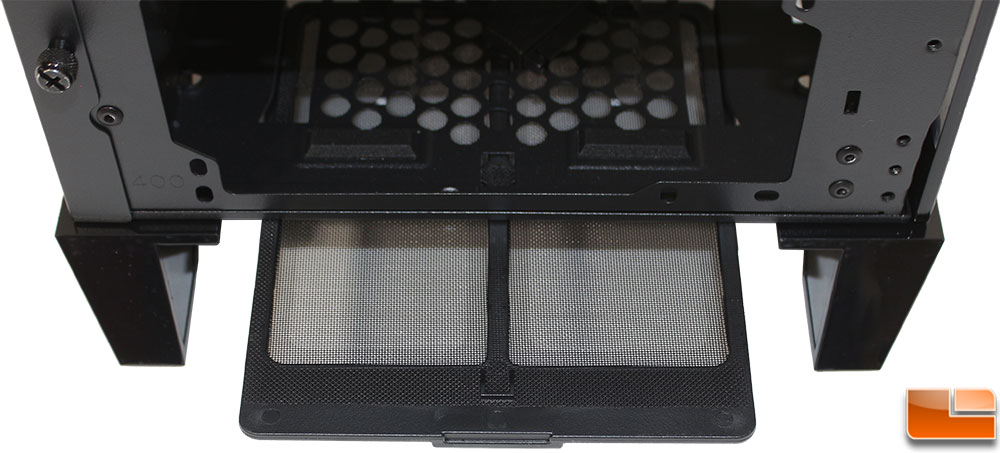
With a bottom mounted power supply, it’s going to take in a lot of dust. As is common practice, Corsair has installed an easily removed dust filter on the bottom of the case. It is held in place very securely with a little slide clip. Pressing down on the filter handle and pulling it out, the filter removes from the case without any trouble.
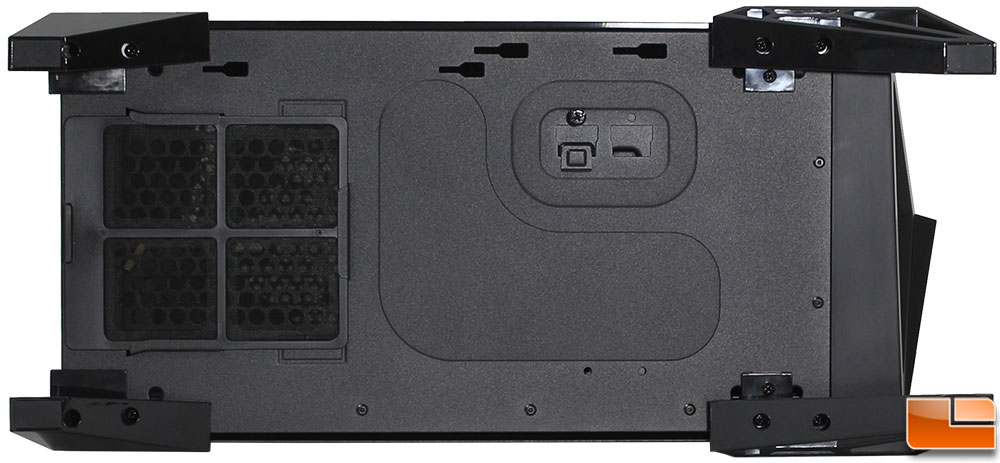
Taking a quick look at the bottom of the case, we find the power supply filter that we just discussed. The other features that we see is a thumbscrew, that is one of three that hold the 3.5 inch drive cage in place. The four feet each have little rubber pads, which helps reduce vibration and keep it from sliding around. There are also four slide lock slots on the bottom panel, which do not correlate to anything inside the case, so I have no idea why they are there.
Time to take off the Tempered Glass side panel and take a look at the interior.