Cooler Master MasterCase Pro 3 Review
MasterCase Pro 3 Build Process
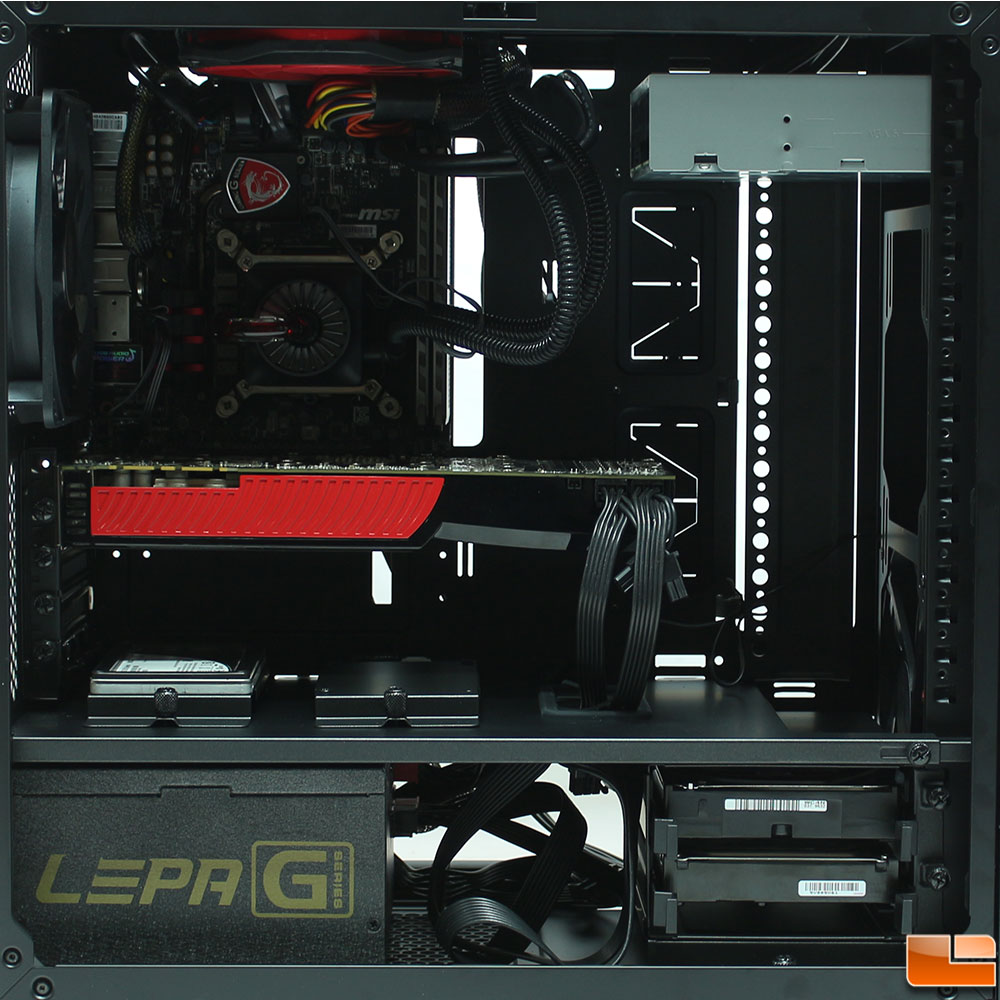
The MasterCase Pro 3 supports both a microATX and mini-ITX motherboard, unfortunately a microATX motherboard wasn’t available to be installed inside the case, so we decided to use a mini-ITX motherboard, a MSI Z97I Gaming AC. With the mini-ITX motherboard installed, there is a lot of unused space, even if a microATX motherboard was installed, there is still a good amount of space available as it would run up to the edge of the rubber on the cable management holes. With everything installed, let’s take a look at what was involved at installing the components.
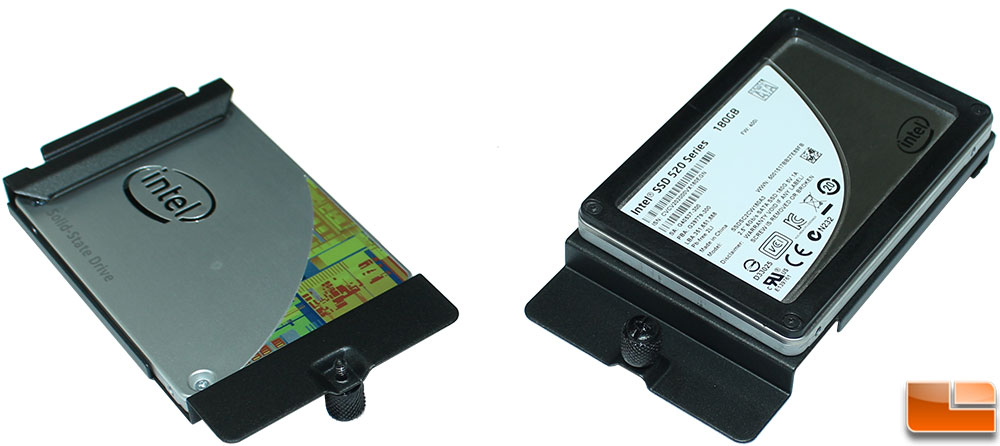
Cooler Master includes two 2.5″ SSD trays, however the MasterCase Pro 3 can support three. The SSD’s can be installed in two different orientations, on the bottom of the tray or on the top. One orientation will hide your SSD from view, while the other allows the SSD to be on display. Sadly, unless you happen to have some kind of specialized double sided screw, you won’t be able to connect a SSD to both sides at the same time (ok, you can use double sided tape/velcro if you really wanted to).
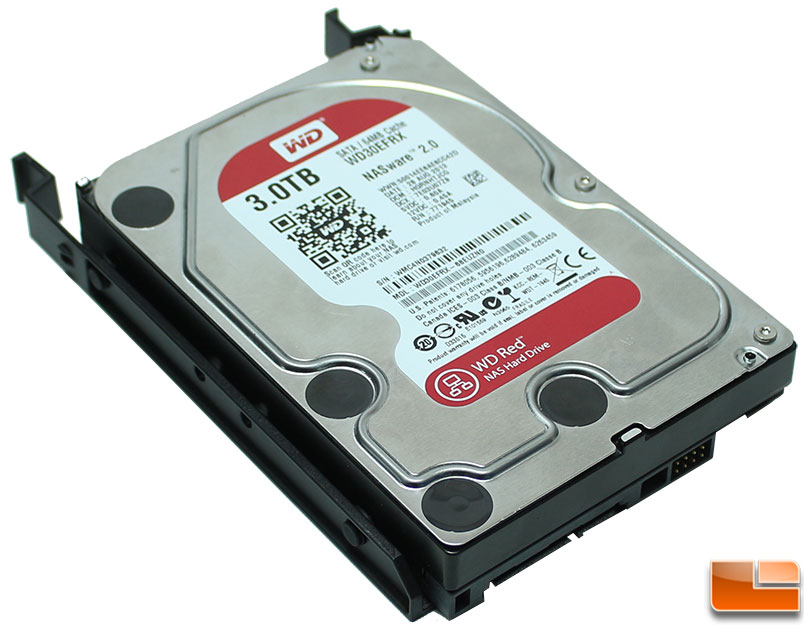
The 3.5″ hard drive trays are nothing special, we have seen and used these types of trays for a long while now. To put your 3.5″ hard drive on them, you bend them slightly and pop in your drive; not difficult to do at all. Of course to use a 2.5″ drive on these trays you’ll use screws.

Rather than installing the power supply from the inside of the case, Cooler Master has provided a removable bracket to attach to the power supply, then you slide the power supply in from the back of the case. I’m not a fan of these types of installations, it is another step for the user to do in order to complete the installation. With that being said, it is extremely easy to install the power supply, and even nicer that Cooler Master has used thumbscrews to attach the bracket to the case. Like the other thumbscrews, these are captive thumbscrews so they’ll remain in the bracket so they don’t get lost.
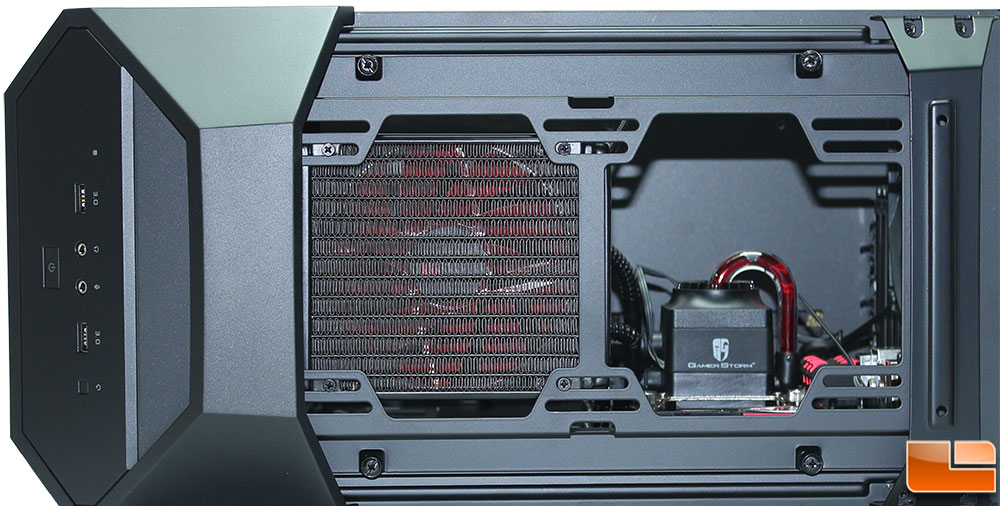
At the top of the case is one of the locations you can install liquid cooler radiators or additional fans. We installed the Deep Cool GamerStorm Captain 120 AIO cooler. While it is a 120mm radiator, you can always install larger radiators here, Cooler Master states that up to a 240mm radiator will fit. We tried to install the fans on the outside of the case, however unfortunately the top shroud wouldn’t go on. It was easy to install the radiator from the inside of the case, however another option would have been to remove the top support and install the radiator outside the case.
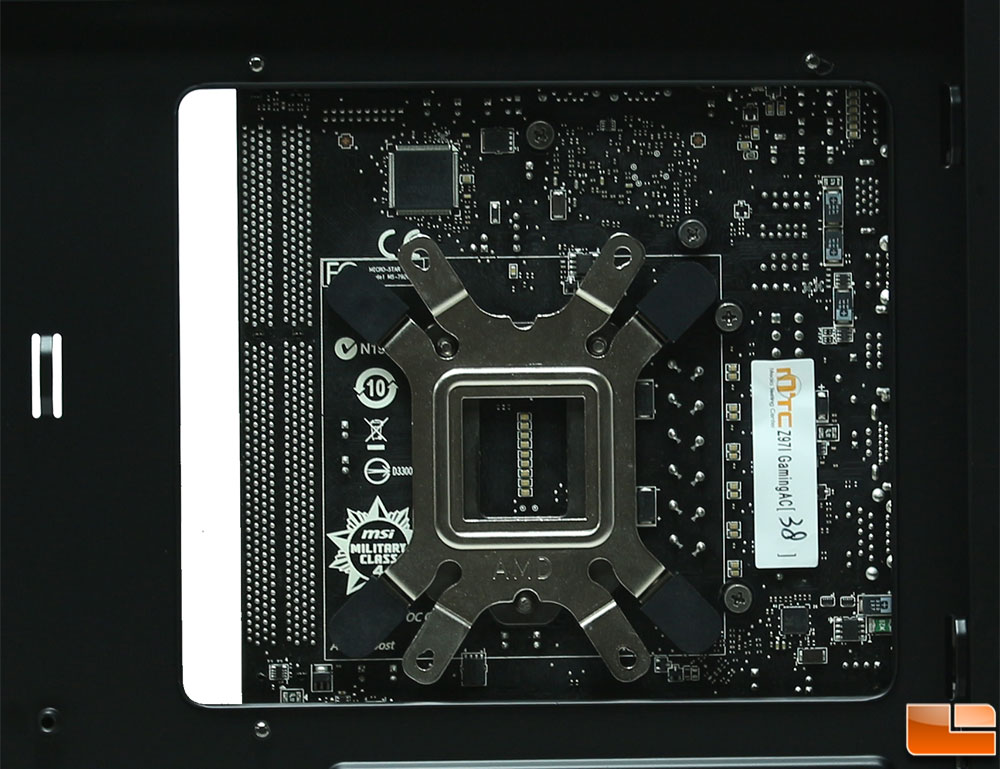
The CPU cooler support bracket cutout is large enough that it should accommodate most CPU locations and shouldn’t pose any issues with installing your CPU cooler after the motherboard has already been installed. Installing a mini-ITX motherboard there is enough room that there is even some open space left; the cutout measures 6.75 x 5.75in (LxH).
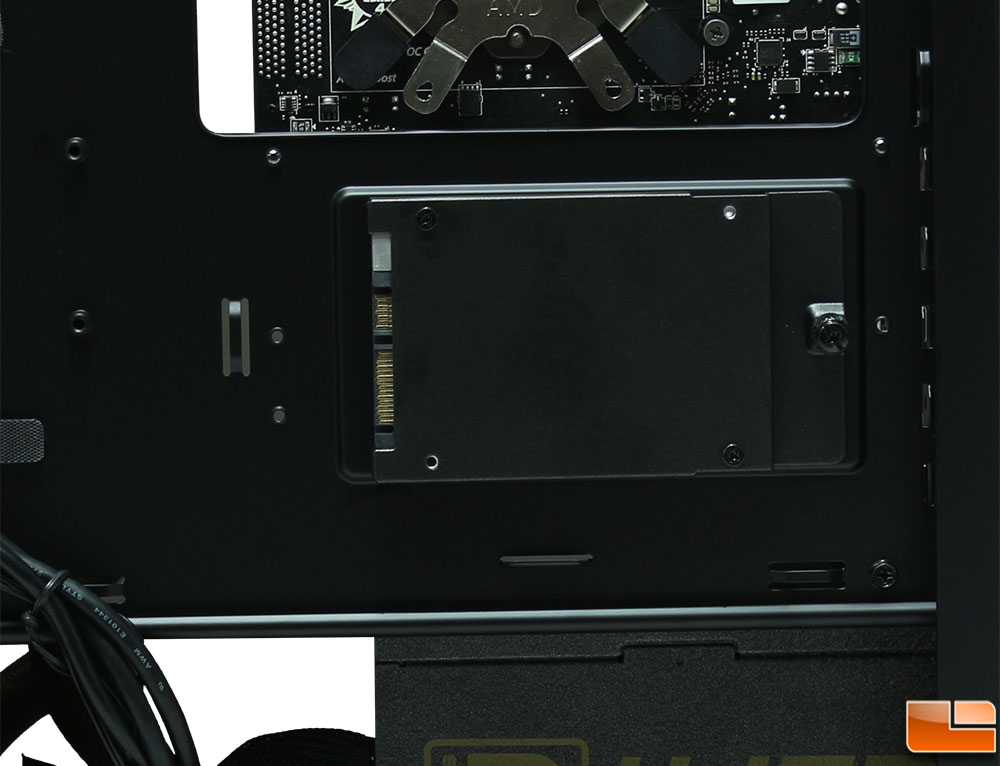
Right below the CPU cooler cutout is one of the locations that you use to hide a 2.5″ SSD on the included SSD tray (or you can always purchase another from Cooler Master). It needs to be installed in this orientation, the drive can not be installed facing out, as the back panel won’t slide into place if it is.
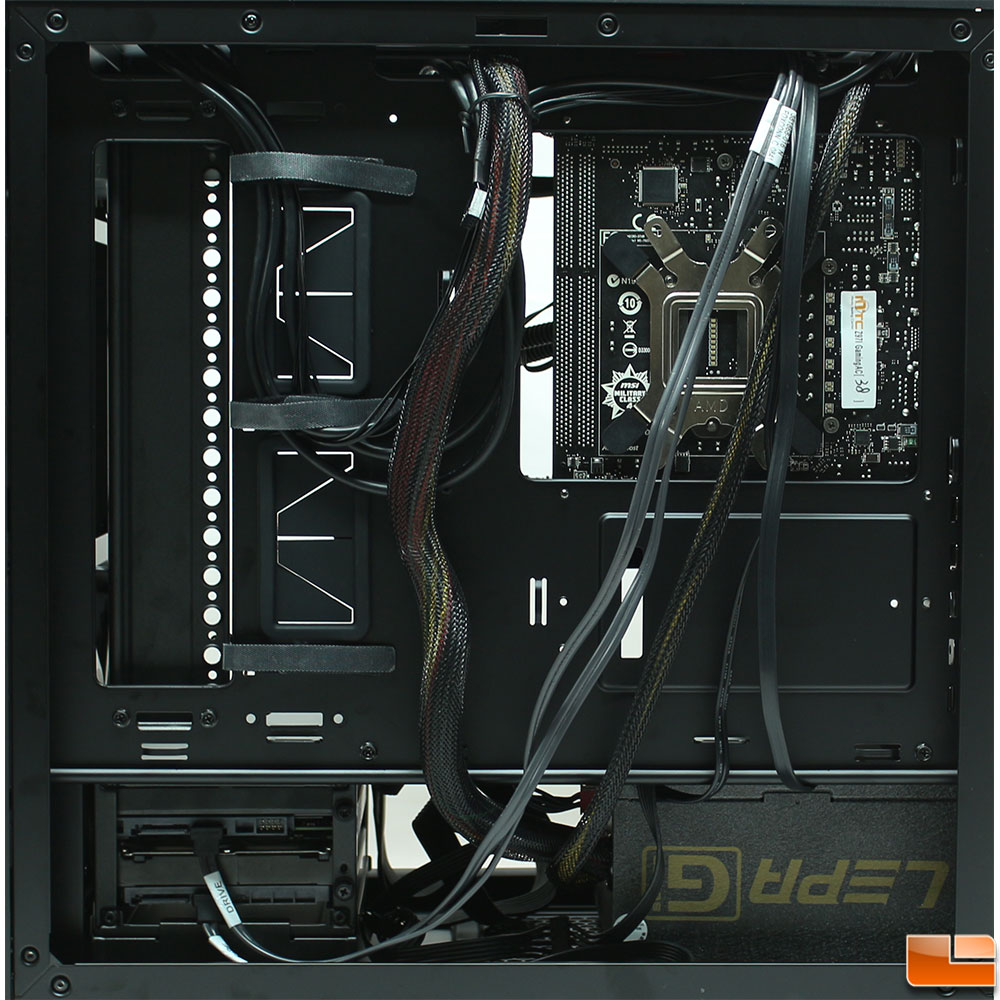
I didn’t try to do any cable management here, this is just how it all turned out after I installed all the cables. All in all, it’s not too bad with the limitations on the tiny motherboard, and cable length limitations. Had some of the ports been in “standard” locations (SATA, power, front panel headers, etc), things would look much nicer, and we would have more freedom to tidy up the cables. As it stands, a few cable ties and everything would be secure and out of the way.
The Cooler Master MasterCase Pro 3 has a place for a 5.25″ device to be installed, however Cooler Master states that this is for a fan controller. The brackets that Cooler Master provides to mount the fan controller can also support installing an optical drive into the bay. One word of warning though, the optical drive is only supported by a few screws into the front bezel plastic. I would be concerned about the weight of the optical drive and the plastic screw holes.
FreeForm Modular System Accessories
One of the major features of the MasterCase Pro 3 is that you can change the external look and internal capabilities without having to purchase a new case. Some of the accessories for the MasterCase Pro 5 will work on the MasterCase Pro 3, and for those that won’t fit for obvious reasons, Cooler Master has upgrade accessories already available.
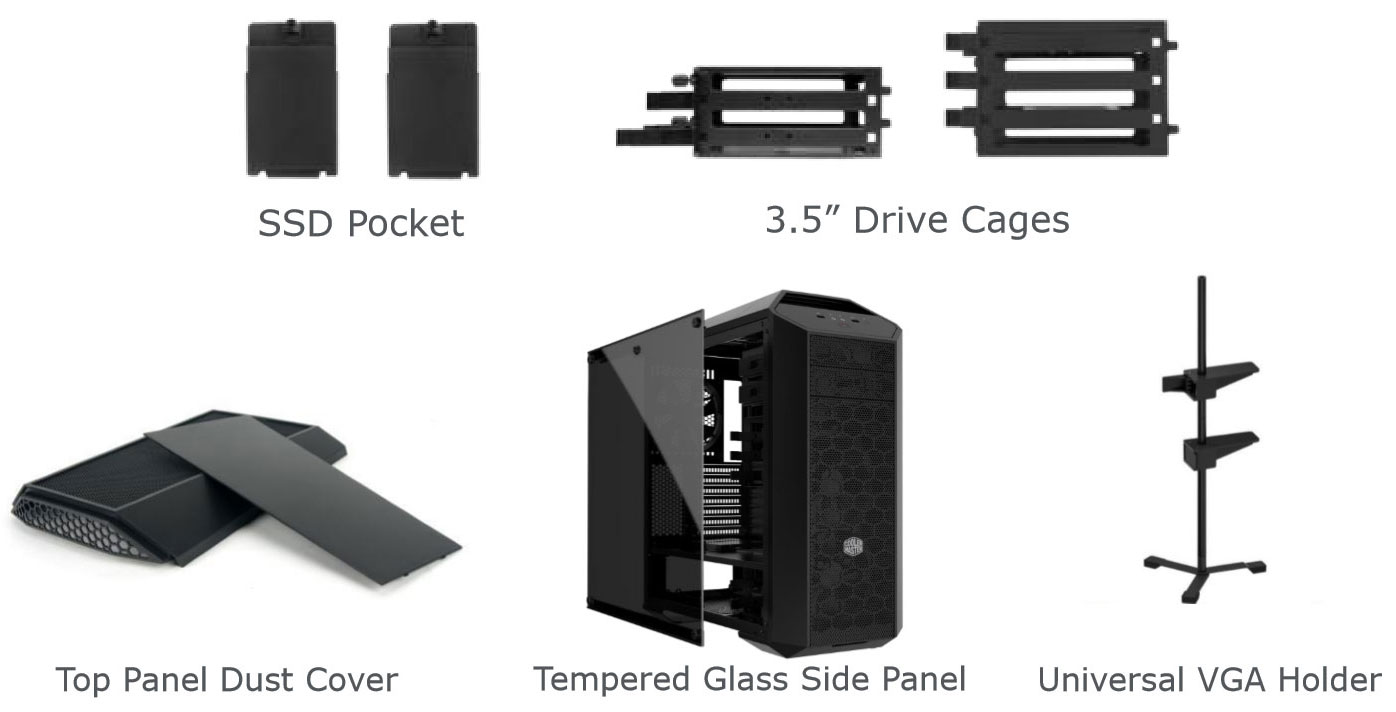
One of my concerns is that the space for the handles is totally open, and while there is little chance dust or debris will fall in through the two handles it would be nice if there was some type of filter hidden under the handles. Guess what, it appears that Cooler Master has thought of this, and has a Top Panel Dust Cover available for the MasterCase Pro 3. Pricing was not immediately available for these options, however expect them to run close to the same price as similar options for the MasterCase Pro 5.