Cooler Master MasterCase Pro 3 Review
MasterCase Pro 3 Internal Review
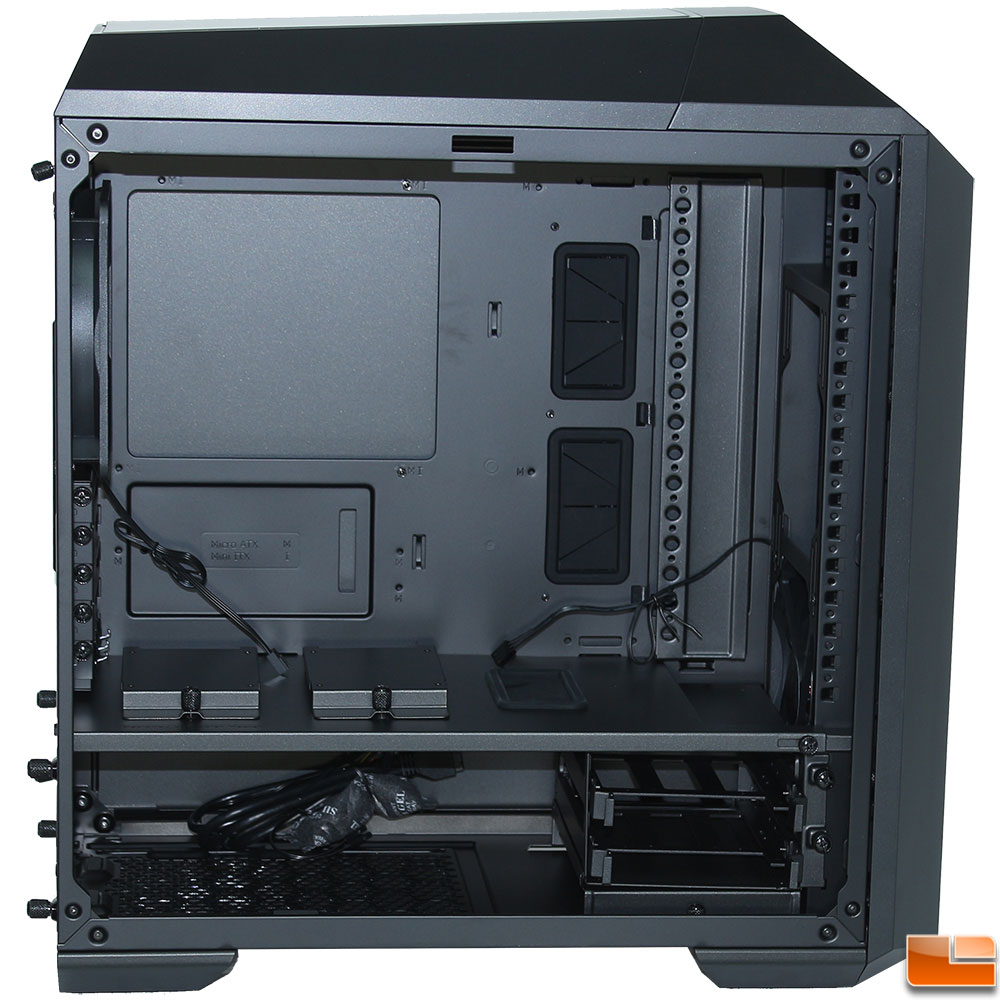
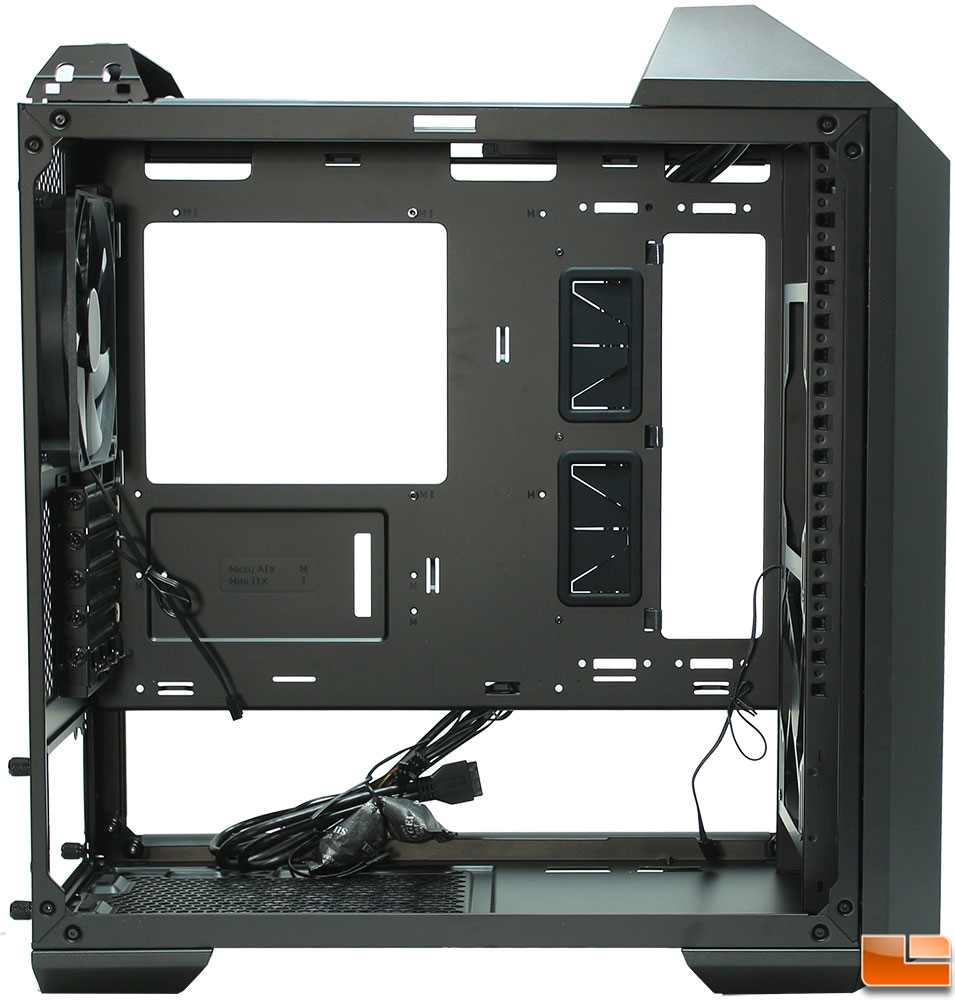
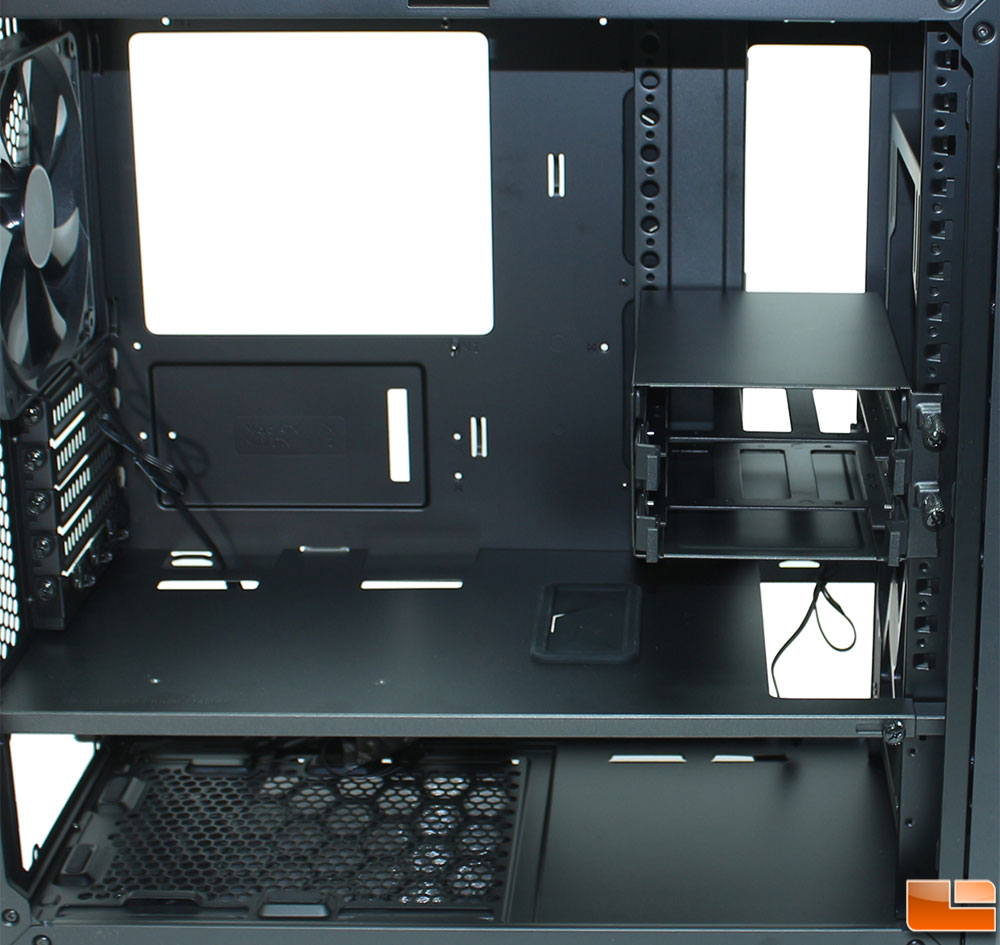
With the side panel removed, we can see how open the interior of the MasterCase Pro 3 is. With the dual chamber design, in the top portion, we find the motherboard tray, which has a large CPU cooler support bracket hole cut out of it, and several cable management holes, two of which have rubber gaskets to help keep things looking nice. Near the front is the vertical support bar for the Clip-and-Click drive mounts.
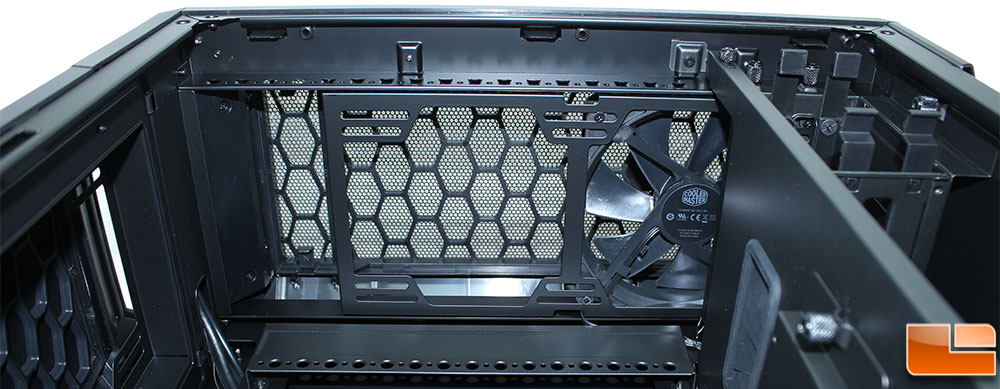
Turning our attention to the front of the case, we see the expected items. At the top (or the left in this picture) is the 5.25″ bay, which doesn’t have any supports for any optical drives, below that is the removable fan bracket, which will support up to 2 x 140mm fans, or a 280mm radiator. Cooler Master has included one 140mm fan, that is rated at 1,200RPM at 19dBA.
On the dual chamber divider, Cooler Master has included three cable management holes, two of them are lined up specifically for the data and power cables for the SSD’s (other cables can use these holes as well), while the other is for any other cable. Only one of the cable management holes has the rubber gasket installed to protect cables. At the front, the divider has been shortened to allow room for a liquid cooling radiator to be installed; as there is about 2.25in of space between the fan and the divider, a radiator and an additional fan will fit here (push/pull fan combo).
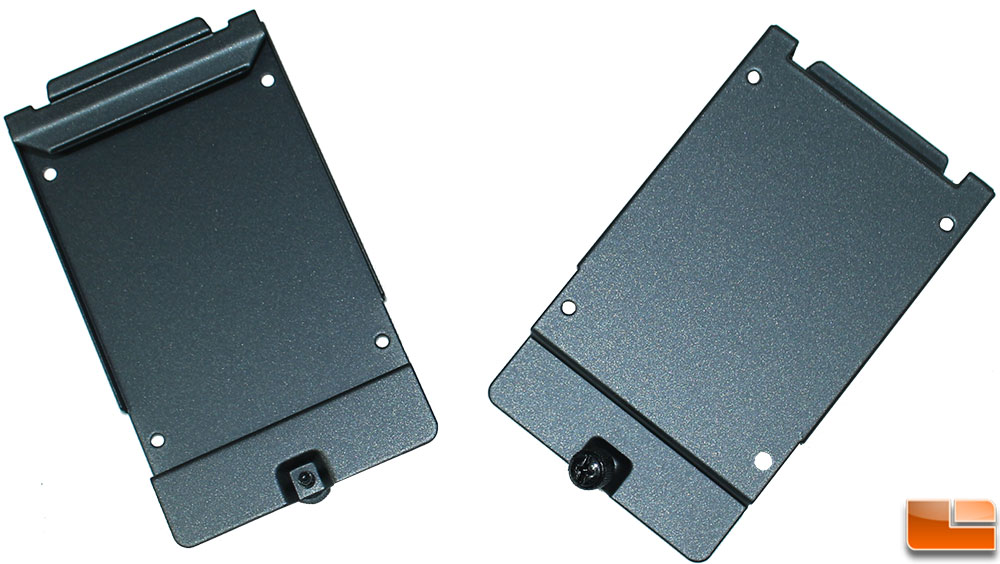
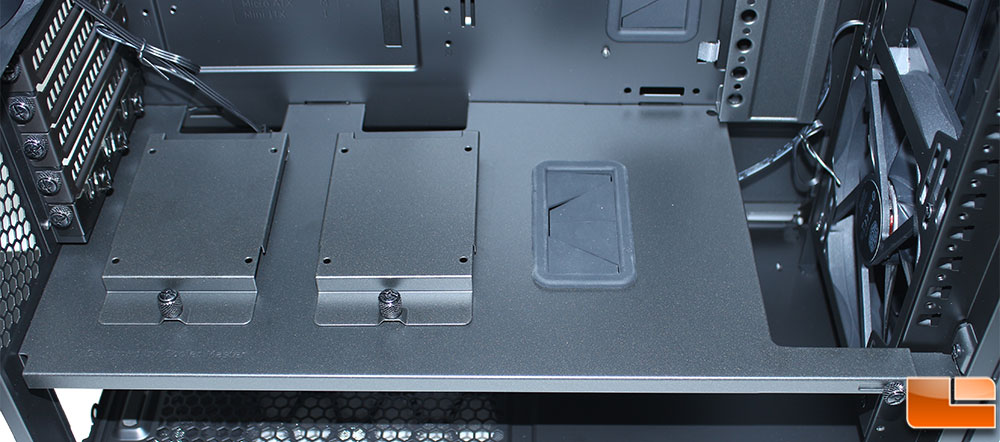
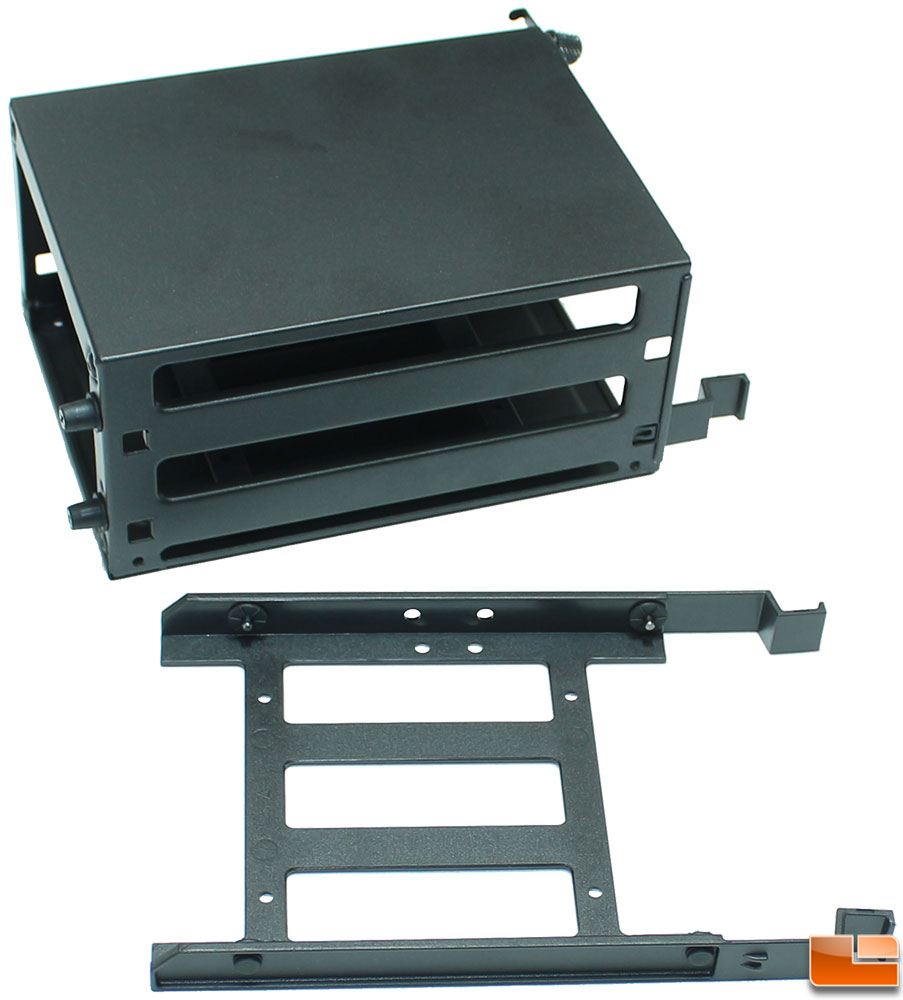
Cooler Master has included two of their “Slip and Clip” SSD trays. These trays are not tool-less, they require the use of screws to attach the SSD’s to the trays.
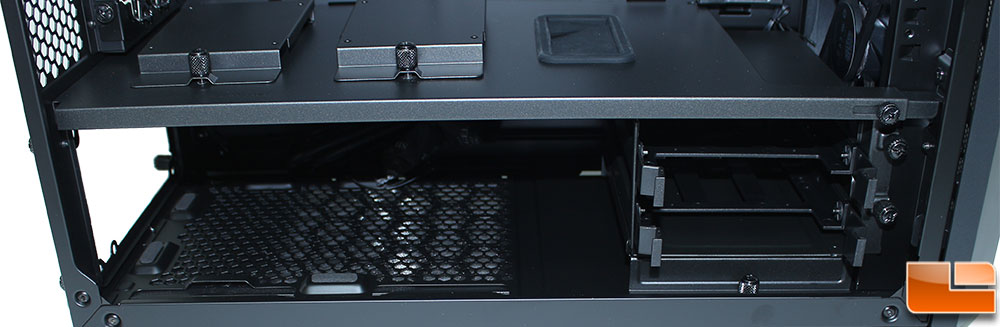
Beneath the chamber divider, there is room for an ATX power supply up to 200mm in length, of course technically a longer one would work as well if you remove the 3.5″ drive cage. There are several rubber capped risers to help reduce vibration noise from the power supply. The 3.5″ drive cage is fully removable and uses thumbscrews to secure the baseplate and the drive cage to the case.
A pretty common style of 3.5″ hard drive tray is used in the MasterCase Pro 3, allowing for easy tool-less installation of 3.5″ drives, and 2.5″ drives with screws. The drive cage is a pretty common design as well, with the exception of the two rubber plugs at the back of the cage, these are used if you happen to move the drive cage to being above the chamber divider.
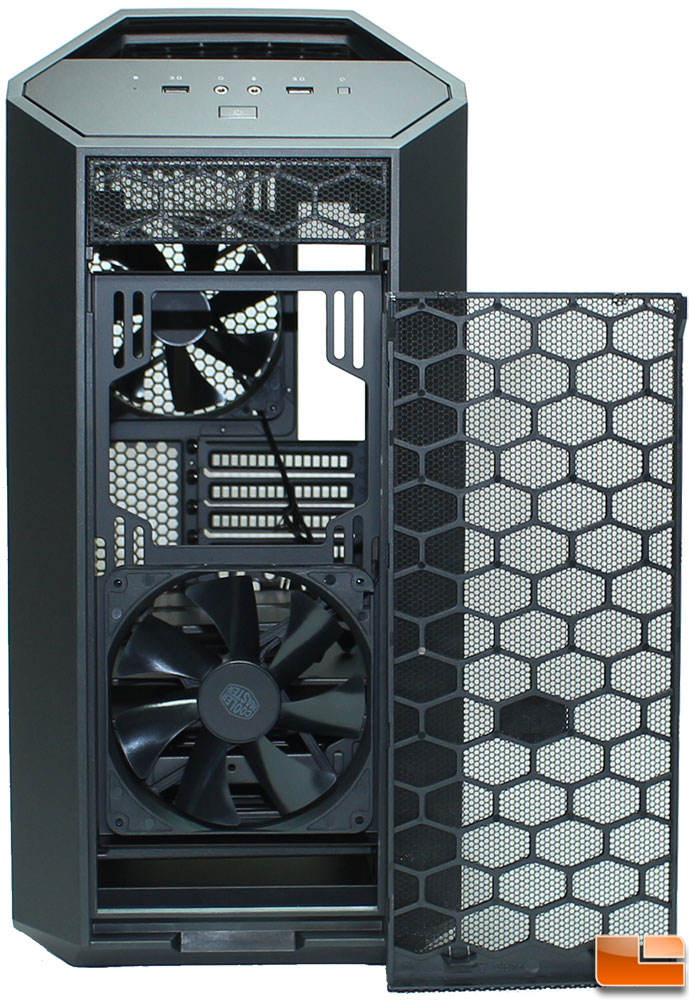
The front panel can be removed in two pieces, the first is removing the wire mesh portion that provides good access to the front fan cage, allowing you to change the fans or install a liquid cooling radiator as you feel necessary. The fan cage is removable as well, in order to do this, the plastic bezel needs to be removed, which is held in place with snap and lock clips on the inside of the case.
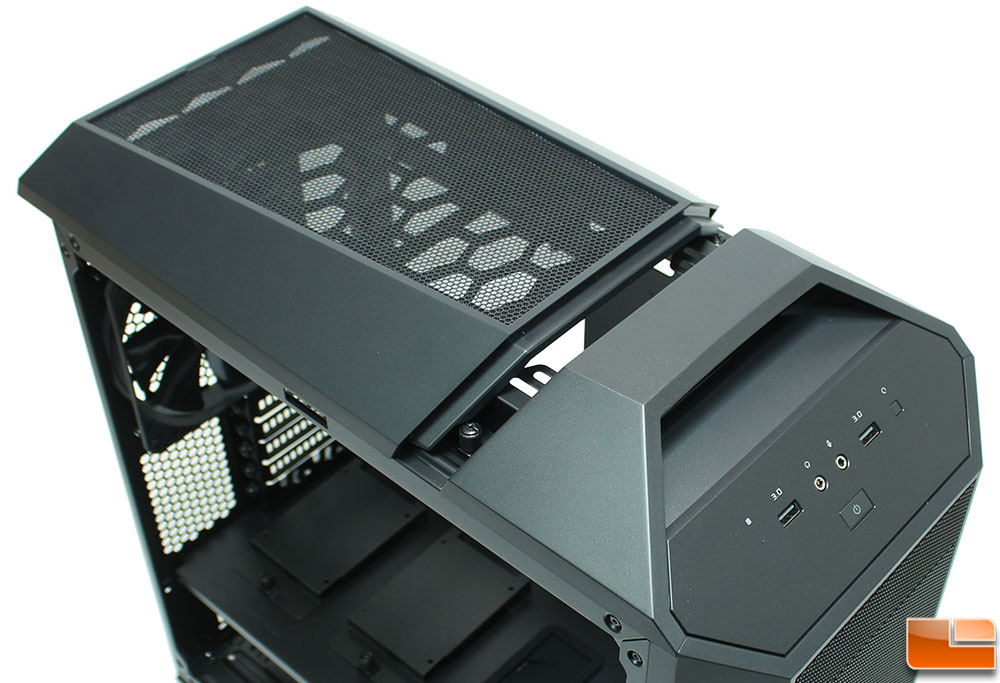
The top cover is a little different than I expected, there are no screws or latches that hold it in place. A simple magnet and rail system holes it in place. While this doesn’t seem like it might be very sturdy or reliable, I found that while transporting a full case around it stayed in place rather well. The front edge of the cover has the magnets on it, and when it gets close to the front handle, it slides into place.
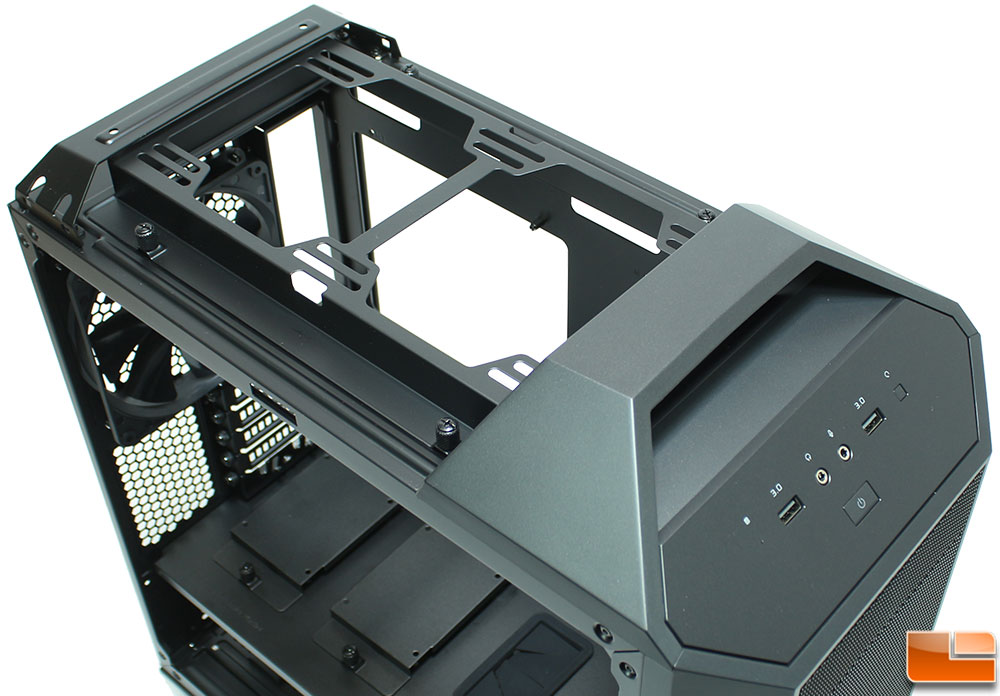
Sliding the top cover towards the back and removing it, we can see the steel handle and the top fan/radiator bracket. Like the other removable parts, the bracket has captive thumbscrews holding it in place. Cooler Master recommends removing the rear handle (which is held in place with four normal screws), however I found that I was able to install fans and a radiator from the inside of the case without any issues. Although, if I wanted to remove the top bracket I was able to do that without removing the back handle, reinserting it with a fan and a radiator might be a little tricky though.
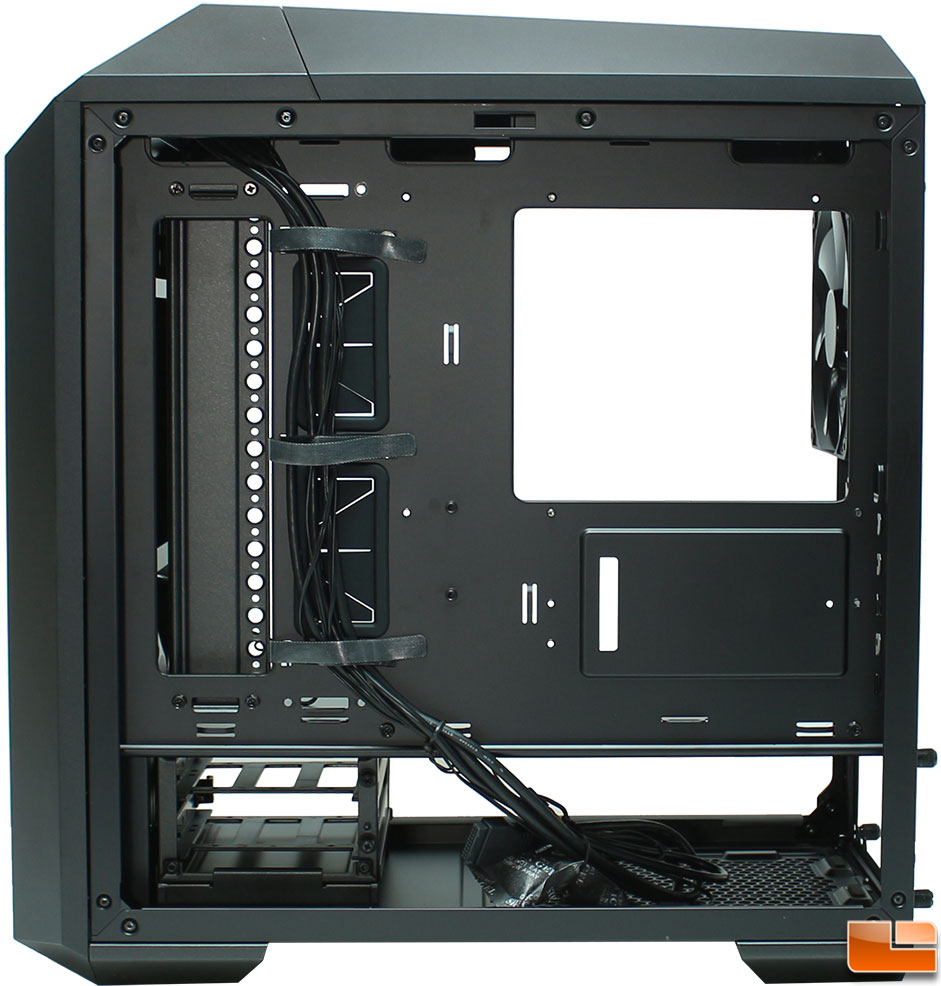
On the back side of the motherboard tray, we find that Cooler Master has pre-installed three Velcro ties. Cooler Master has also included 9 cable tie locations spread around on back. With the number of tie locations, and the pre-installed Velcro ties, doing good cable management shouldn’t be an issue.
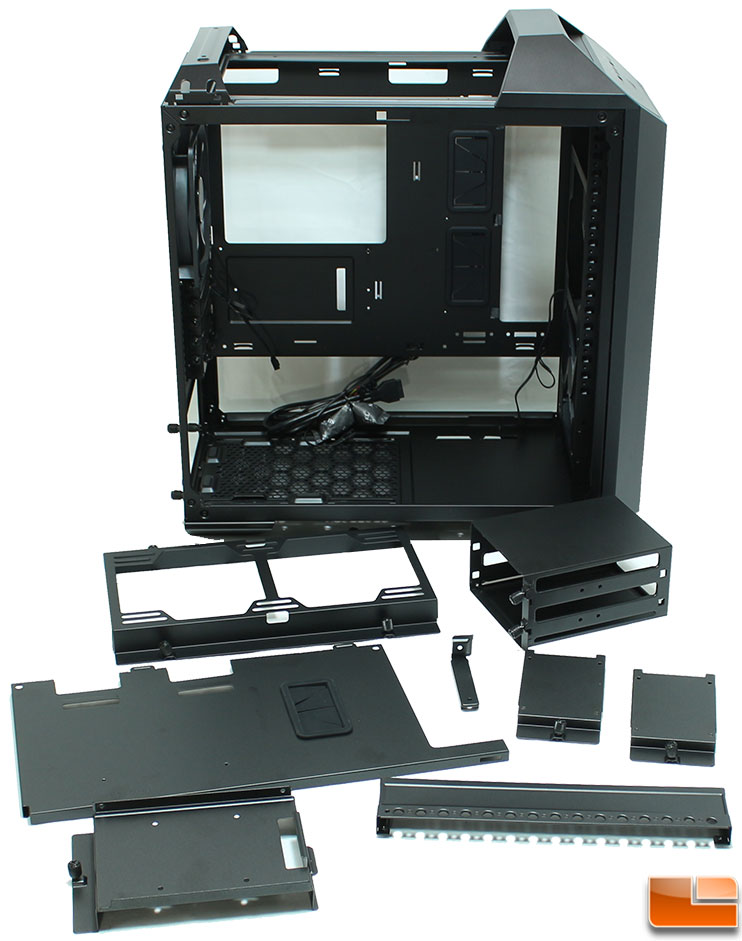
When Cooler Master says you can choose which parts are installed inside the case, they weren’t kidding. You can remove almost every piece of the case down to the individual frame. I realize that I didn’t remove the top handles, or the front bezel, but take my word for it, those are removable too.
The power supply cover removed with four screws (one back, two behind mb tray, and one in front by fan) and one thumbscrew (this is the only non-captive thumbscrew in the case). The top fan bracket can also be removed with four thumbscrews, and while the back handle uses four screws. The vertical drive support is held securely in place with four screws on back of mb tray.
With everything back inside the MasterCase Pro 3, we decided to show one of the alternative positions for the 3.5″ drive cage. Moving the Clip-and-Click panel, we are able to move the 3.5″ drive cage to above the chamber divider, it can be placed in any position from the very top to sitting on top of the chamber divider.