Rosewill Legacy MX2-B Mid-Tower Case Review
Legacy MX2-B Hardware Installation
With the install completed, many of the components fit exactly as expected. With the size of the case, there are some differences and little considerations that make the installation a little tricky. With a little planning the install can be pretty painless.
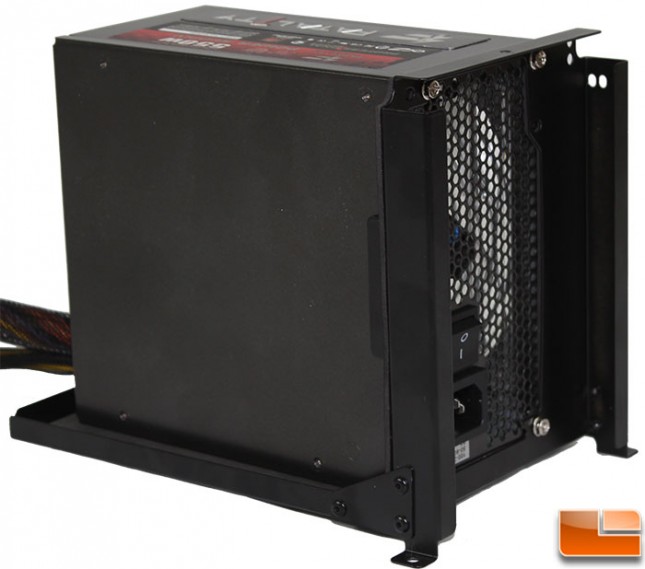
Installing the power supply on the bracket is not difficult, if you have installed a power supply before, this part is easy to do. Place the power supply on the bracket and secure it with four screws. The only tricky part will be deciding which direction the intake fan will face, towards the front of the case (where there are no vents), or towards the motherboard where it can get some airflow from the bottom intake fans.
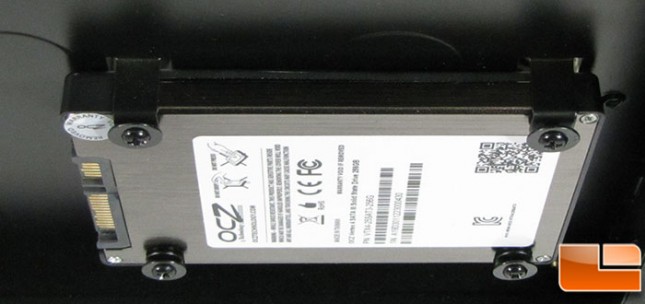
Next, we’ll go ahead and install the SSD on the back of the motherboard tray. The user manual states that needs to be installed before the motherboard, however it seems the manual is incorrect. Unfortunately, this is the first issue I ran into. The screws used to connect the SSD so not properly secure the drive to the brackets. There is some movement, and if you take a close look at the screws, you can see a bit of space between the screw and the bracket. While a SSD does not have any moving parts, it is still a concern that the drive can move, even just a little.
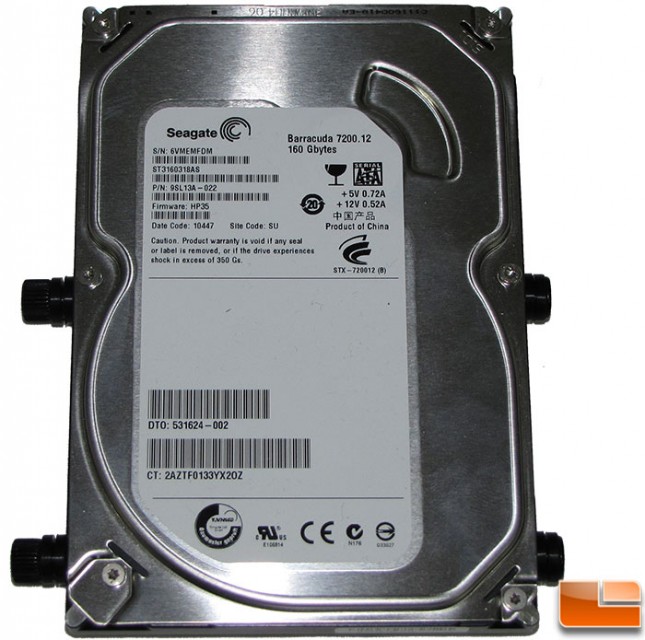
Next, we prepare the 3.5″ hard drives for installation by attaching the thumbscrews on the left, with rubber washers, and on the right the flat head screws with the rubber washers. The rubber washers reduce the vibration noise from the hard drive so they are necessary, and is also part of the install process to keep the drive secure. When the drive is slid into the drive chamber, the washers are notched for the guide rails.

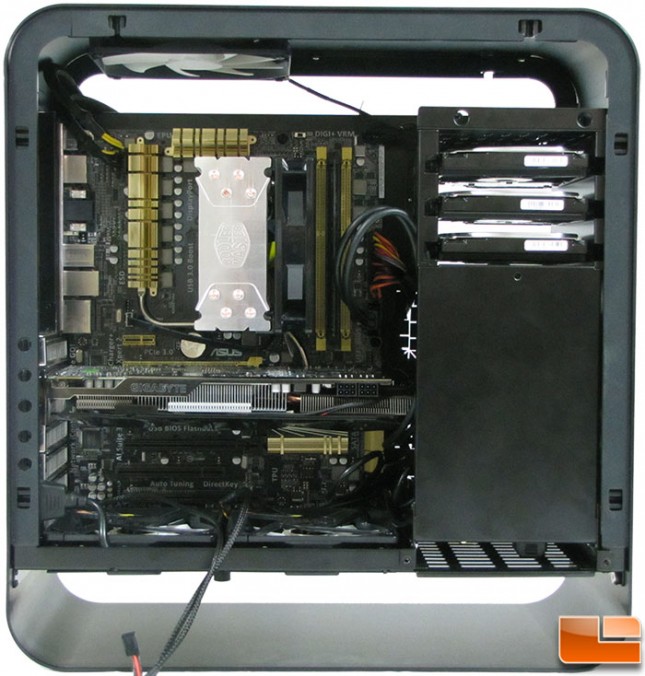
The motherboard is generally installed like every other motherboard. With the size of the case, pay special attention when placing the motherboard inside the case. Once the motherboard was installed, it was time to connect it. Sadly, here I began to run into many issues. The entire row of connectors on the bottom edge of the motherboard cannot be accessed! All the connections need to be made before the motherboard is in place, otherwise, the bottom fans will need to be removed. Also, as tight as the space is, if the SuperSpeed USB 3.0 connection was on this edge, it would be totally unusable as there is not enough space for the connector. In addition, the ASUS motherboard uses the Q-Connector for the front power connections, it cannot be used at all with this case. With the Q-Connector and the power connections to the case it is just too tall. Even the motherboard debug LED is totally covered.
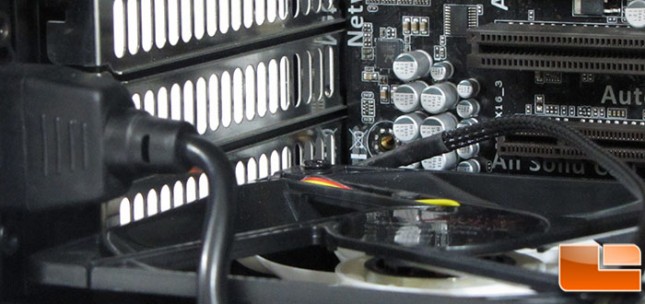
Taking a closer look at the bottom of the motherboard, should a three-way video configuration be planned, it would be impossible. The bottom PCI expansion slot is partially covered by the fans, and there is no room for a dual slot video card in the bottom PCI-E slot.
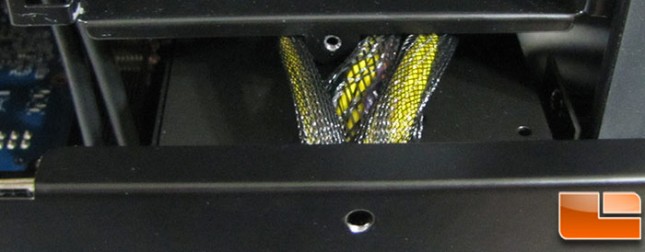
When sliding the power supply bracket into place, a few little things came up. In my test build, I was using a modular power supply, power cables have to be installed first and fed through the hole in the back in order for them to fit. They do fit, but it’s a tight fit; some modular connections might have problems. Also, when sliding the bracket all the way in, it was held up by the power supply cables, they need to be pressed out of the way in order for it to be secured properly. If the cables on the power supply are rather large, it might be a little difficult to get the bracket to slide all the way in. However, I could have turned the power supply around so the intake port would be towards the front of the case, that was a little easier to get it in place.
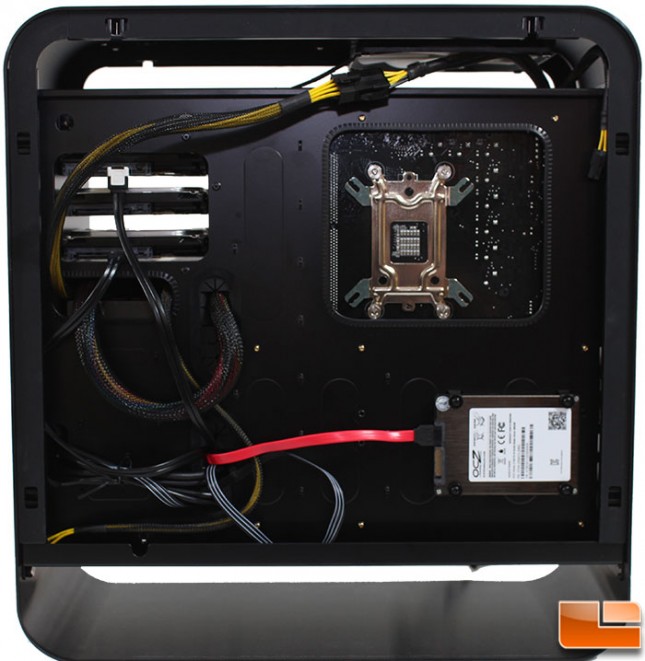
With everything installed, I wanted to check out the options on the back of the MB tray for cable routing options. There are over 21 cable tie locations to secure the cables, and just under an inch of space for cables to fit. Without doing anything special to route the cables the back panel snapped into place without any issues.
The final step was to install the video card, the Gigabyte HD7870 is 280mm long, which is the maximum size for the Legacy MX2-B. It could not be installed straight in, I had to move it into place at an angle then put it into the slot once it was past the power supply bracket. Of course, once again, the easier way would be to install the video card before the power supply; especially if it is longer than the motherboard at all.
With the amount of available space at the top of the case, I would assume the 140mm exhaust fan could be swapped for a small radiator, allowing for some liquid cooling options. There are no options for installing a larger dual fan radiator without doing some mods.