Fractal Design Arc XL High Airflow Full Tower Case Review
ARC XL Interior Impressions
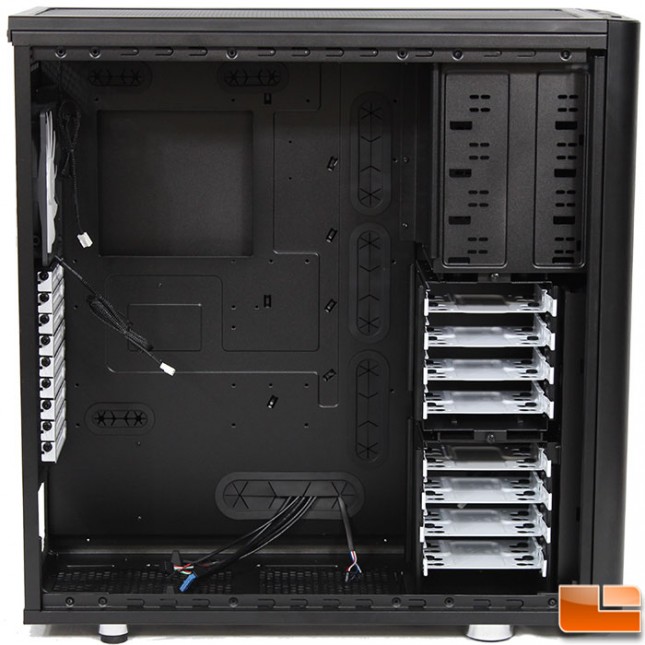
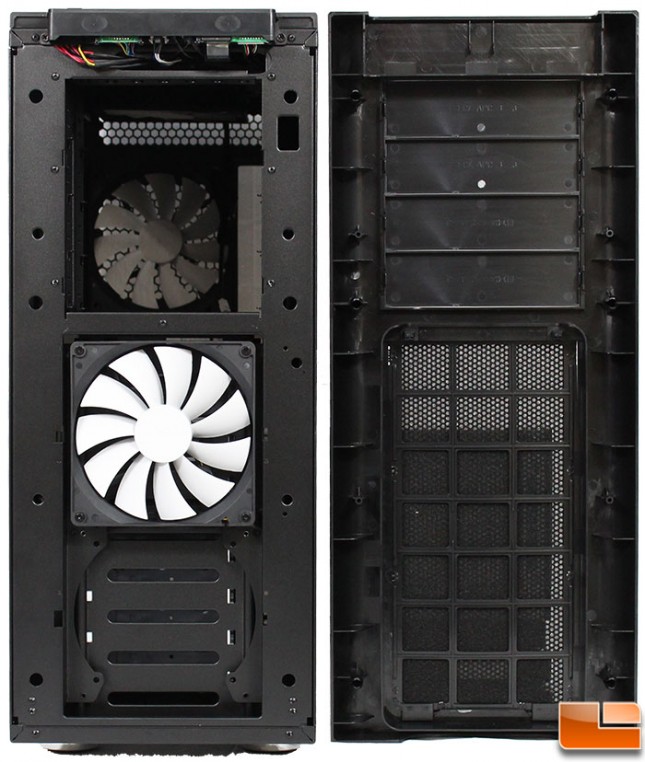
The ARC XL has a large area for a motherboard, as it will support up to E-ATX and XL-ATX boards. The interior is painted black to match the exterior with the 3.5″ drive trays, expansion ports and fan blades being white to contrast against the black. Seven cable management holes (four large, and three small) with rubber guards to keep cables tidy. There is also a large CPU bracket cut-out that should support all CPU positions.
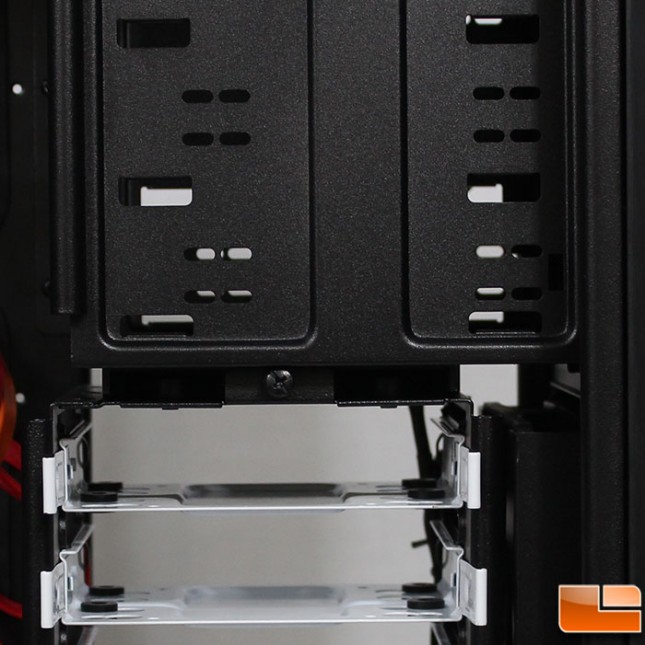
While at first glance the 5.25″ device cage on the ARC XL do not appear to be tool-less, Fractal Design includes thumbscrews for those devices, making it tool-less. The 3.5″ drive cage, uses screws as well, however these are not thumbscrews; thumbscrews connect the two 3.5″ drive cages. There are two 3.5″ drive cages that can be removed; with the top one in place a video card up to 13 inches can be installed, however if your card is longer, once the cage is removed a video card up to 18.75 inches can be installed.
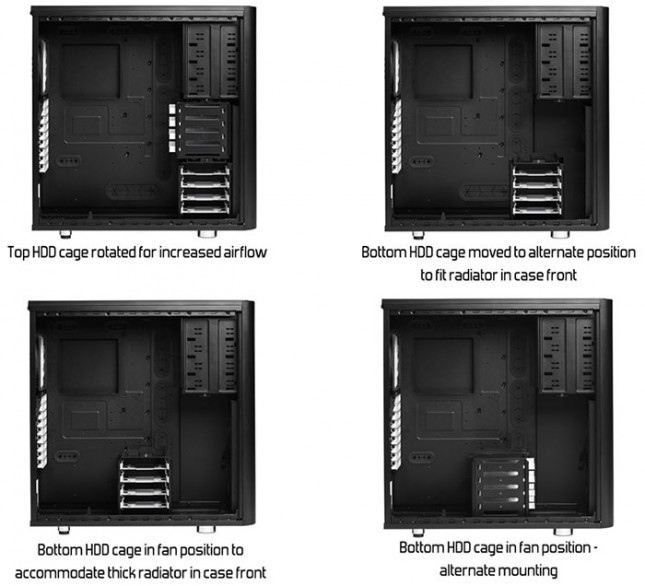
While t he ARC Midi R2 comes with hard drive cages that support 3 drives each, the ARC XL support 4 drives in each cage. For the hard drive cages, that’s where the differences end. The ARC XL continues the tradition of allowing the user to determine the optimal position for the drive cages by making them removable and repositionable. Removing both of the drive cages, still allows use of the hidden SSD trays behind the motherboard and the 5.25″ drive bays. Each of the drive cage positions has a purpose, allowing the use of extremely long enthusiast grade video cards, better airflow, or using various size of liquid cooling radiators. With the drive cages moved 240mm radiator could be installed in the front of the case.
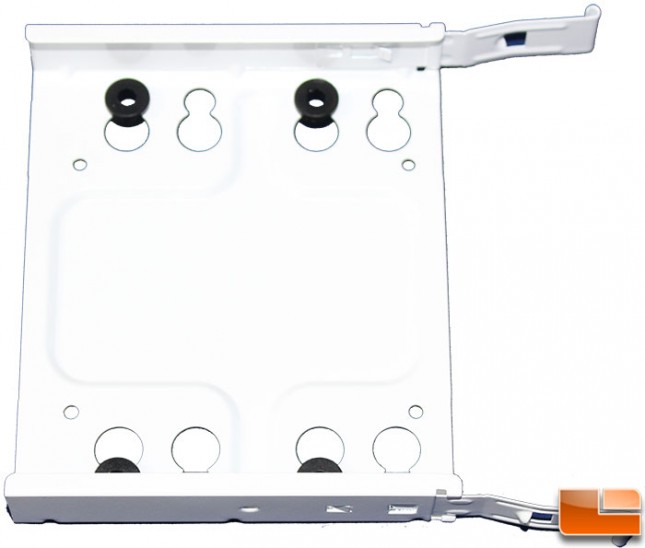
The drive trays are metal with rubber anti-vibration grommets. 3.5″ hard drives are secured to the tray with screws through the grommets, while the 2.5″ drives are secured using different screws. Once the drives are secured, the tray slides into place and securely locks into place using clips.
The bottom area, for the power supply, will support up to 345mm (13.5inches). If a 120mm or 140mm fan is installed that space is reduced to 190mm (7.5inches). The power supply is supported by two large rubber feet which will keep it off the bottom of the case to allow for sufficient airflow through the bottom vents. This is one of the locations that a 120mm liquid cooling radiator could be installed.
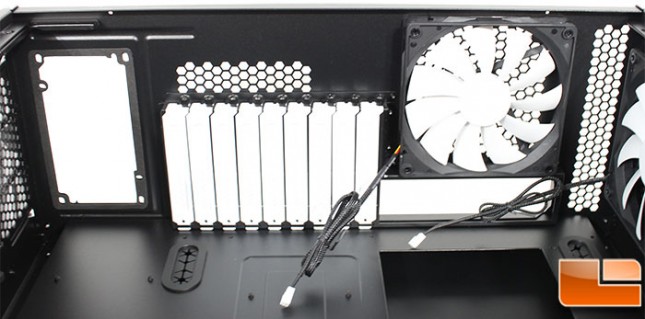
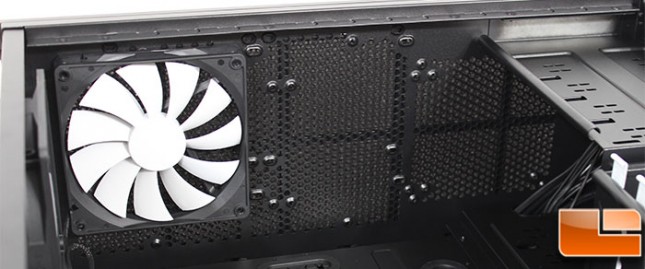
The back panel is pretty normal, with nine expansion ports, a 140mm case fan, motherboard I/O plate, and plenty of vents. Each of the expansion port covers are white to contrast against the black case; these are held in place by a thumbscrew. The fan can be replaced by a smaller 120mm fan or even a 120mm or 140mm liquid cooler. The power supply location has an integrated gasket to help keep the vibrations to a minimum.
The top view provides another look at the top fan or liquid cooling locations. Here either three 120mm or two 140mm fan can be installed, or for those going the liquid cooling route, a 240mm long thick radiator or up to a 360mm slim radiator could be installed.
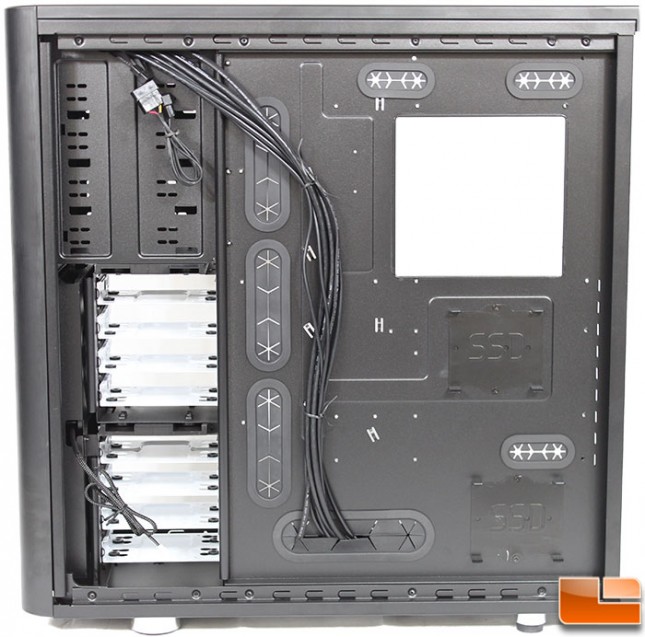
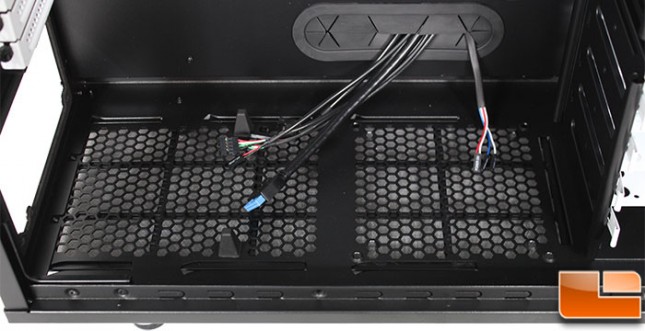
On the back of the motherboard tray there are seven locations to secure the cables with the included cable ties. Two hidden SSD locations are found here as well, one is right below the motherboard CPU support bracket cut-out and the other would be located right behind the power supply. There is 26mm (1inch) of cable routing space, using a straight SATA connection cable will be necessary as there is not much room for the right angle connections.
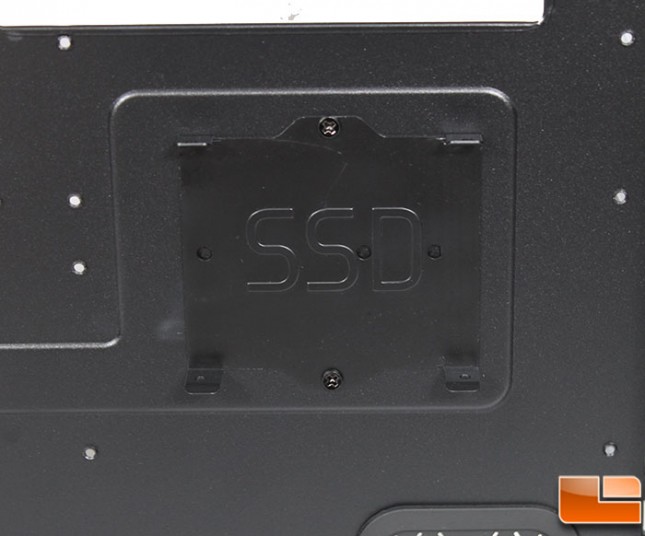
The SSD installation on the little brother, ARC Midi R2, was an annoyance. To install a SSD, the screws were put through the motherboard tray; which is fine when installing the drives before the motherboard. However if they needed to be changed, it would be a headache. The ARC XL changes that by using two trays for the 2.5″ drives. This is a much better implementation of the SSD installation.
A quick pull from the bottom of the front bezel, and it comes right off. The 5.25″ drive bays do not have any additional covers that need to be removed so the bays are ready for installation. On the backside of the bezel, the 5.25″ drive bay covers are held in place by a latch on each side of the cover. The front wire mesh filter has a foam filter on the inside.