Corsair Hydro Series H75 Sealed Water Cooler Review
Installing The H75 CPU Cooler
I always appreciate hardware thats simple to install, so when kits include tool-free options, thats a big plus in my books. The H75 does indeed include a tool-free solution for mounting the pump, but lets take a look and see if it functions well when installing this kit.
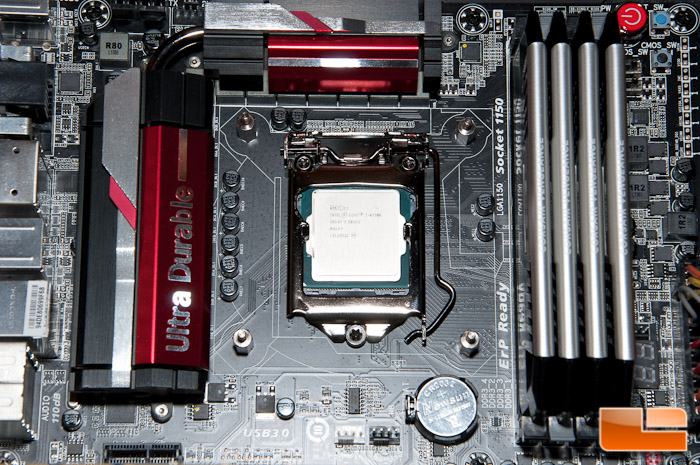
Prior to working with the H75, I cleaned up the old paste from my CPU. I recommend keeping the cover on the H75s block so you dont accidentally scrape off the pre-applied thermal compound, let alone so you dont accidentally knock off a capacitor or something else on your board, since the protector acts like a little bumper.
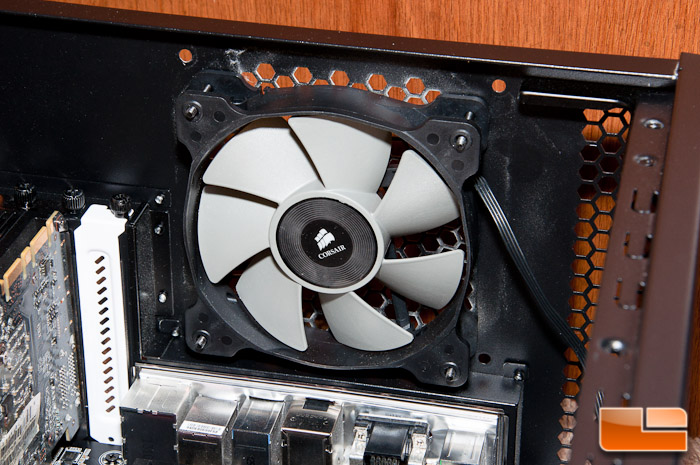
The case that Im using for this is a Fractal Design Define XL R2 case, which is plenty big enough for this radiator. I started off by removing my rear 140mm exhaust fan and then simply setting the new 120mm exhaust fan in place with the included screws. By doing this, it will make your life easier trying to get things to line up.
Next, I mounted the backing plate and then screwed in the standoffs. These standoffs dont require any tools and can be screwed in with your fingers with ease.
Jumping back to the radiator, I mounted that to the rear of my case, screwing in a couple screws by hand to hold it in place, and then tighten them down with a screw driver.
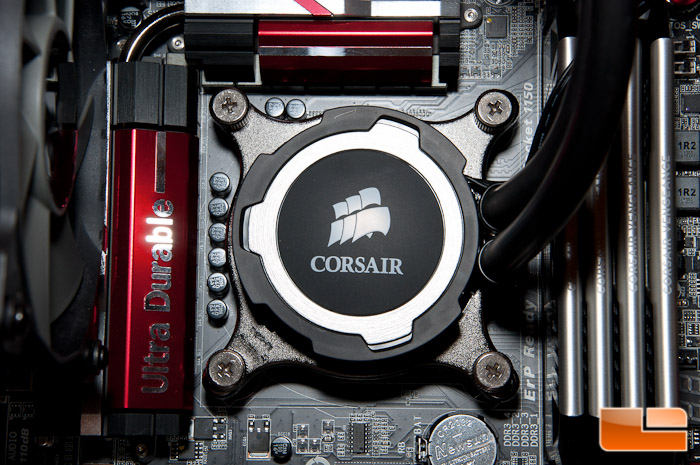
Back at the block end, you can now remove the protective cover and position it over the CPU. Dont worry about the holes on the bracket looking way too big, as the thumb screws will fill in this gap completely.
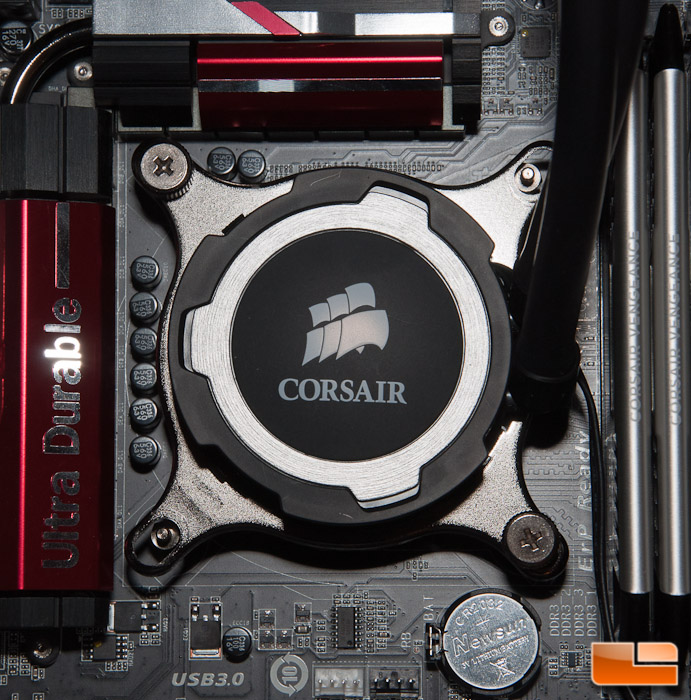
Twisting on the thumb screws comes next and was relatively easy, but I found it much easier to use a screw driver for a couple of them due to the tight space. Do a crisscross pattern to put even pressure across the CPU and tighten so theyre snug.
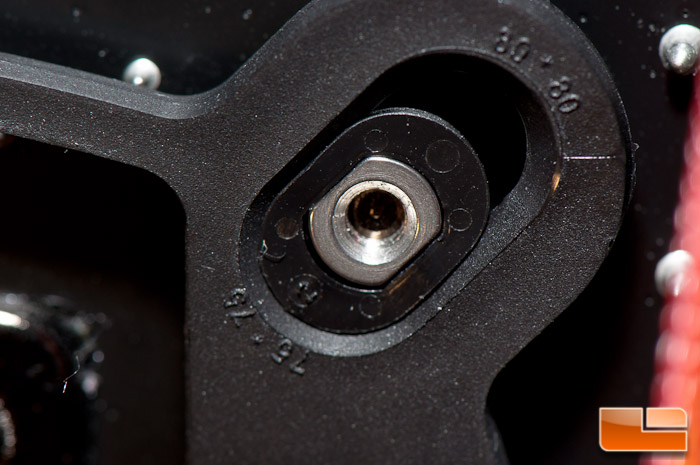
I ran into an issue when screwing down the thumb screws, in that they just kept on spinning, spinning, and spinning. These screws should just stop at one point, so I looked at the rear bracket to see what was going on. I found out that the metal pin on this plastic bracket was spinning, in which it should not. I tried to push everything back into place, but the metal pin was wrecking the plastic bracket as it spun. This is a major design flaw.

For your reference, this is how the pin is supposed to be sitting.
I was honestly slightly hesitant to continue on, but when I did end up firing up my machine, temperatures were just fine, meaning it seated properly. Well get into all of the temperatures coming up.
The last step is to hook up the two fans directly to your motherboard and the 3-pin PWM connector for the pump.
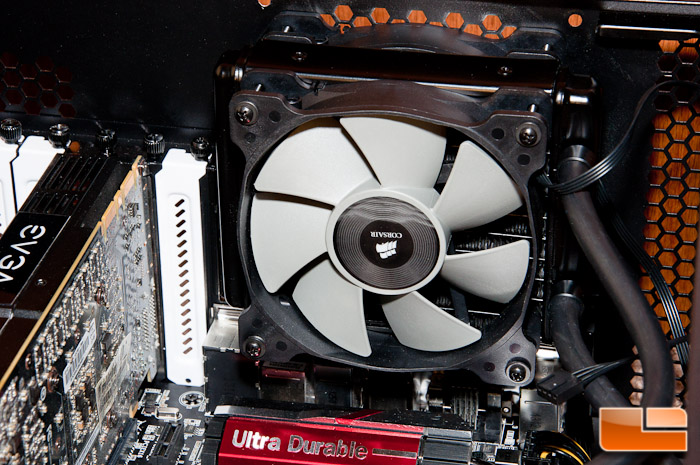
Heres what it looks like all installed.
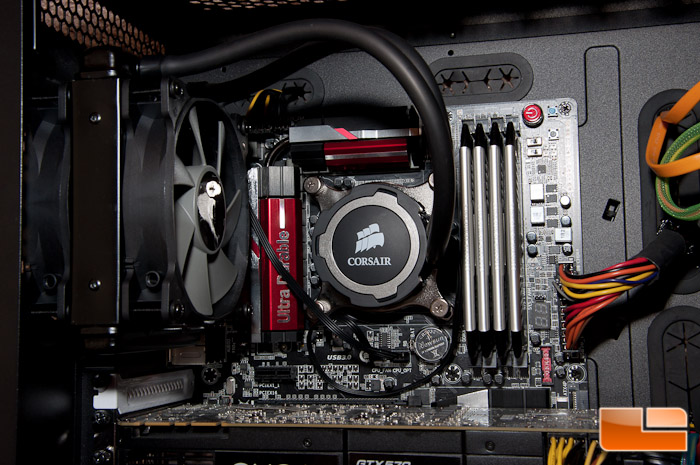
Because the fans are controlled by the BIOS and not a special piece of software like the H100i uses, these fans will be pretty quiet if you leave your settings alone. I am leaving my fan settings on stock settings, and after firing up the system, they were not overly loud, rather they were pretty quiet. There felt like a nice amount of airflow passing through, too.
This wraps up the installation section. I only had an issue with the water blocks thumb screws not stopping due to a back plate design flaw, but in my upcoming section well take a look at some temperatures and how well this kit performs. Before we do that, lets take a quick look at the hardware being used in this test.