VisionTek 120GB USB 3.0 Pocket SSD Drive Review
Using WinToUSB To Boot Windows 8.1 and Windows 10
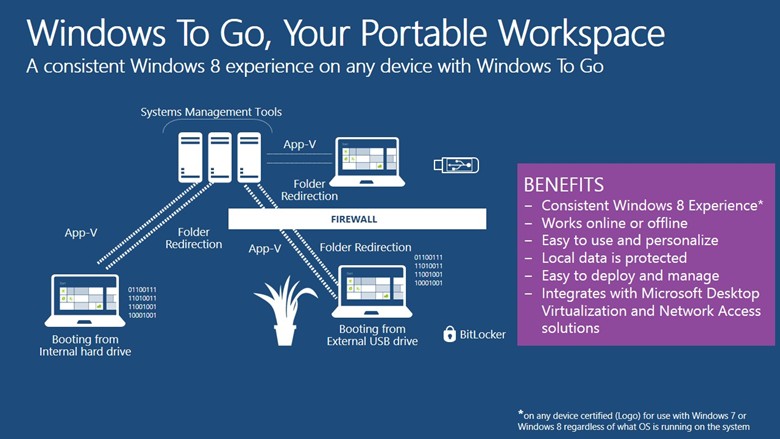
With a USB drive as fast as the VisionTek USB Pocket SSD you might want to use it as a bootable drive to run Windows or Linux on. VisionTek gives instructions on how to use their drive as a Microsoft Windows To Go device, so we figured we’d give it a shot. Here are the instructions from VisionTek:
Before beginning any type of system update or upgrade, you should always BACK UP YOUR DATA as there exists the potential for data loss. VisionTek assumes no responsibility for your data and provides these configuration and/or usage recommendations only as a suggestion.
- Obtain a legal copy of Microsoft Windows 8/8.1 ISO file by following instructions here. NOTE: Do not download the ISO file to the VisionTek USB Pocket SSD, just download the ISO file to the internal drive on your PC.
- Boot your PC, launch a Command prompt, type diskpart, and then press the Enter key.
- Type each of the following and press the Enter key after each line.
DISKPART> list disk
DISKPART> select disk # (Where # is the USB SSD)
DISKPART> clean
DISKPART> create partition primary
DISKPART> select partition 1
DISKPART> active
DISKPART> format fs=NTFS
DISKPART> assign
DISKPART> exit- Download WinToUSB to the VisionTek USB Pocket SSD.
- Load the ISO file onto the VisionTek USB Pocket SSD, select Boot and System drive as the USB SSD partition.
- Restart the computer and, after changing the Boot Device Priority in your BIOS and you can now boot into Windows directly from the VisionTek USB Pocket SSD.
Important Notes When Using The VisionTek USB Pocket SSD As A Bootable Drive
-
Do NOT remove the Pocket SSD while saving data, transferring data, or when the drive is booted into Windows.
-
To remove the Pocket SSD, follow the normal Windows shut-down procedure. Doing otherwise may result in data corruption or loss of data.
-
When used as a Windows boot drive, the Pocket SSD will perform just like a normal Windows environment.
-
The Pocket SSD is usable on multiple computers as a standalone installation, meaning you can move it from machine to machine. HOWEVER, if there is another SSD or HDD installed in the machine, you will have to change the Boot Device Priority setting in the motherboard’s BIOS.
These directions are easy enough to follow so we gave it a shot with Windows 8.1 Enterprise.

We downloaded WinToUSB version 2.0 (2015.1.26) and found that it was extremely easy to use. You just point the utility to the Windows .ISO file that you have on the PC.
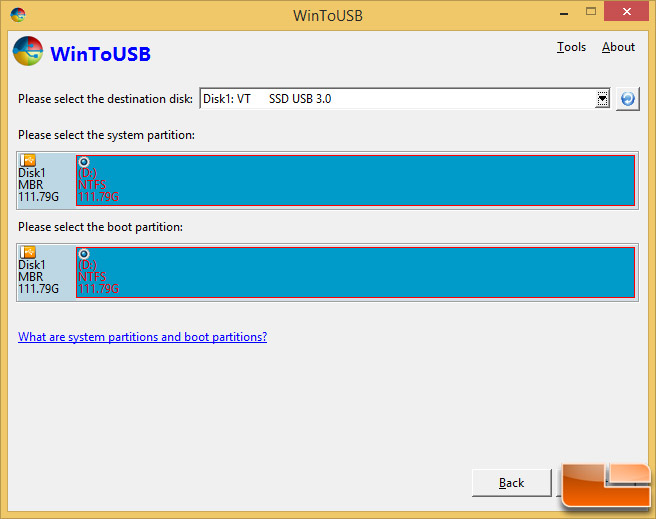
You then select the partitions that you want the system files to be located and what will be the boot partition.
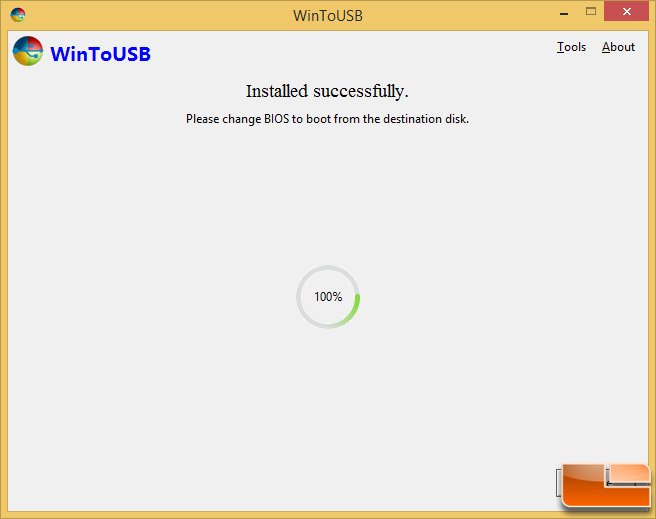
After a a few minutes of waiting for the ISO files to be extracted and set up on the USB drive you are done. You just need to change the boot order in your systems BIOS or simply remove all other drives from the system.
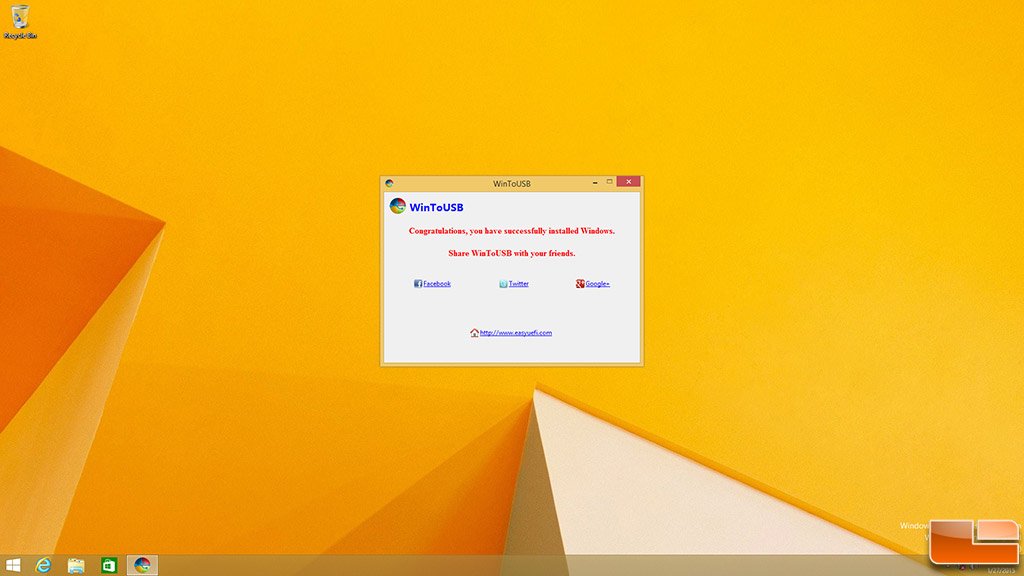
Once you boot up you’ll need to setup Windows 8.1 like normal and when you finally reach the desktop you’ll be welcomed by a WinToUSB prompt that congratulates you on a successful installation. From this point on you’ll need to install all the necessary system drivers and Windows updates. Once that is done you can put on your applications and you are up and running Windows on the VisionTek USB Pocket SSD. It should be noted that the VisionTek USB 3.0 Pocket SSD does not support the TRIM command, so just a heads up there.
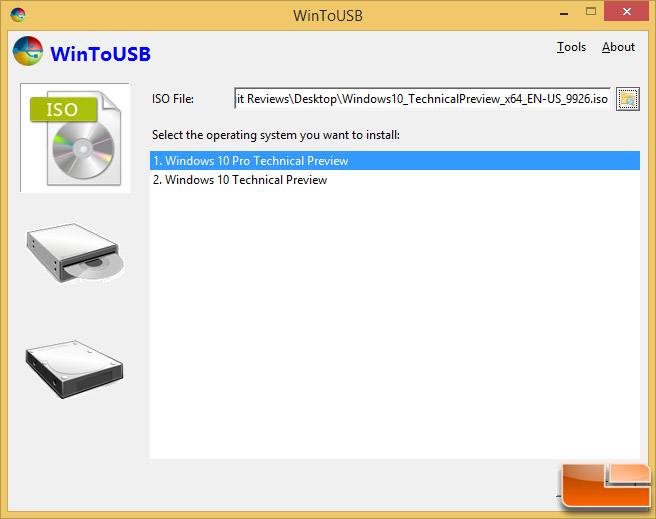
We tried to get Windows 10 Pro to run on the VisionTek USB Pocket SSD, but ran into issues with Windows 10 build 9926 and WinToUSB on our test systems. We looked into it for a couple days and discovered that we are not the only ones having issues. The author of WinToUSB is looking into the issue and will hopefully have a fix soon.
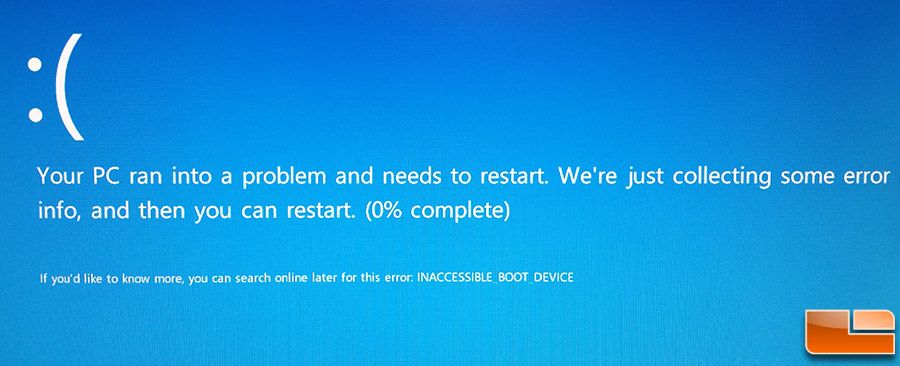
With the latest version of WinToUSB v2.0 along with Windows 10 Pro build 9926 were run we were unable to get the USB 3.0 Flash Drive to successfully load Windows 10. No matter what USB 2.0 or USB 3.0 port we tried we always ended up with an INACCESSIBLE_BOOT_DEVICE error. We also tried USB 3.0 ports controlled by both Intel and ASMedia USB 3.0 controllers with no success. We really wanted to try out the latest build of Windows 10, but we will have to save that for a later time as it appears that there is a USB driver issue that will likely be resolved here shortly.