Thecus N5200BR NAS Server Review with 5 drives in RAID 6
RAID Creation and Usage
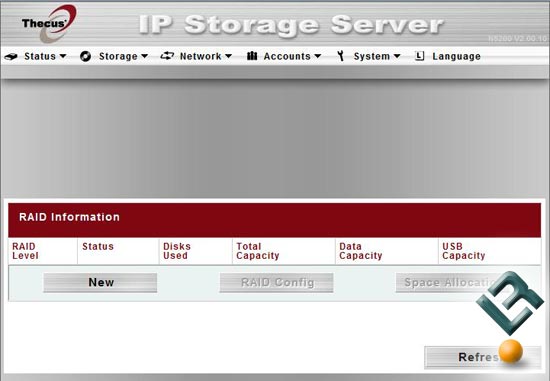
To get the Thecus N5200 online you need to create a new RAID array under the ‘Storage’ tab. The Thecus N5200 supports standard RAID levels 0, 1, 5, 6, 10, and JBOD. You choose a RAID level when you create a system volume. The factors for selecting a RAID level are:
- Your requirements for performance
- Your need for data security
- Number of hard disk drives in the system, capacity of hard disk drives in the system
I personally went with RAID 6, which is essentially an extension of RAID level 5 that allows for additional fault tolerance by using a second independent distributed parity scheme (dual parity). Data is striped on a block level across a set of drives, just like in RAID 5, and a second set of parity is calculated and written across all the drives; RAID 6 provides for an extremely high data fault tolerance and can sustain two simultaneous drive failures.
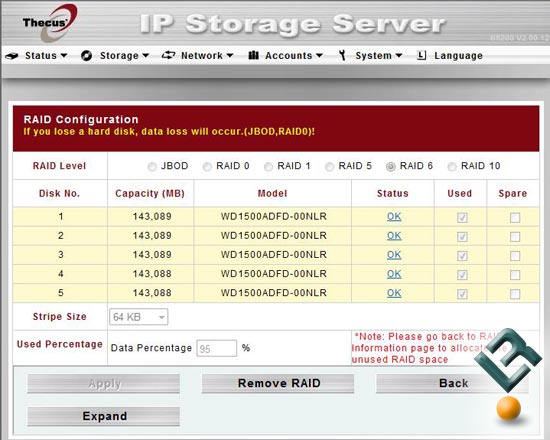
I forgot to take a screen shot of the RAID configuration when I was setting up the system, but it basically looks like this and you can select which drives to use or keep as a spare.
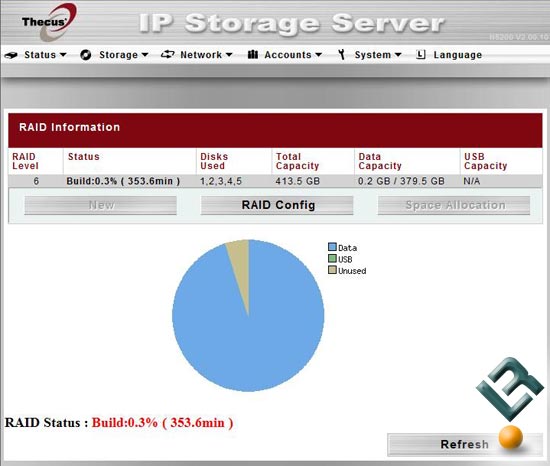
One thing that should be noted is that once a RAID array is being created there is no way to stop it once the wheels are turning. The RAID build itself takes a very long time to complete, which might be a sign that the ULV Celeron processor that is being used could use some more horse power. To build our 5 disk RAID 6 array it took roughly 360 minutes, which is 6 hours for those that are trying to convert that in your head. I went to sleep when it was building the array, so I’m not sure how accurate the built in timer was.
The Thecus N5200 has a ton of features so be sure to check out the entire 90 page user’s manual if you want to see what you are getting into when purchasing one of these NAS servers. Setup will vary depending on how many drives you have and how you will be using it on the network. Setup wasn’t too bad and the documentation was pretty good compared to some of the user’s manuals that I have seen.
Comments are closed.