OCZ Vendetta CPU Cooler Review
Installing the cooler
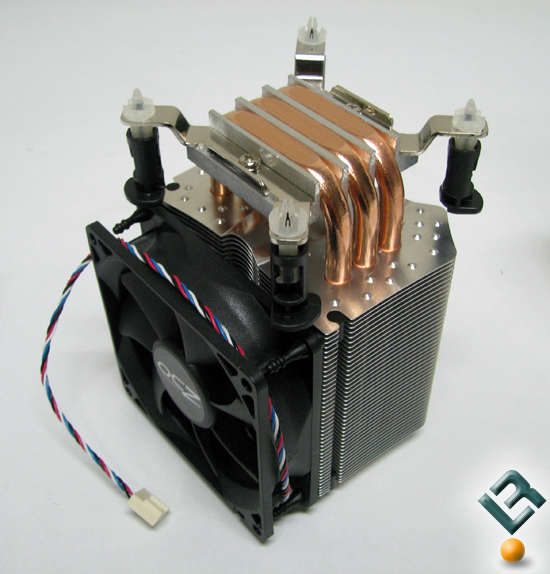
If you are setting up for an Intel 775 socket installation, you’ll have to attach the retention brackets to the base; these are held on with two screws, one each side. Then all you have to do is put it on like you would the stock cooler. This is a big plus for those who get that bad taste in their mouth every time they think about having to completely tear down a system to install a cooler. Let’s move on to installing the Vendetta.
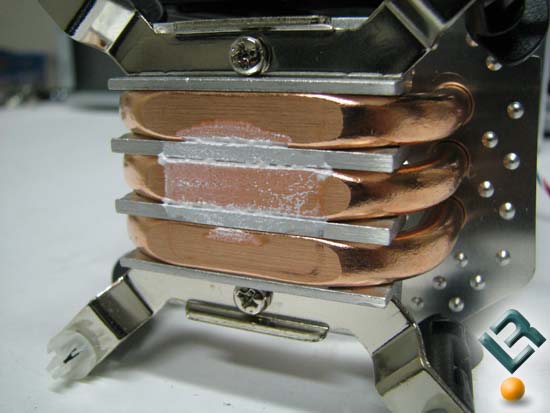
This is where I started looking at the base and wondered how the thermal paste was going to spread; I wasnt getting my hopes up due to how the pipes are held in place. The cracks would stop the paste from flowing evenly. I first put the paste on per Arcticsilvers instructions, installed the cooler and power cycled the machine. I then removed the cooler and the above was the result. No big surprise, but its obvious that the normal way of putting the paste on wasnt going to cut it.
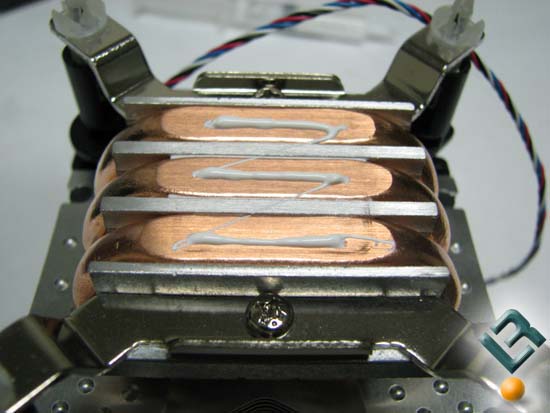
So, I cleaned everything up and put the paste straight to each heat pipe. Reinstalled the cooler and power cycled the machine once again.
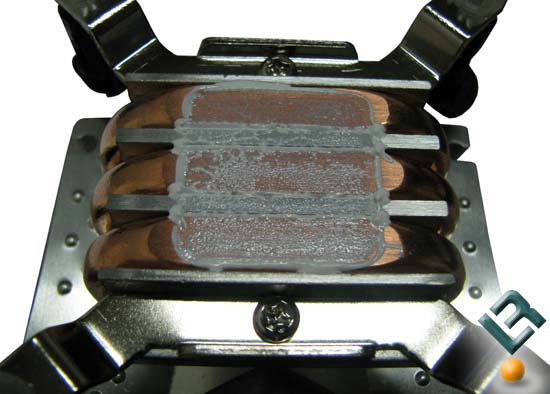
Removed the cooler to inspect how the paste spread. I was happy this time, cleaned it all up and reinstalled everything.
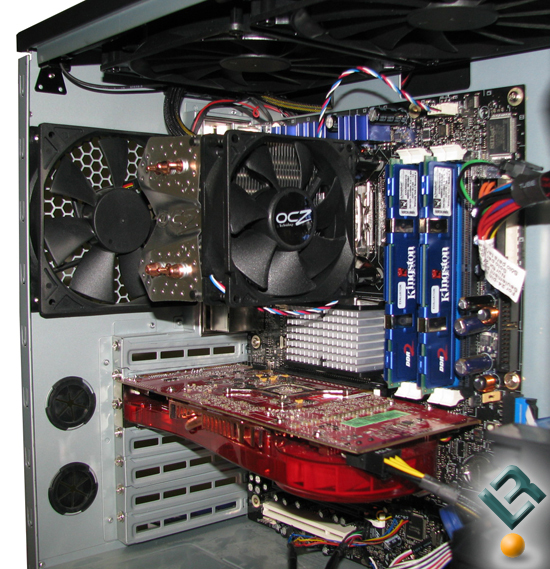
Once installed into the Antec P190 ATX Case, I found that it was impossible to use the 200mm side fan. It was just shy of being able to close, but it had to be removed from the side panel. I was really hoping that it would fit seeing how its almost an inch shorter than the ZEROtherm NV120, but alas no go, so off come the side fan for testing.
Comments are closed.