NZXT Switch 810 White Case Review
By
Installing in the NZXT Switch 810
Now that we have explored the case inside and out it comes time to build a rig inside this big full tower case.
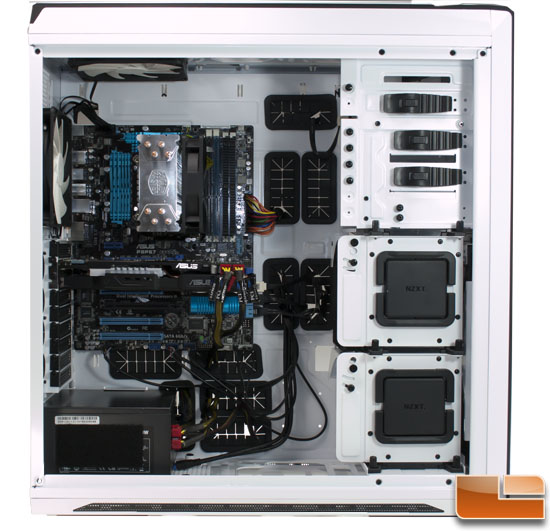
Like most full tower cases the NZXT Switch 810 provided plenty of space to mount our common hardware build out but they were very thoughtful in how they positioned the standoffs to mount the motherboard. All the grommet holes made cable routing options easy that ATX power extension came in handy.
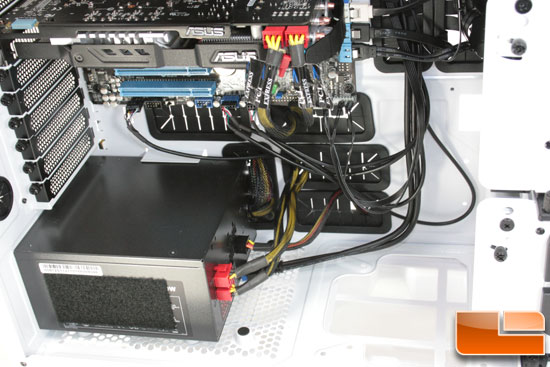
The grommet furthest back down in the PSU area would be covered by a 1000 watt or larger PSU it was plenty handy for our 700watt OCZ model with just enough room to get that fat 24 pin routed. If we were trying to make things a bit nicer we would have been more careful with the USB, HD Audio, and I/O lines.
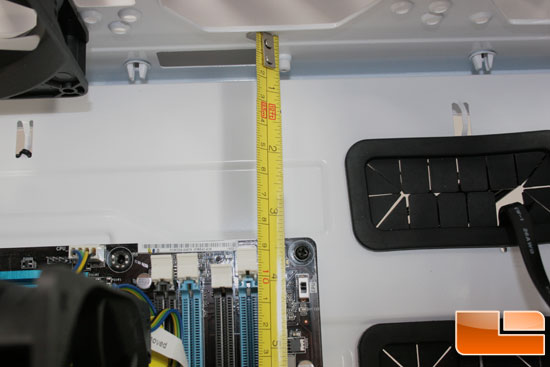
For those of you thinking about water cooling NZXT claims 90mm of space above the motherboard but we measured 85mm before the actual edge and 90mm to the screws. Still 85mm is plenty for a 60mm thick radiator like the XSPC RX360 and 25mm thick 120mm fans as an example of massive 360mm radiator. With the 30mm in the space above you can do push / pull on a very thick radiator in this case with no problem.
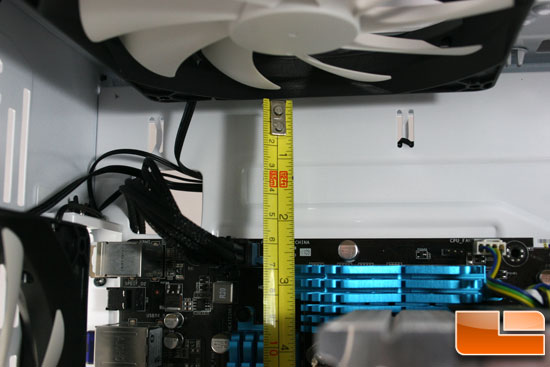
This image just shows 60mm to installed 140mm fan that is 25mm thick. Tons of room above the motherboard unlike some full tower cases that slide the motherboard all the way to the top of the case.
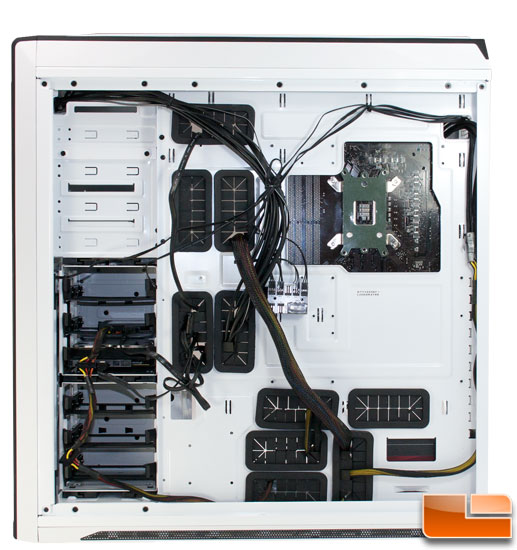
Going around back the cables have plenty of room to be routed and even with us only spending a few minutes it already looks fairly clean back here.
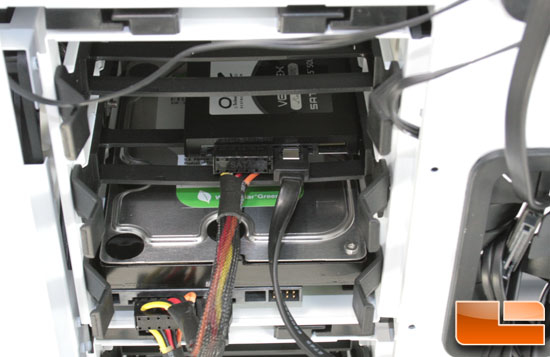
With all this goodness everything wasn’t clean and simple when it came to mounting our SSD in one of the HDD cages. The trays have the SSD holes at the back which means that cross bar cuts right in the way of cables and prevents you from using 90 degree SATA cables. Our SATA power cable was bowing that cross brace and we fear this might make it slip out over time. We would recommend using a different area to mount your SSD than one of these trays, or mount it with Velcro or something other than the holes in the tray.
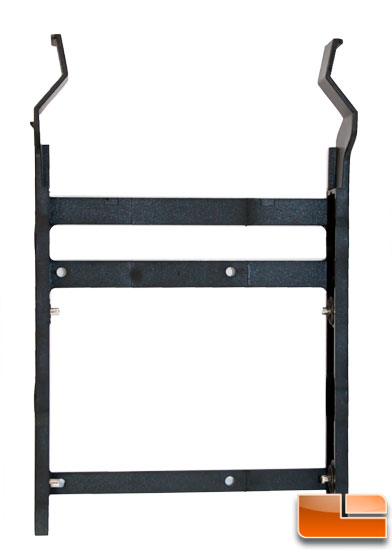
That top bar is the one that interferes with the plugs on the SSD. We considered rotating the SSD 180 degrees but the cage is solid in the back so you cannot run cables out that way.

Comments are closed.