NZXT H440 Mid-Tower Case Review – 5.25-inch Drive Bays Are Gone!
Hardware Installation Inside The NZXT H440
Mid-tower cases always scare me, especially when it comes to enthusiast grade cases. The H440 has a fairly unique design inside and looks to have a pretty decent layout, so lets see if installing hardware is as easy as it looks.
Starting off with the clean slate, this is what youve got:
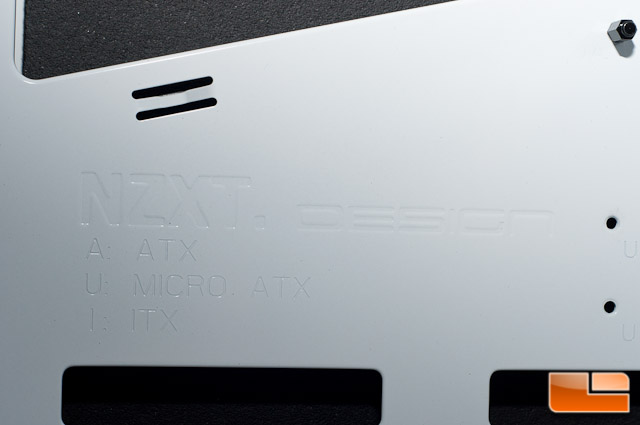
Im using an ATX sized motherboard, but you can use a Micro ATX or ITX board inside this case. Those of you with longer or larger boards are left out as there isnt nearly enough room for a board of that size here. All of the standoffs were pre-installed by NZXT, so that leaves out a somewhat tedious step. There is even a guide pin in the middle, which I always appreciate.
Next up I dropped in my video card. I am indeed using an old video card for this build, but this card actually measures the same many high end cards that you find on the market today, coming in at 267mm. For reference, cards like the GTX Titan, 780, and 770 all measure in at 267mm long, while AMDs R9 280X and 290X both measure in at 275mm. Of course if you go with a card with extreme cooling on it, itll be longer than chances are youll have to remove a drive bay or two.
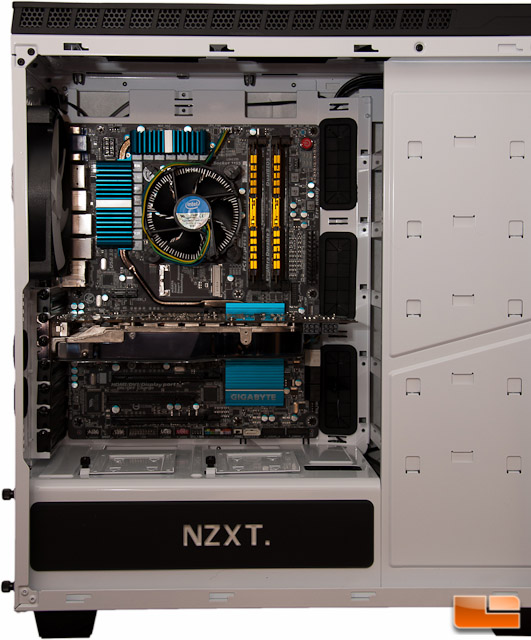
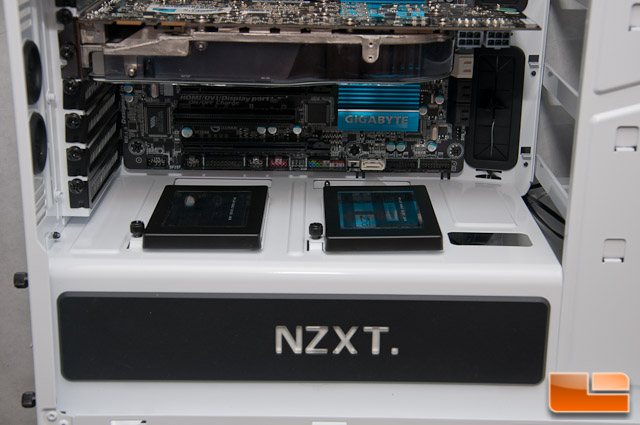
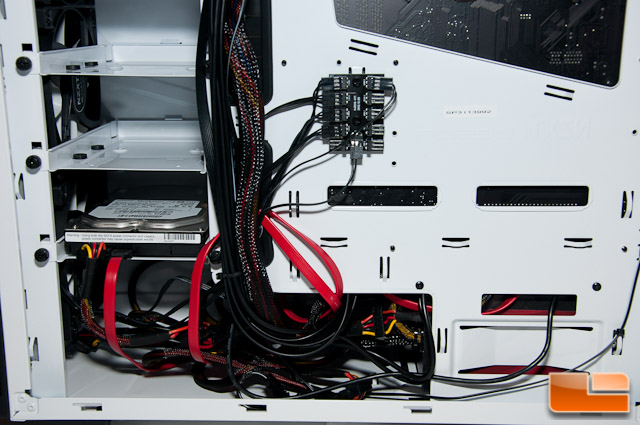
I did install my SSDs right away, but eventually found that I should have waited before screwing them down. I had to finagle with the SATA power and SATA data cable with the SSD not fixed to the case. To get the power how I wanted to the left SSD, I slid my PSU out a few inches to give me room, otherwise I would have had to route the wire on the rear and thats not what I wanted to do. In all honesty, this was a serious headache trying to get the wires to work perfectly. I would have liked to see these trays be hot swap bays, leaving all of the hard work out for the end user and probably paying a couple bucks more. In the end, though, I think it looks extremely slick!
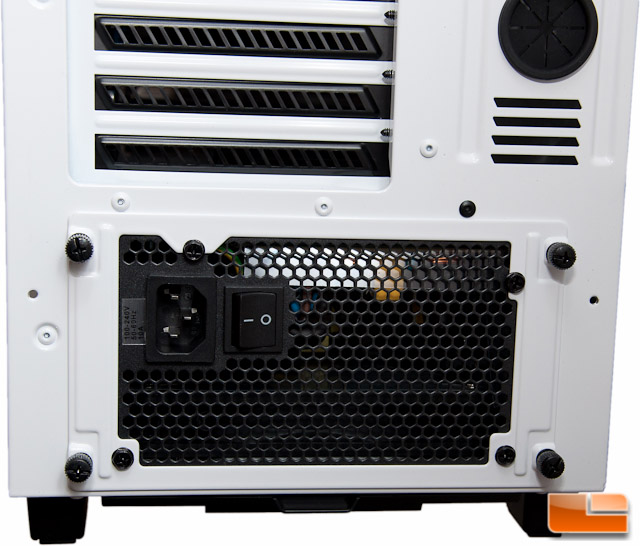
Dropping in your PSU is pretty easy, but I would strongly recommend attaching all cables before sliding it in, assuming youre modular. The space under the shroud is pretty tight, and it gets worse when you have cables on your PSU. Simply attach the bracket on your PSU, slide it in place, and fix it to the case with the thumb screws. There is one Molex power connector hiding in the back, which is for the LED light system in the case.
Wire routing behind the motherboard tray actually wasnt too bad, but I would have liked to see a little more room.
Looking closer at my rats nest of wires, this shows you how sloppy you can get with this extra space down here. Obviously youre going to have to be careful with your wires and the front case fans, but youve got a ton of room to work with down here that you should be able to keep them away.
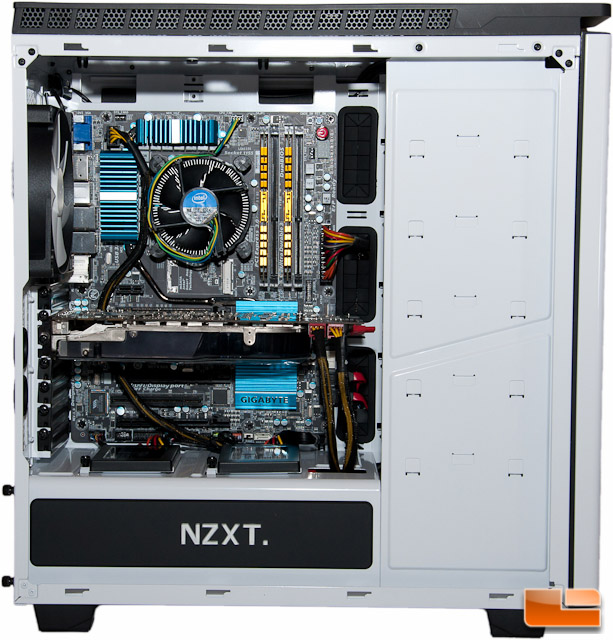
Looking at the front side, just notice how clean looking everything is. This is one of the cleanest setups that Ive built; even with my nasty 8-pin motherboard power wire being routed in the front and not the rear (the wire is a bit short on this power supply).
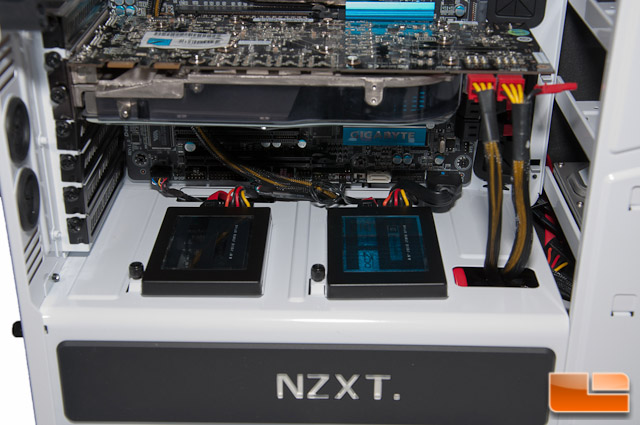
One big thing to note, is if youre looking to use the SSD trays and any ports on the bottom of your ATX motherboard, be prepared to fight a little since its quite cramped with the SSDs in place.
I fired everything up and I honestly could barely hear the stock fans. The sound deadening material appears to be doing its job quite well.
I didnt catch that there were LEDs mounted above the rear I/O panel to help you find ports in poor lighting situations until I started the system, and I actually quite like this.
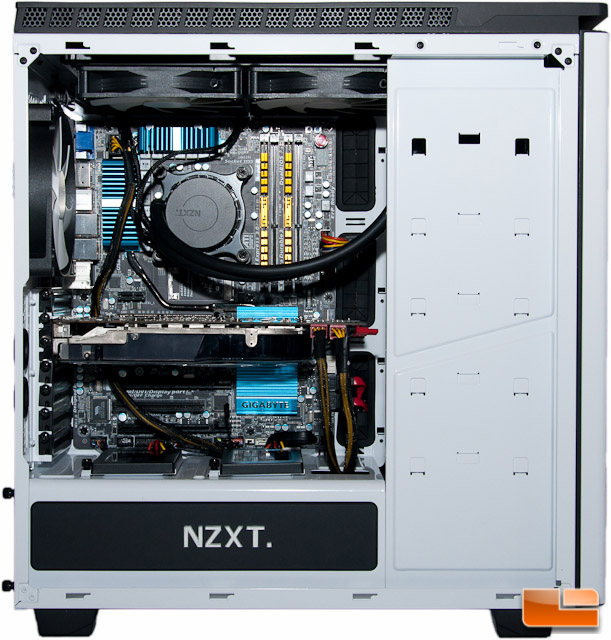
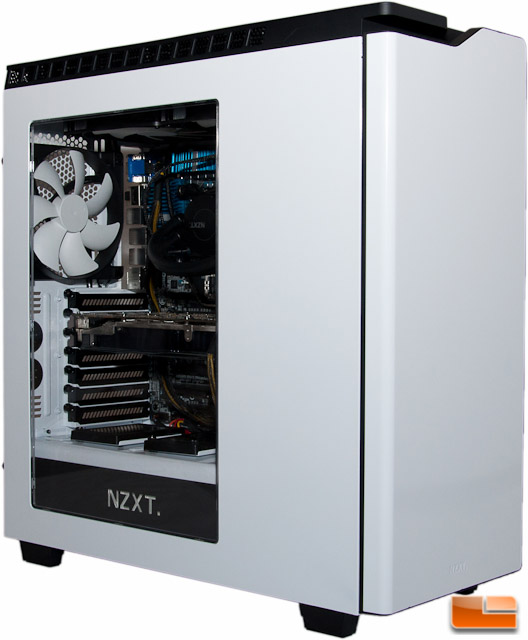
Heres a money shot of the whole system assembled with the side panels on.
I attempted to install my Thermo Chill PA120.3 radiator both up top and on the front, but unfortunately found that this radiator did not fit; its just simply too big! This radiator is 60mm thick, so its a monster. I tried my best, but this case is just far too tight to accept it. Even if you managed to get it in place on the top mount, you would have no room for fans. I simply couldnt squeeze it in on the front, but it would have been pretty cramped if I could get it to fit.
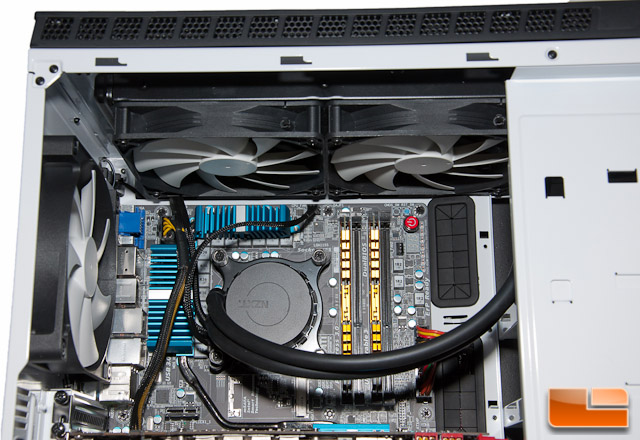
However, I did get a chance to mount my NZXT Kraken x60 radiator up top and found this to be relatively easy. This case is pretty tight, being mid-tower and all, but I got it to work with only a little effort. I had to remove the top most 3.5 tray with the way I mounted it and that made things much easier. I opted to install the tubing over on that side, which is why I was forced to do such. I would have to say the Kraken x60 compliments this case quite well, so if youre looking for one with this case, it can be had on Amazon for $119.99 shipped.
With the Kraken x60 in place, there is very little room between the radiator/fan combo and the motherboard, so dont expect to install a radiator thats thicker than this 27mm thick Kraken x60 with 15mm thick fans.
Overall installing hardware inside the NZXT H440 was pleasant, though I did have some troubles with the bottom SSD trays and the surrounding connectors on my motherboard. Some might be wondering why we ran the 8-pin power connector for the motherboard over the top of the board. The reason for that is because the cable is too short on our power supply is too short to be routed through the motherboard tray, up the back and then back out and around. If your PSU’s cables are too short you can pick up a cable extender and better hide your cables.
Lets wrap this review up and catch my final thoughts.