NVIDIA nForce 7 Series Arrives – ASUS M3N-HT Deluxe Motherboard
ASUS M3N-HT Bundle and BIOS
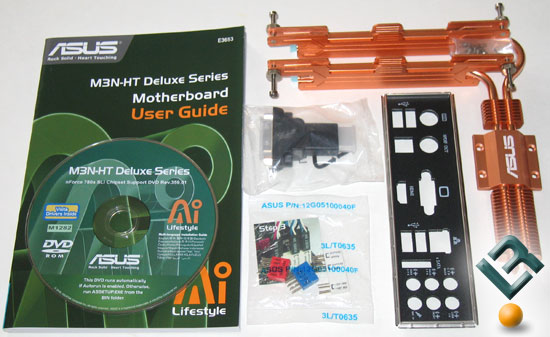
The bundle that the ASUS M3N-HT Deluxe comes with is pretty stout. Asus included a large passive RAM cooler that can be attached to the chipset heatsink for improved memory cooling. The HDMI-to-DVI adapter is going to be needed for those wanting to use a current LCD monitor. The supplied Q-connectors make wiring quick and easy and the I/O shield looks fancy as it’s now black. Also included in this picture is the user manual and driver DVD.
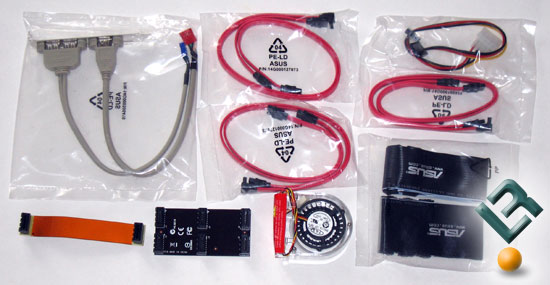
ASUS also includes six SATA cables, a pair of SATA power adapters, IDE cables, a case bracket with additional USB and Firewire ports, SLI and 3-Way SLI bridges. In addition to the HDMI-to-DVI adapter, the M3N-HT Deluxe comes with an optional chipset fan and an optional fan that is needed when water cooling.
The BIOS
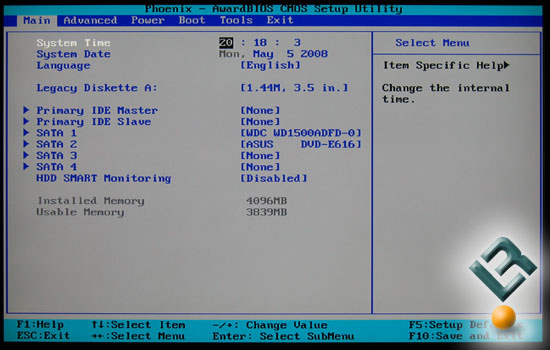
ASUS used a Phoenix AwardBIOS for the M3N-HT motherboard, so it should look familiar when you press delete or click on the BIOS icon at the Express Gate menu. The BIOS version that we used for testing was version 0701, which was the latest and greatest BIOS when testing was done.
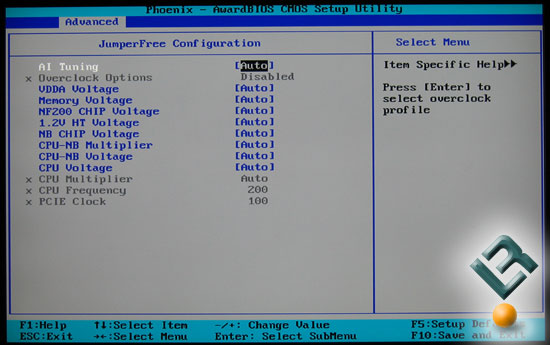
The Advanced menu contains the JumperFree Configuration sub-menu, which is where most enthusiasts will spend their time. By changing the AI Tuning value to manual you can chance the CPU Multiplier and CPU Frequency (Bus Speed) as these are required for overclocking. The DDR2 memory voltage goes all the way up to 2.5V and the CPU Voltage varies depending on what processor you have installed. The Phenom 9850 Quad-Core processor, for example, can go up to 1.55V, while the AMD Athlon 64 X2 4850e can go up to 1.68V.
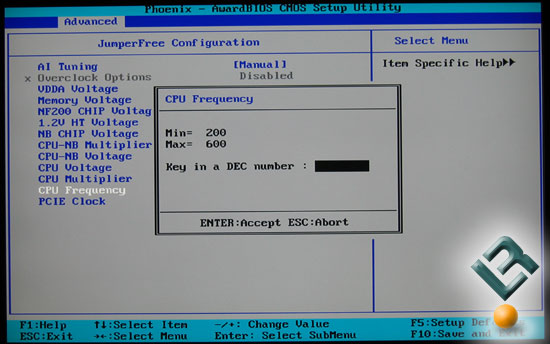
The CPU Frequency can be adjusted from 200MHz to 600MHz, but good luck getting any Phenom much higher than 230MHz!
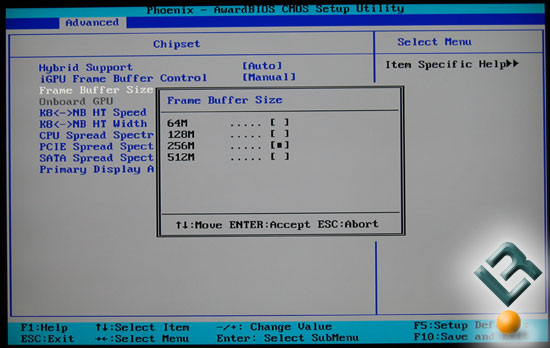
Since the board has integrated graphics (iGPU), many will want to adjust the frame buffer. Default settings are for the frame buffer to be set at 256MB and that is the amount required for HybridPower to work. Hybrid Support settings can also be found under the advanced chipset menu, which will allow you to enable or disable the feature.
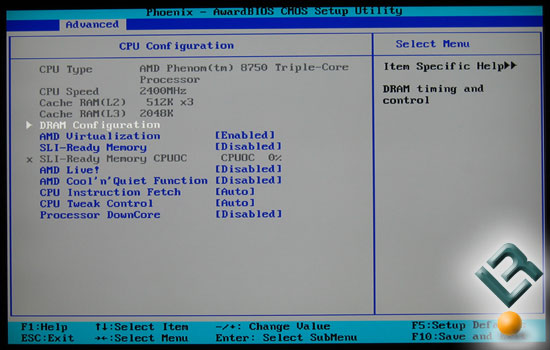
Still in the Advanced menu, under the CPU Configuration menu, one will find where to enter the DRAM Configuration menu and a list of other critical settings. ASUS disabled AMD Cool’n’Quiet, so we enabled it to keep the power consumption testing accurate with previous test systems.
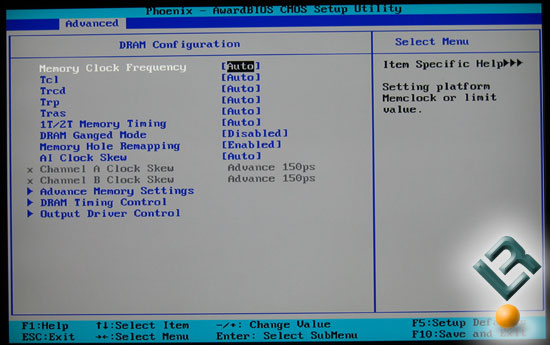
The DRAM Configuration menu is where you will need to go if you have to manually set the memory timings. We set our kit to 4-4-4-12 and forced the frequency to 800MHz.
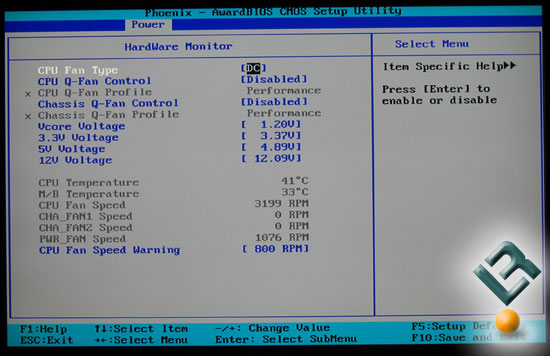
One of the other menus that is worth talking about is the HardWare Monitor sub-menu under Power. This is where you can check fan speeds, temperatures and the rails on your power supply.
The ASUS M3N-HT Deluxe motherboard has a very feature rich BIOS and we tested it on the AMD Athlon 64 X2 4850e, AMD Phenom X3 8750 and the AMD Phenom X4 9850 processors. The dual/triple/quad-core processors that we used on the ASUS M3N-HT all seemed to work well!
Comments are closed.