Gigabyte Brix Pro Review – GB-BXi7-4770R
Inside the Gigabyte Brix Pro
To take the Gigabyte Brix Pro apart you first need to remove the bottom cover that is held on by four Philips screws. Once you remove the bottom plate you can quickly and very easily install a 2.5″ hard drive or SSD of your choice along with the DDR3L memory kit and mSATA SSD. You can use either a 2.5″ notebook drive or mSATA for the boot drive.
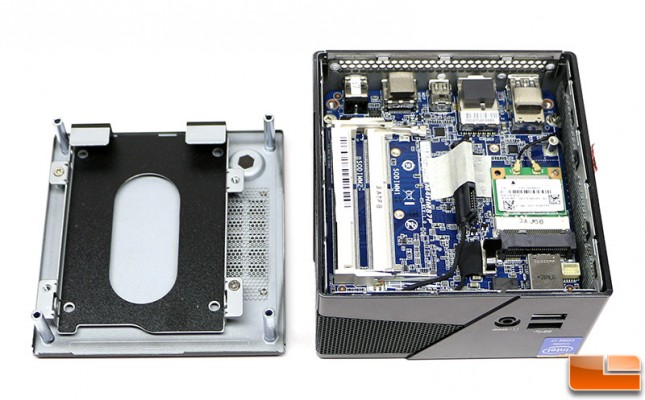
The image above shows how the 2.5″ drive tray is built into the bottom cover of the Brix Pro. Gigabyte includes a custom SATA data and power cable for the 2.5″ drive with the Brix Pro, so no additional cable is needed. We checked and the cable uses the SATA III (6Gbps) interface. What is the maximum z-height drive that you can fit? Gigabyte officially supports 7mm and 9.5mm thick drives.
The Gigabyte Brix Pro comes with just the 802.11ac wireless installed, so all you need to do it pop in the DDR3L (1.35 Low Voltage) memory kit of your choice and storage drive and you should be ready to install the OS of your choice. Since many want to see ‘inside’ the Brix Pro we are going to continue to do a full tear down before we add in the memory and mSATA SSD that we’ll be using.
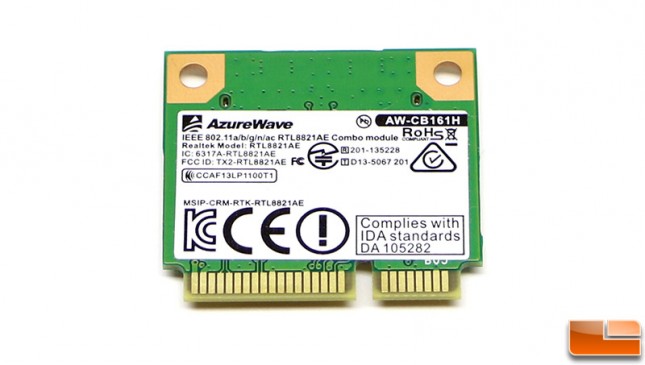
Gigabyte went with an AzureWave AW-CB161H mini PCIe card to handle the 802.11ac WiFi+Bluetooth 4.0 wireless duties. This card also shows that it is Realtek Model RTL8821AE. Gigabyte went heavy with Realtek controllers on the Brix Pro as the Gigabit LAN, audio and wireless are all handled by Realtek.
- Audio: Realtek ALC296
- 802.11ac Wireless: Realtek RTL8821AE
- Gigabit Wired LAN: Realtek TRL8111G
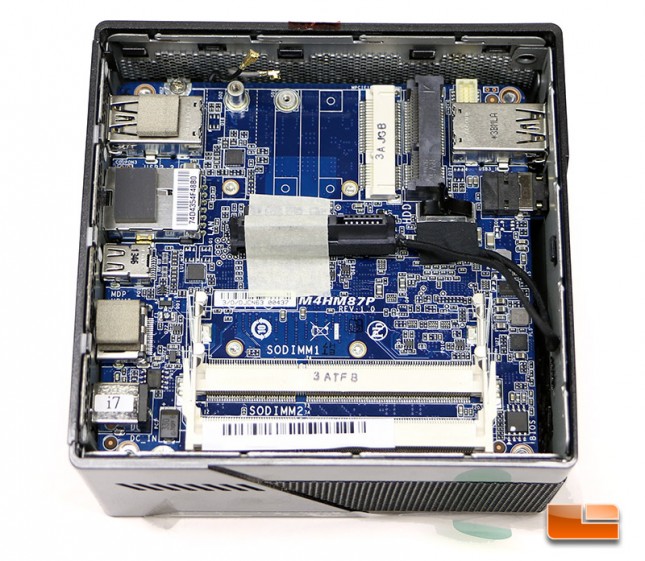
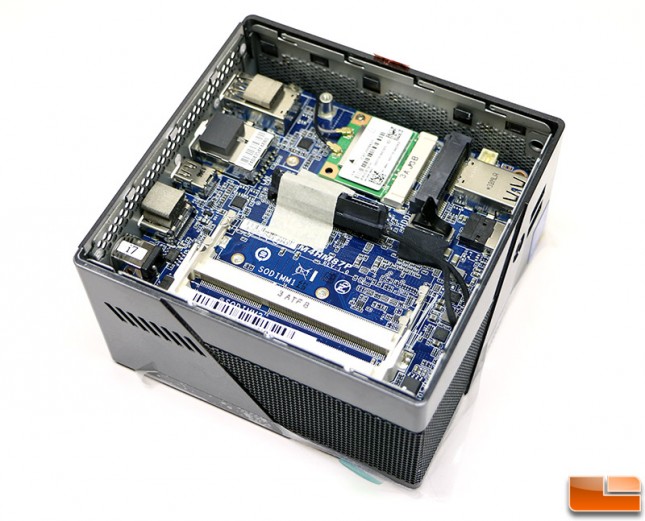
Our Gigabyte Brix Pro uses the Gigabyte M4HM87P revision 1.0 motherboard and the layout and design looks familiar as it is very similar to what Intel has done with their NUC series. Two Philips screws hold the motherboard down, so let’s take those off and remove this board.
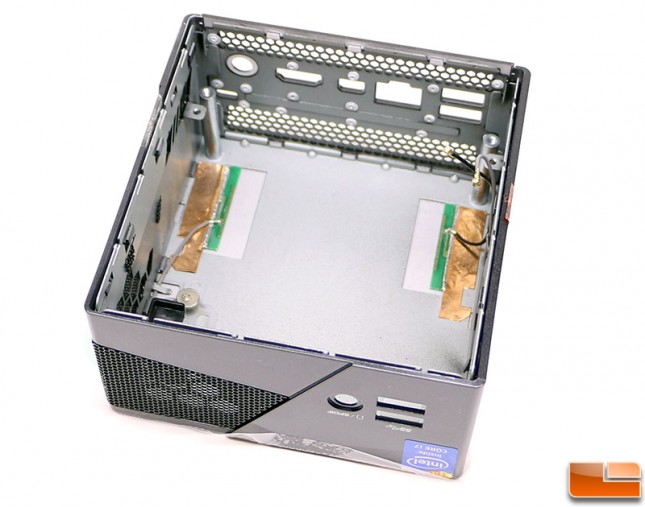
With the Gigabyte M4HM87P motherboard removed from the system we can see how Gigabyte ran the dual antennas in the enclosure. We were half expecting to see three antenna solution inside, but those have yet to take off since companies like Intel don’t offer a three antenna solution just yet. Not much else can be said about the case, so let’s look back at the motherboard.
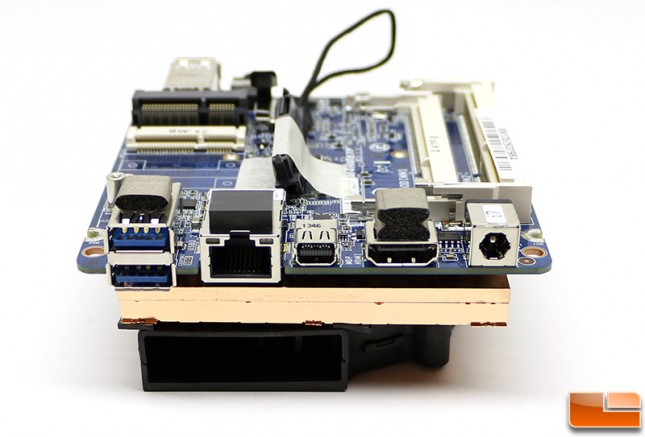
Here is a look at the rear I/O panel of the Gigabyte Brix Pro and under that you can see a thin copper heatsink for the Intel Core i7-4770R processor and then the large exhaust opening from the blower style fan.
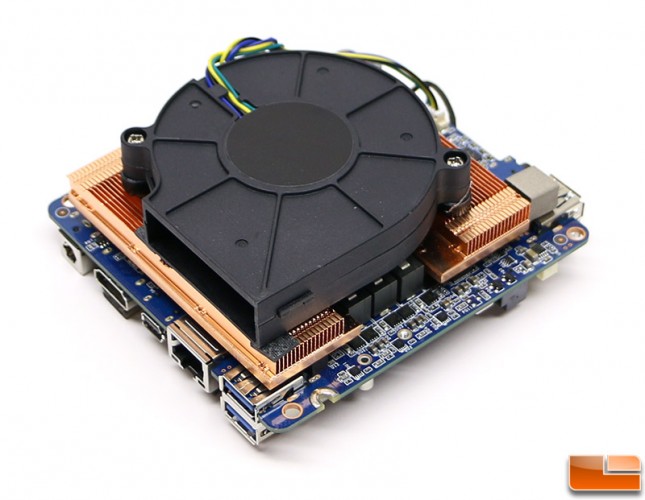
The large blower fan sucks air through the small fins on the cooper heatsink and exhausts the hot air directly out of the case. Having an outside thermal exhaust system is needed for a system like this.
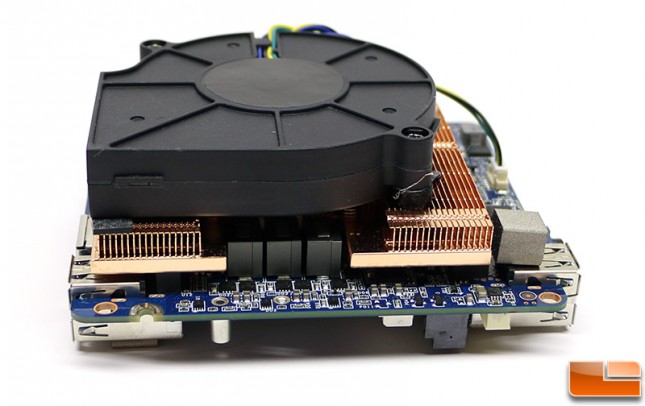
Notice that Gigabyte had to shape the heatsink around the three phase power solution on the motherboard in order to maximize the heatink surface area in order to dissipate as much heat as possible.
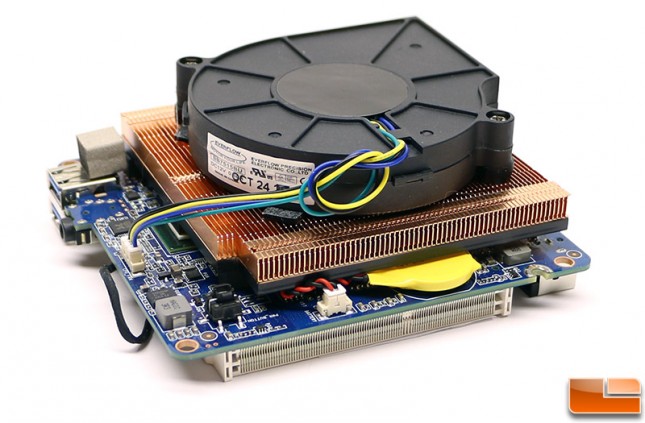
Spinning the motherboard around to the other side you can see just how many cooling fins there are. The last four rows on the left side end short to leave enough clearance for the power button of the chassis to work. The system battery is tucked tightly between the PCB and heatsink as you can see above. Gigabyte went with the EverFlow BB7515BU DC12V 0.80A fan on the Brix Pro. This 75x75x15mm centrifugal blower fan is often referred to as a turbo fan and is common in servers. We couldn’t find any CFM ratings, but this fan pushes major air and is pretty loud.
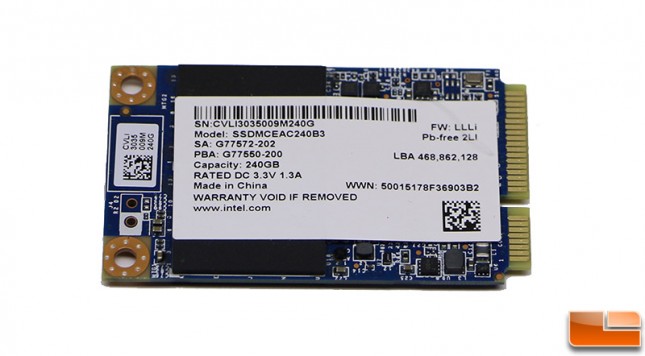
We went with the Intel 525 Series 240GB ‘Lincoln Crest’ mSATA SSD. The part number on this SATA III SSD is SSDMCEAC240B3 and it can be picked up for $264.99 plus shipping. This drive is rated to have up to 550MB/s sequential read and 520MB/s write speeds along with up to 50,000 IOPS when it comes to 4K Random Read and 80,000 IOPS on 4K Random Write operations. It is also backed by a 5-year warranty.
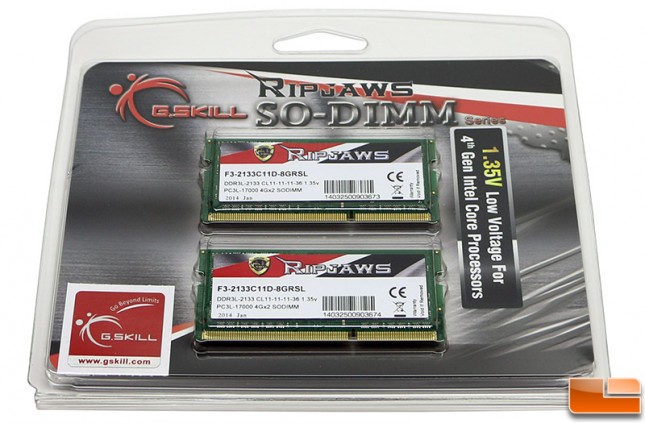
The fastest memory that the Gigabyte Brix Pro supports is 2133MHz and we wanted to have the best performance possible. We went with a G.SKILL RIPJAWS 8GB DDR3L 2133MHz CL11 SO-DIMM memory kit. This kit is sold under part number F3-2133C11D-8GRSL with a lifetime warranty for $89.99 shipped. This price makes it the lowest cost 8GB (2x4GB) 2133MHz DDR3L memory option on the market right now.
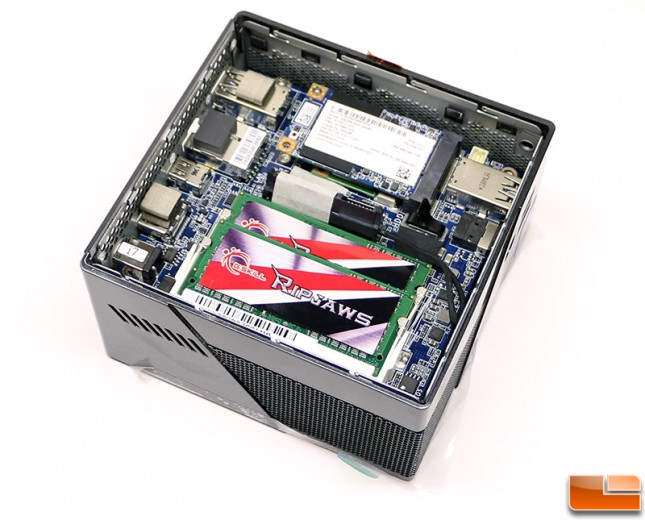
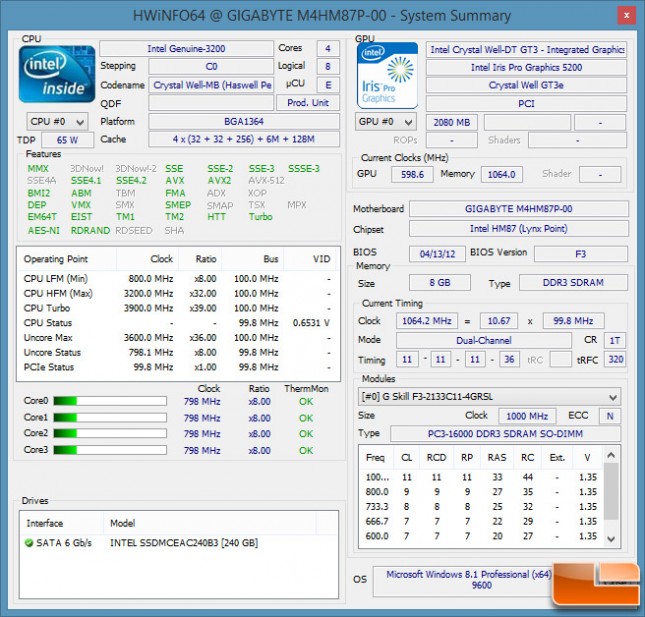
Here is a quick look inside the Gigabyte Brix Pro with all our hardware installed. The build turned out great and should take just a few minutes if you just need to install the memory modules and mSATA SSD. Assembling one of these systems is very easy. We installed Windows 8.1 Pro 64-bit and here is a quick look at HWiNFO64: