ABIT AV8 Motherboard
The BIOS
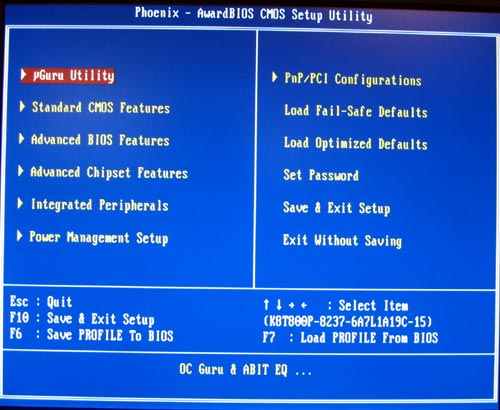
The ABIT bios has always been a personal favorite of mine. They are easy to navigate and usually give you all that you could want and need. We will highlight a few sections of interest in the bios.
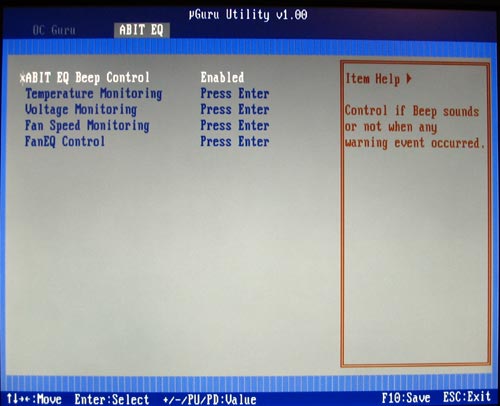
The most interesting part of the bios is certainly the uGuru page. This gives you a wealth of info and the ability to have full control over the setting of your cpu and other important aspects. When you come into this page, it is actually divided into two parts: OC Guru (which is what most of us hardcore overclockers want to see!) and Abit EQ. As you can see from the picture, the Abit EQ page is the page that you go to if you want to see all the things that can be monitored. Let’s look at them:
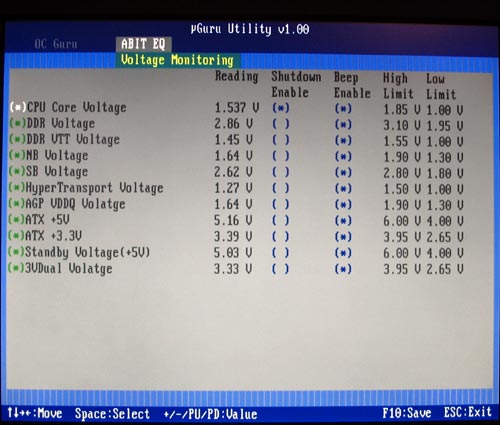
Here we see the voltage monitoring. You have the ability to set the computer to shut itself off if any of these voltages gets out of whack. This is a very nice option, and could save your board in the extreme event that something just went haywire!
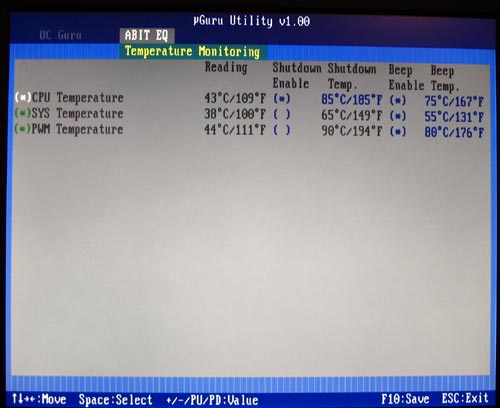
We also see the temps under the Abit EQ page. Only three are given, and once again, you have the ability to force a shutdown if any of the temps reach that threshold.
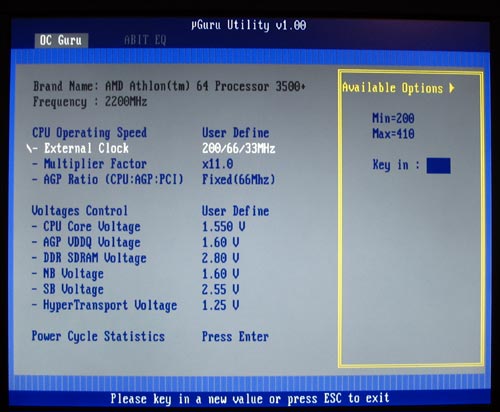
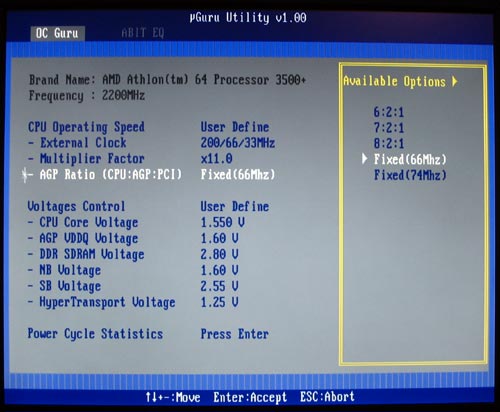
Ok, now for the juicy stuff! The OC Guru, which is under the uGuru page, is where you have all the tweaks for your fsb, multipliers, dividers and voltages. Abit has included a multitude of settings to adjust to help you squeeze every ounce of performance out of your rig. We can see on this page that the fsb starts at 200 and goes all the way to 410 fsb! That is pretty amazing! We have multipliers available from 11 on down to 4. Our retail 3500+ chip is locked after 11. That is true for all retail chips other than the FX series. The AGP/PCI lock does work on this board, unlike some of the other boards that first came out for the Socket 939 platform.
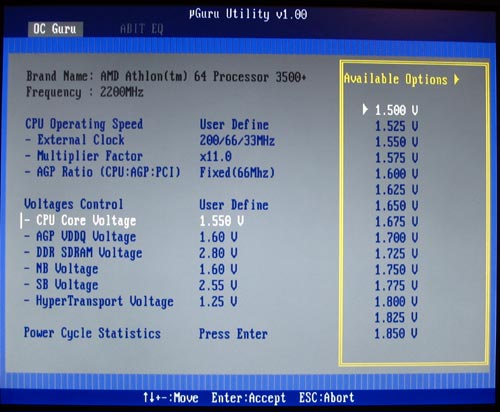
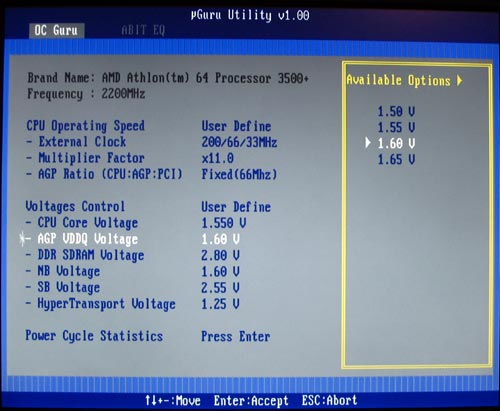
Vcore is selectable all the way up to 1.85, which should be enough for the air-cooling overclockers, but those going for broke with water and phase change would like to see at least 2.0! AGP voltage is selectable up to a respectable 1.65. Rarely does this do much for overclocking, so this is a fine limit.
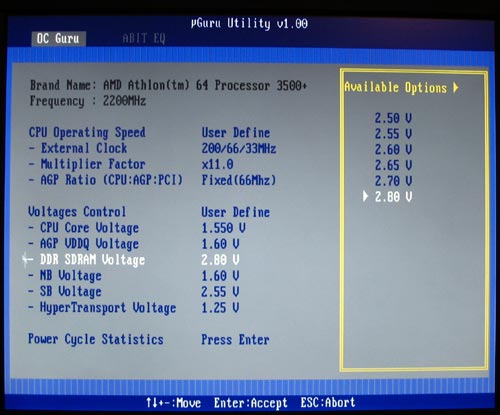
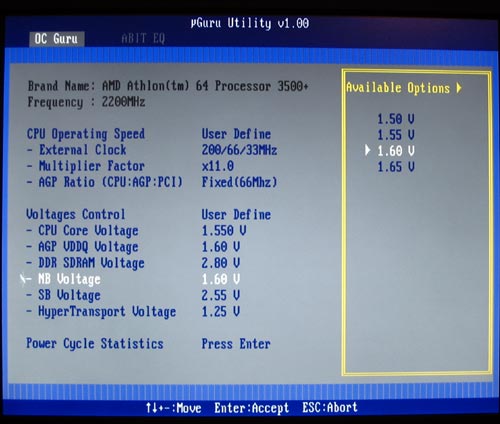
We were very surprised to see the vdimm only go up to 2.8v. Abit has been generous in the past, allowing some of their boards to go up to 3.2v for the memory. The die hard overclocker in me wants to scream at this limitation! I would once again plead, “GIVE US OUR VDIMM!” Northbridge voltage is not something that has commonly been found on motherboards, and in our overclocking adventure it did little for us to increase this — even up to the limit, 1.65 volts.
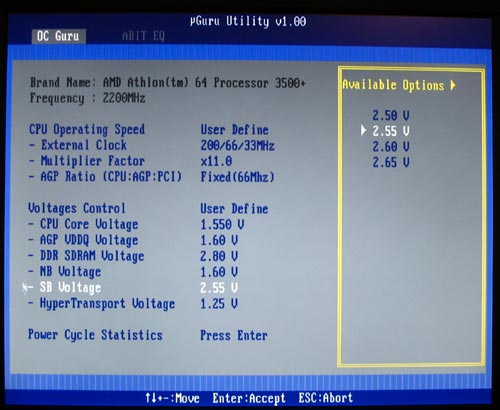

Another uncommon voltage to see in the bios was the southbridge voltage selector. This also had little if any affect in our overclocking. It is selectable up to 2.65. The last voltage on the page is the HyperTransport voltage. This was nice to have, and setting it up to 1.35 helped us to gain a few fsb higher.
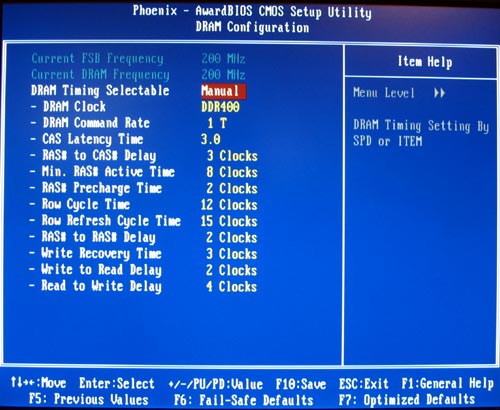
Another very important page in the bios is the DRAM configuration page. Abit has given us plenty here as well. You can set your ram divider from this page. The available dividers are: 400ddr, 333ddr, 266ddr and 200ddr. A very important setting here is the DRAM command rate. This is selectable at either 1T or 2T. For best performance, you will want to keep 1T enabled if at all possible. In our overclocking of the board, even though we could go higher by changing it to 2T, our benchmarks decreased considerably when we did that. Our suggestion would be to overclock as far as you can using the 1T command, and leave it there.
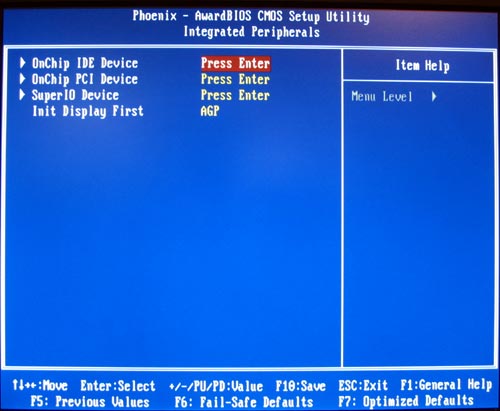
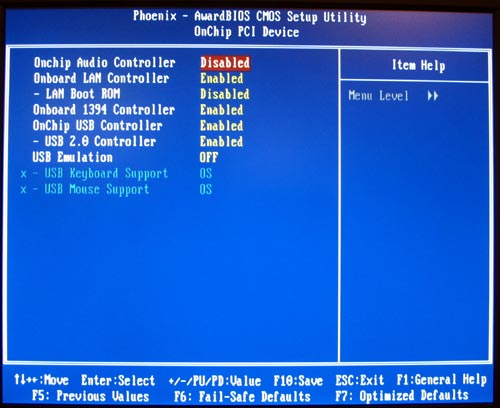
The Integrated Peripherals page will let you setup all your IDE drives, your SATA drives, and your Raid configuration. This page also lets you set up your sound, LAN, and IEEE 1394 devices, as seen in the second picture here.
Well, that is all of the interesting aspects of the Bios.
The Bundle
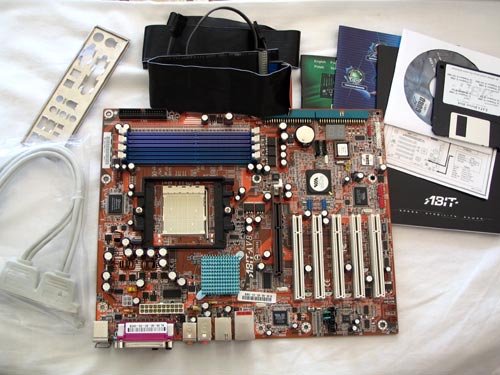
Abit always does a great job in packaging their boards. It is very attractive, and gives you what you need. The board comes with the backplate, 2 SATA connectors, and IDE and floppy connector. It also comes with the Driver/Utility CD, the RAID install floppy for windows, a USB/1394 header, and colorful, thorough documentation.
OK, let’s get to the performance!
Comments are closed.