Corsair Hydro Series H80i GT AIO Liquid Cooler Review
Corsair Hydro H80i GT Installation
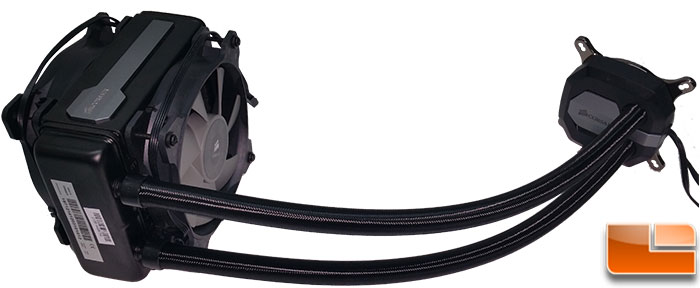
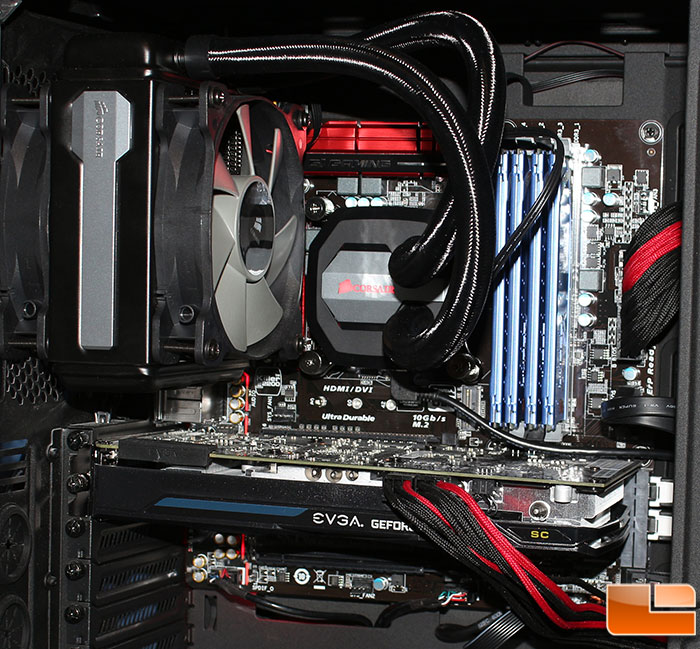
Before doing the actual installation, I wanted to see exactly how the cooler looks when put together. The two 120mm fans are attached to the radiator, and thankfully that’s all that’s needed to install this on an Intel based system.
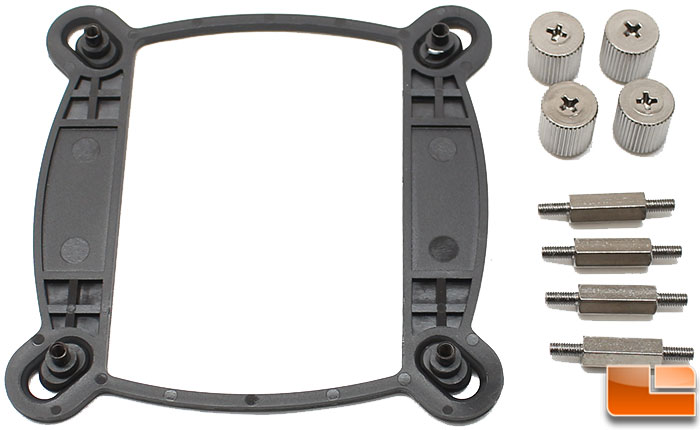
Getting the right mounting hardware together is pretty easy as Corsair does a great job with showing every step in the installation guide. The support bracket will fit both Intel and AMD systems simply by sliding the corner brackets. No matter the CPU, you’ll need the four screw caps, and finally the four mounting screws. There are eight total for Intel systems, the difference is the length of one side of the screws.
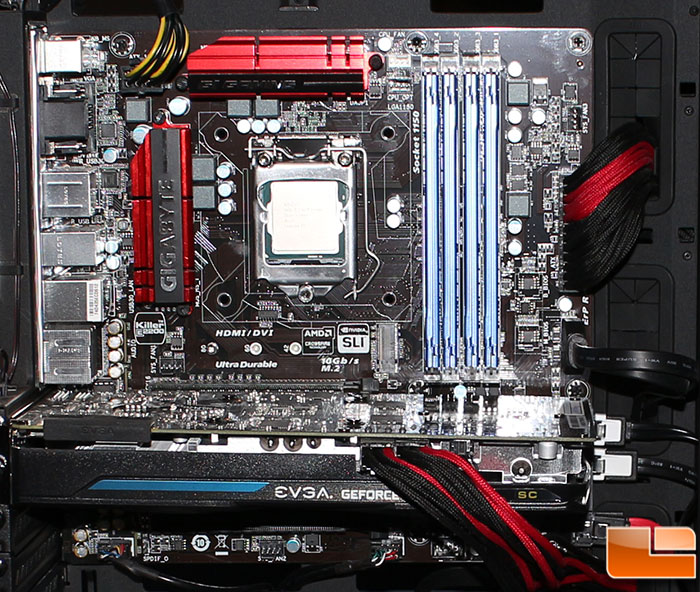
If you are replacing a CPU cooler, make sure to clean the old thermal paste off the CPU. If you are installing this on a new system, there isn’t much to do to prepare the system for installation. Place the support bracket on the back of the motherboard and secure it with the screws; there is no double sided tape to secure the bracket to the motherboard. I noticed it was a little loose once the screws were in place, that quickly changes once the pump is attached.
Attaching the screws to the system, I noticed on slight issue with my installation method. I hoped to leave the fans attached when installing the H80i GT, however had I followed the installation guide, it tells you to install them after you attach the pump. There is a reason for this, the second fan is right over two of the screws that you’ll need access when attaching the pump.
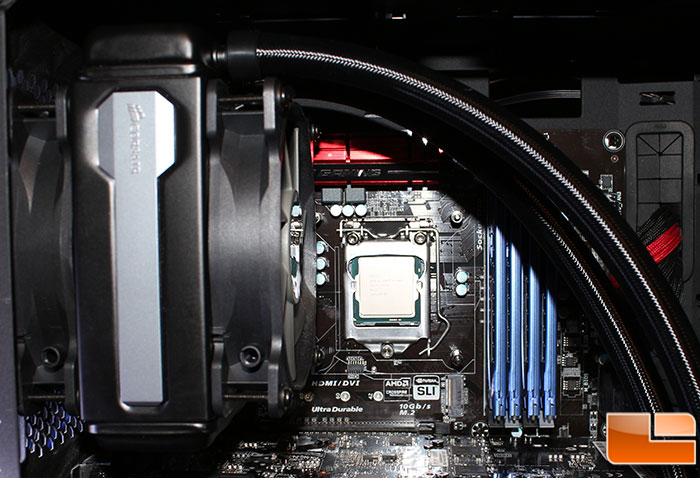
After removing one of the 120mm fans, the rest of the installation is done very easily. Place the pump onto the exposed screws and use the included thumb screws to secure it. No thermal paste needs to be applied since it is pre-applied by Corsair. I personally start by attaching each of the thumb screws and slowly tighten them with a criss-cross pattern to make sure the thermal paste is spread evenly. The pump is connected to the CPU_FAN header on the motherboard and the two SP120L PWM are connected to the pump.
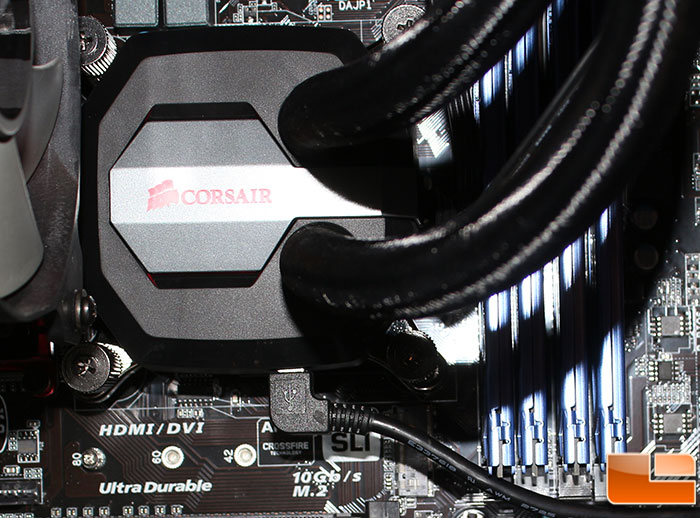
If you are planning on using the Corsair Link feature, you’ll need to attach the Corsair Link cable that is provided. Connect the micro-USB connection to the bottom side of the pump, and the other end to a free USB 2.0 header.
If you follow the installation guide, the installation of the H80i GT is extremely easy. If you are able to follow simple directions, then there is no reason a novice can’t install the H80i GT within a few minutes and have their liquid cooled system running.
When the H80i GT is turned on, the Corsair logo is white, and can be customized with the Corsair Link software. One thing I quickly noticed is how loud the pump and fans were. The system was left running for a 24 hour burn-in and the noise never went away. The noise was random but would happen for a few seconds every minute. As my system sits at shoulder height, this is a little disappointing, if it is a few feet away you might never notice it. While testing, I did find that the pump is noisy only when it is running in Performance Mode, in Balanced or Quiet Mode the pump is silent, and the fans are extremely quiet as well.
Corsair Link
Corsair doesn’t provide a copy of Corsair Link with the Hydro H80i GT, it is provided on their website and the latest version can be downloaded here. Corsair Link allows you to control the speed of the fans and pump, change the LED RGB colors and several other functions. Corsair has included various pre-configured profiles for each of the components, which can be modified.

The nice thing about Corsair Link is that you can customize the picture of the case with a picture of your choosing. Then drag and drop the various components that it detects for easy monitoring. I am currently using the NZXT H440 Razer edition case, I replaced the default Corsair case with a picture of the H440.
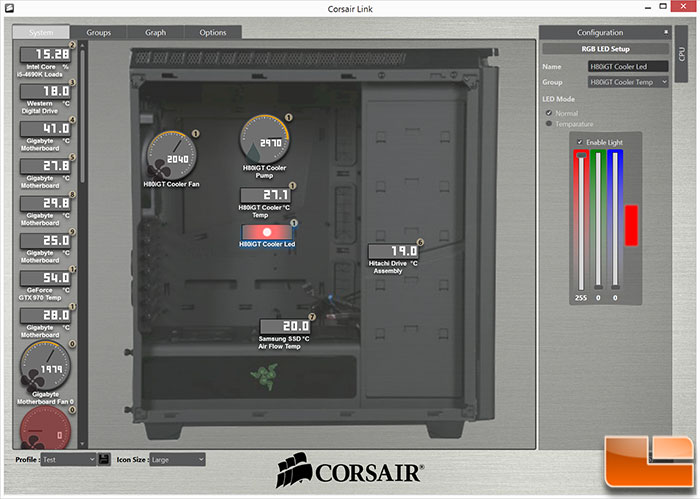
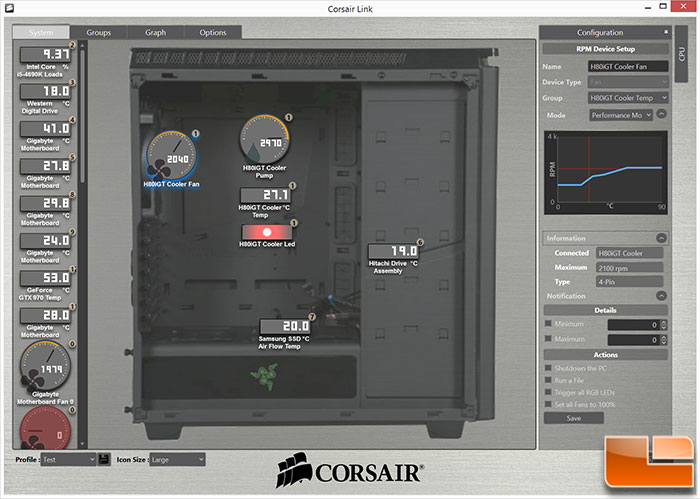
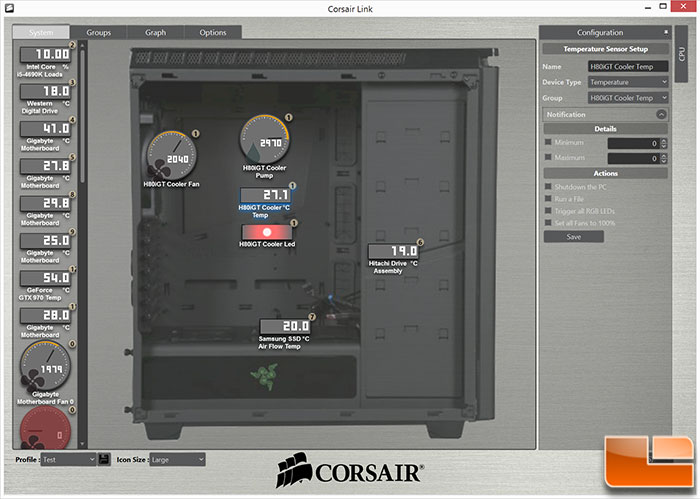
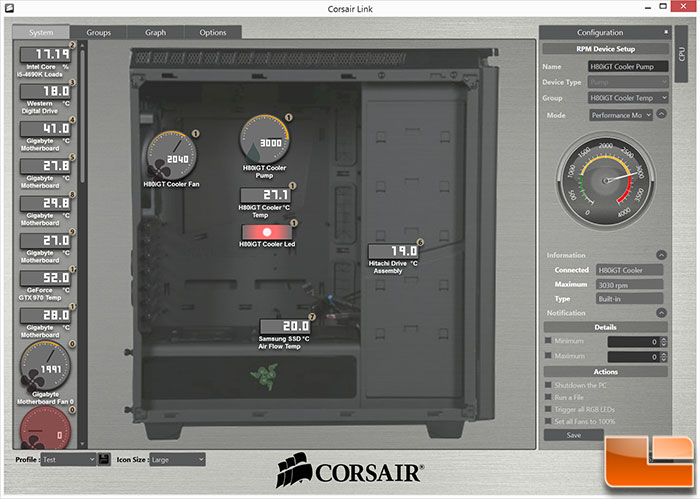
It took several reboots for Corsair Link to recognize the H80i GT pump and fans, and only showed one fan was connected, but controlled both at the same time. Occasionally when the system boots up, it won’t recognize all of the components, rebooting resolves it, but you shouldn’t have to. However, after the testing was completed, I rebuilt my operating system and Corsair Link worked correctly the first time. Once Corsair Link recognizes the components, I was able to make changes to them. By default, the fans and pump was running on Default mode which makes the fans and pump run at high speed, which also makes them noisy. Previously, I mentioned the noise from the pump, when I changed the pump speed to Quiet, or Balanced the pump and fans became silent.