Corsair COOL Water Cooling
Installation
Installation
Installation of the “Cool” was pretty simple once I got past the CD issue. The best way to approach it is to dry fit the entire system (assemble it without thermal paste of filling the system with water) and make necessary adjustments where needed (I needed to move my DVD drive out of the top bat to accommodate the reservoir).
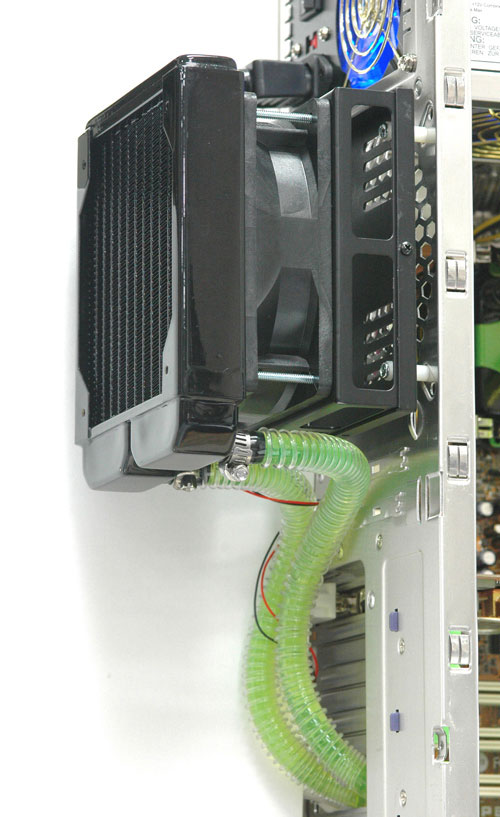
The only problem I foresee with this kit is the mounting assembly for the radiator and fan assembly, and it really isn’t a serious one. After installation, the assembly sticks out about 5 inches from the back of my case, meaning it won’t fit in the computer compartment of my desk. On top of that, you cannot block the rear of the radiator as it is the exhaust from not only the cooling system, but also you case. This is very minor issue to be honest. I actually thought the installation was very simple, and with all of the mounting hardware I can’t foresee this system not working regardless of the case it is installed in.
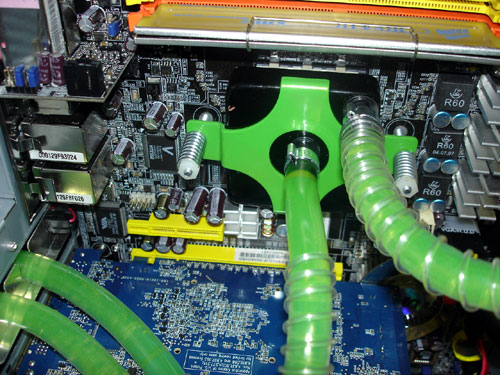
When it came to mounting the CPU block, I was impressed with how Corsair simplified the mounting procedure by utilizing the motherboards included backing plate. Most kits require the removal of the board and using a combination of bolts, nuts, washers, and springs. Corsair still uses these, but not having to remove the board to install a cooling system makes a huge difference.
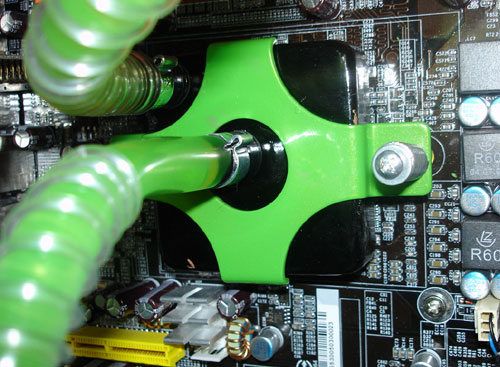
Moving on to the clamps, I didn’t care for the permanent clamps placed on the CPU block, but understand Corsair wanted to remove the chance of leakage from you system. For the other connections corsair chose the plastic “C” clamps which have become pretty standard fair in these types of systems. I have never bee a big fan of these. I like good old fashioned zip ties myself, but the “C” clamps should be more than adequate for anyone.
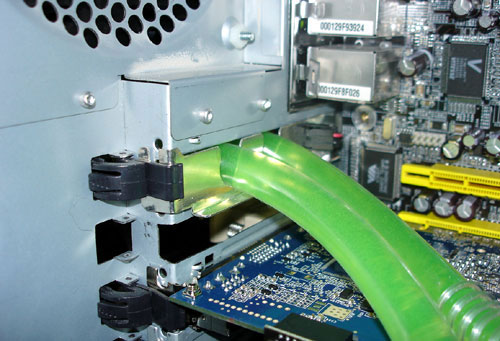
Another aspect of “Cool” I really liked was how Corsair bridged the interior cooling assembly to the exterior radiator assembly. While Swiftech also utilizes the Rad Box, Corsair improved the design by simply including a PCI slot cover with holes cut into it for the tubing to pass through. This helps reduce the chance of the assembly leaking into your case. I hope Corsair at some point puts some rubber grommets on this slot cover. Though it would take a lot, the slot cover is made of a thin piece of tin, which could possibly cut the tubing…..I’m not saying it?s likely, I?m just saying it could happen. Placing rubber grommets or manufacturing the cover of a softer material would alleviate this problem. i would also really like to see a fan controller included here. Although the Panaflo fan is very quiet, I feel that the ability to adjust the fan would have been a nice touch.
When it came to actually filling the system I had no problems at all. Simply pour the contents of the Corsair coolant into the reservoir and top it off with distilled water. Purging the system of air was quick and simple. From start to finish installation took a little under 45 minutes, not too bad at all. Let?s move on to some testing.
Comments are closed.