Ultra M998 Midsize Black Tower PC Case Review
Looking Inside

Packed away on the inside of the case was the accessories box. In it were casters, nickel plated and black anodized mounting hardware, modular power cables for the Power Rail (more on this later), and a single SATA cable for the front panel eSATA connection.

Moving on to the inside, we will first look at the fresh air duct on the side panel. The duct can be adjusted to match the height of your CPU cooler to funnel cool air straight to it. The only down side to it is that it will only work for stock or low profile coolers.
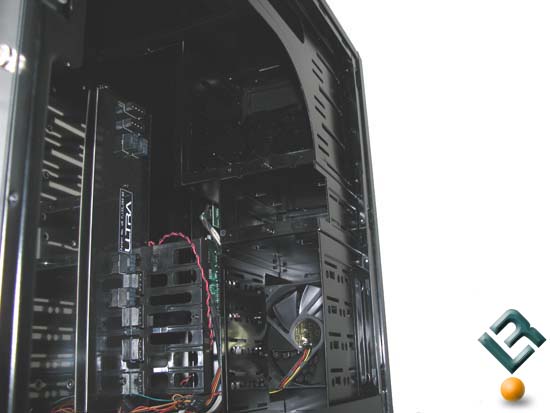
Looking towards the front of the case, we can see the drive cages, the Ultra Power Rail and video card support/cable guide. The Power Rail is an interesting part unique to this case. I was not quite sure how it was supposed to work at first; the instructions are a little on the vague side. At the top of the Power Rail there are 4 power connectors for the PSU to connect to, 2x molex and 2x 8 pin PCIe, the power is then sent via the PCB that makes up the Power Rail to the lower connections. From there, you can use the provided modular cables to send power to the components mounted in the lower part of the case. The Power Rail can be easily removed if you chose not to use it, remove four screws it comes right out.
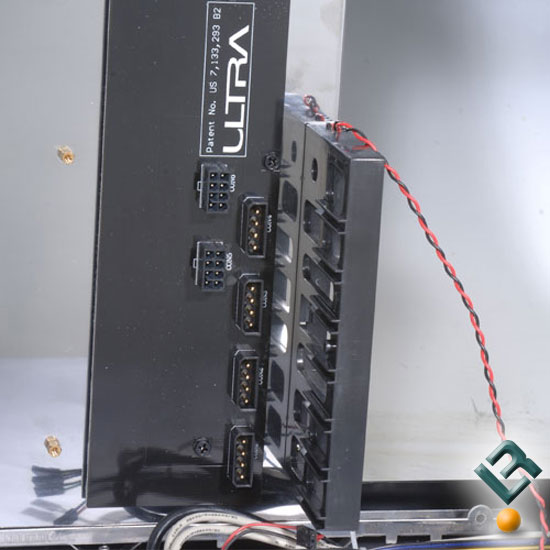
Here is a closer picture of the Ultra m998 power rail. This makes wire routing simple!
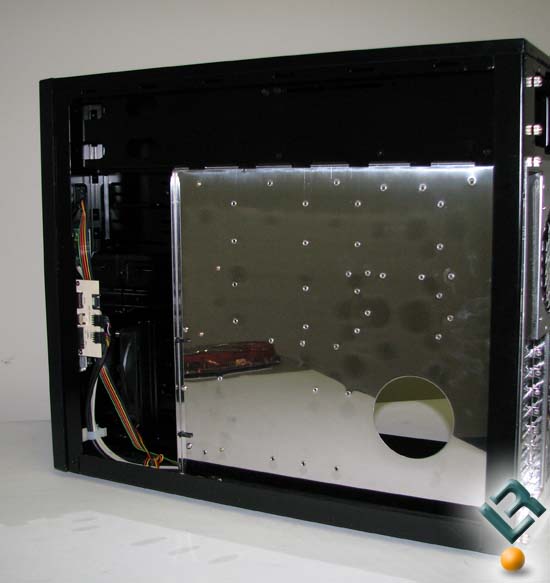
After removing the right side panel we can see the back of the motherboard tray and wiring for the front panel. Due to the extra width of the M998, there is tons of room to hide extra PSU cables in between the drive cages and side panel.
After removing the top and front panels, we have the almost bare skeleton for the M998.
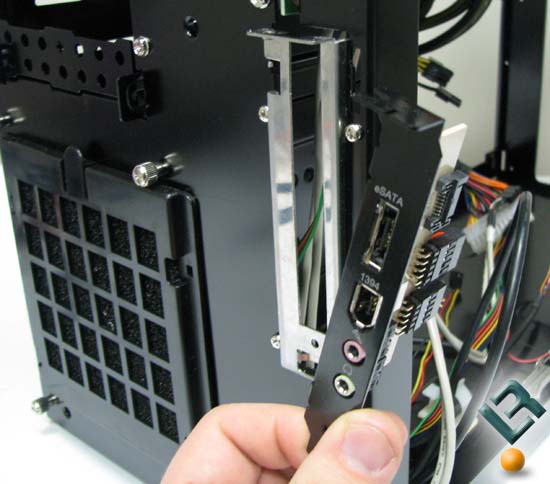
Looking closer at the front IO ports, its removable; it is in fact, a PCI slot-type IO bracket. So if you dont like this panel you can replace it with one of your liking.
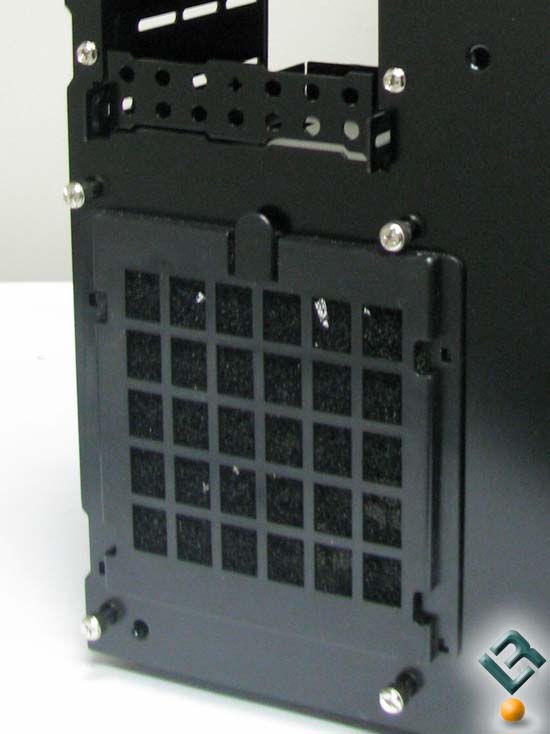
Looking at the bottom-front, we can see the screen for the front 120mm intake fan, as well as the retaining screws for the 3.5 and hard drive bays. Now a couple things I didnt like about this arrangement: First, the top right thumbscrew over the screen prevents the screen from being removed. Second, to remove the hard drive or 3.5 bays you have to remove the front panel to get to these screws. If you chose to leave these off the internal retention clips are not sufficient to keep the cages from rattling. Also, to remove the middle 3.5 bay you must remove the hard drive bay first. Lastly, with the wide spread use of thumb screws through out the case, Im not sure why the 3.5 drive bay had normal case screws.
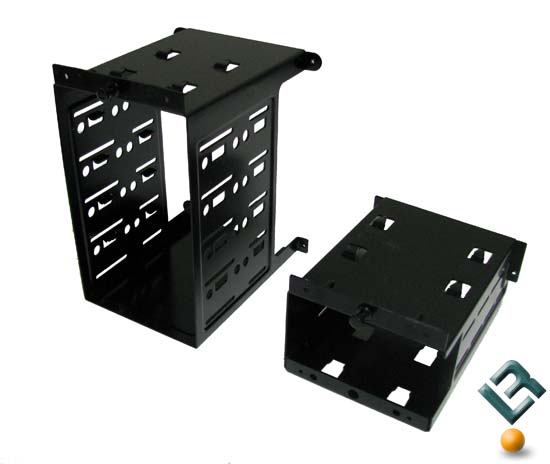
Here, we have the hard drive and 3.5 bays removed from the case. You have room for five hard drives and two 3.5 devices.
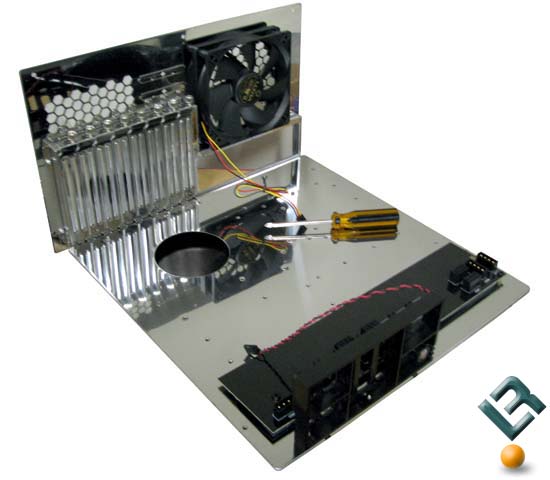
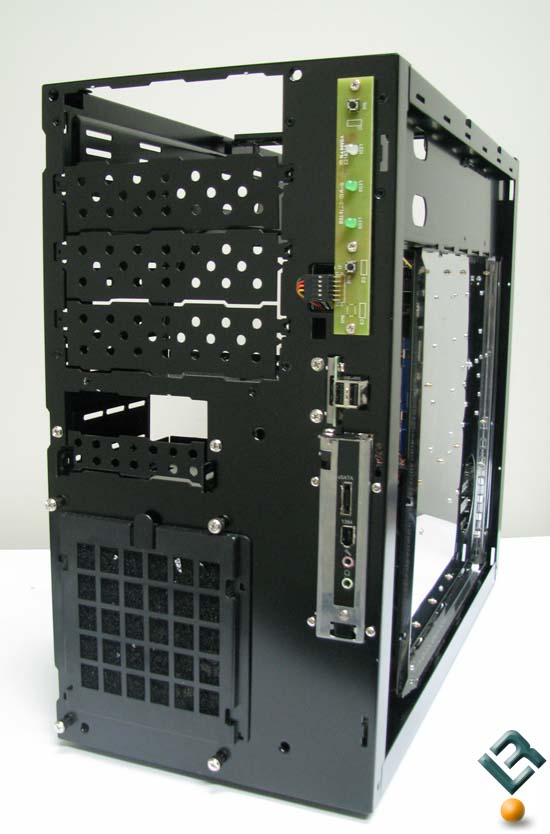
The last piece of the puzzle to be uncovered is the motherboard tray itself. The tray has a nice chrome finish and all the expansion slot covers have thumb screws. We can also see the rear 120mm fan, extended length card support, and Power Rail.
Comments are closed.