Thecus N5550 5-Bay Home NAS Review
Building the RAID, User and Share Setup
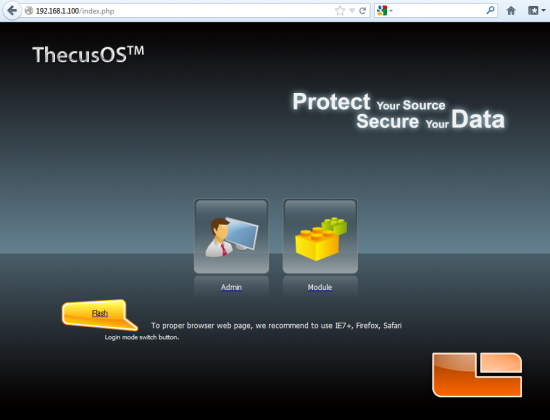
Setting up the Thecus N5550 5-Bay NAS is very easy to do. There is a disk that comes with the NAS that has a setup wizard on it, but we skipped that and did the installation on our own. All you really need to do is install the ethernet cable and plug in the power cord before turning the device on. Once you fire it up, the Thecus N5550 defaults to a local network address of 192.168.1.100 and you can login with the Admin account with the default password of ‘admin’. You should check for firmware updates before proceeding any further.
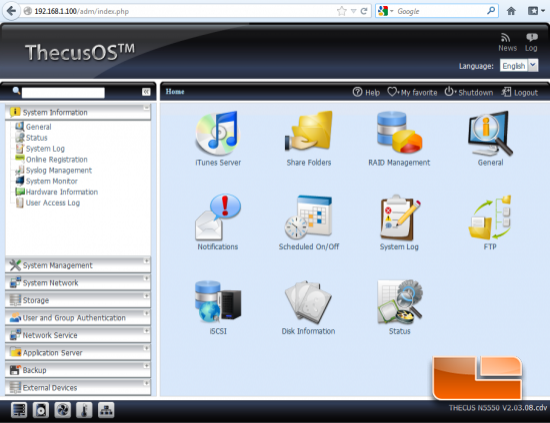
Once you login you’ll find a fairly easy user interface that will allow you to do hundreds of different things. There are so many features of the ThecusOS that we won’t even try to cover them all. The Thecus user manual is 198 pages long and does a fairly good job covering the interface, so if you want to know more you can download there here. We are just going to show you how to build the RAID array and to do that you just need to go to RAID Management. Once you are in RAID Management you just need to click on the ‘Create’ button and just complete the six steps required.
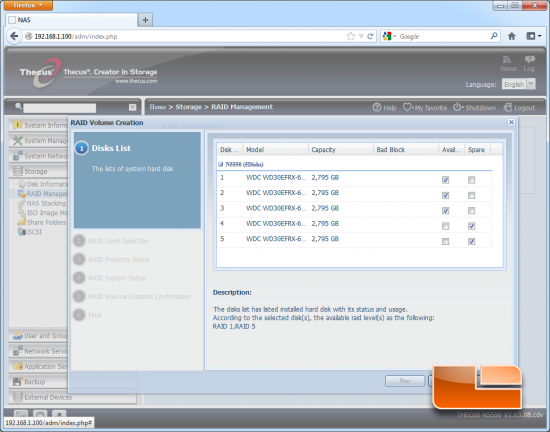
When you start the RAID setup you are presented with a list of your drives. You could make multiple RAID volumes or leave some as a standalone disk for a hot spare. Depending on how many drives you have and what RAID configuration you want, it will impact what RAID level you can pick from on the next step.
It should be noted that you can create multiple RAID arrays, but you can only do them one at a time.
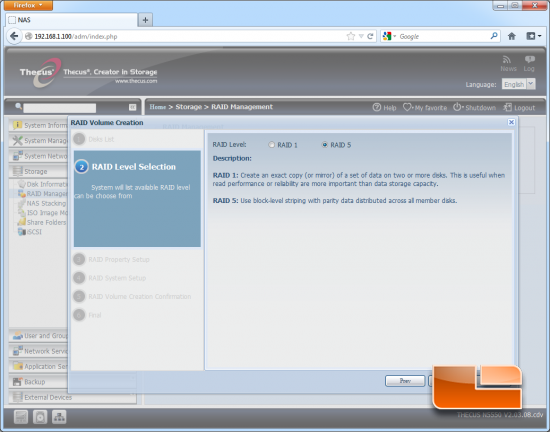
The second step allows you to select the type of RAID you want. The Thecus N5550 supports six different types:
- JBOD: Combine multiple drives and capacities into one drive.
- RAID 0: Normally used to increase performance and useful for setups such as large read-only NFS server where mounting many disks is time-consuming or impossible and redundancy is irrelevant.
- RAID 1: Create an exact copy (or mirror) of a set of data on two or more disks. This is useful when read performance or reliability are more important than data storage capacity.
- RAID 5: Use block-level striping with parity data distributed across all member disks.
- RAID 6: Extend RAID 5 by adding an additional parity block; thus it uses block-level striping with two parity blocks distributed across all member disks.
- RAID 10: A Stripe of Mirrors. Multiple RAID 1 mirrors are created, and a RAID 0 stripe is created over these.
The defacto RAID type is RAID 5 as it will allow you to lose one drive and not any data. Many experts are now saying that RAID 5 is not the way to go. Hard Drives have a 3% chance of failing in the first three years of drive life, and then after that the failure rate starts rising. With five brand new drives you have a ~15% chance (3% x 5 drives) that something will fail. If one drive went down in a 5x 3TB RAID 5 setup, you have four 3TB drives left and will have to rebuild the cripled array once you get a new drive. What could happen during the rebuild is that the RAID controller will see an unrecoverable read error (URE) or two on the other drives that are needed to rebuild the data on the new drive. SATA Hard Drives have a URE rate of once every 100,000,000,000,000 bits, which sounds like a small, but that is once ever 11.4TB! Since we are using five 3TB drives we will have 15TB and that means we will likely have at least one URE. So, with a RAID 5 array that has one drive fail and a URE on a used part of the drive will usually result in a RAID array that can’t be rebuilt. The last error you want to see on a NAS is that your RAID volume can’t be built. With disk drive capacities increasing to 4TB and beyond in 2012 it will make running RAID 5 very risky. Most people don’t want to backup a NAS, so be sure to run the right RAID type! (RAID 6 is recommeneded by many experts as it uses two parity blocks and not one like RAID 5.)
That said, we’ll be testing the Thecus N5550 in RAID 5 with 1 spare disk and then with RAID 6 with no spare disk.
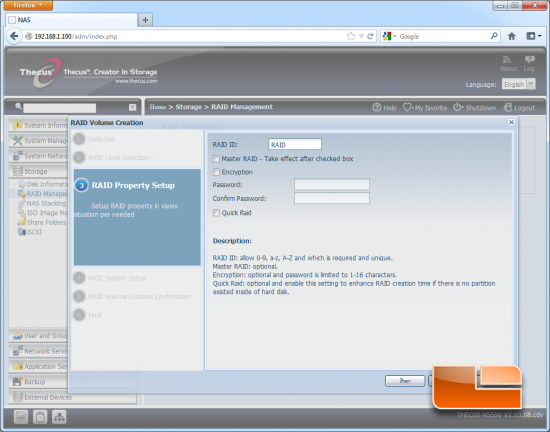
In step 3 you pick if you want the RAID volume encrypted and what you want the volume name to be.
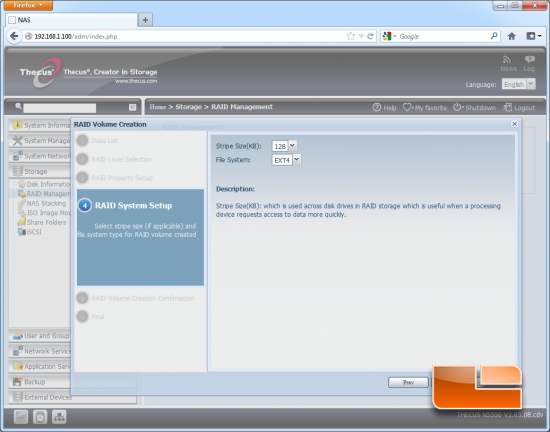
In step 4 you can set the volume stripe size and the file format. The default size is 64kb and file system of EXT4. We bumped our stripe size up to 128KB.
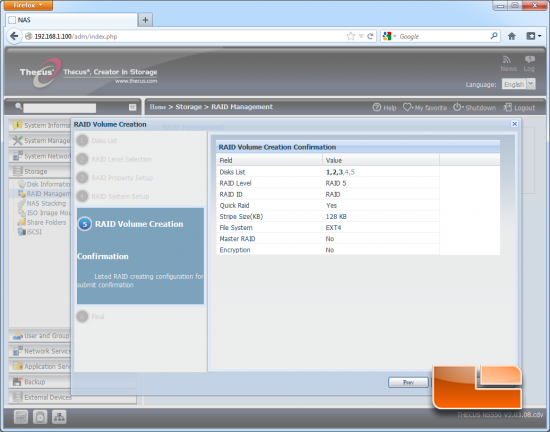
Step 5 is a review of all the settings you have configured. If you want to change something you can by backing up to that step.
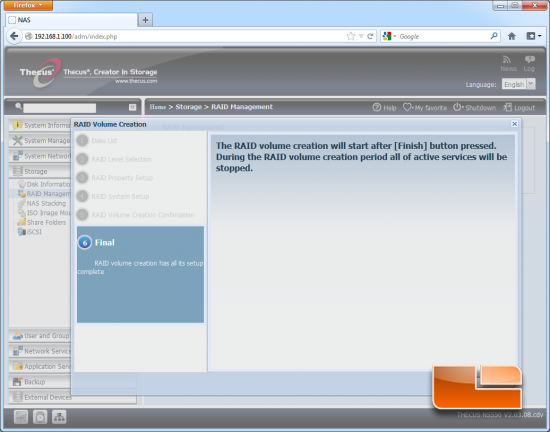
And the 6th and final step is the ever important “are you sure” step when dealing with drive formatting.
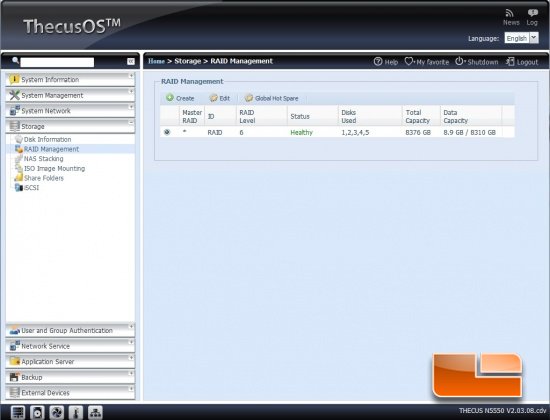
The system takes many hours to create the raid volume if you don’t do a quick build, so be sure to run it and walk away. When it is done formatting it should say ‘healthy’ in the status box here.
Now we need to add a user. Do this by clicking on the Local User Configuration icon on the home screen.
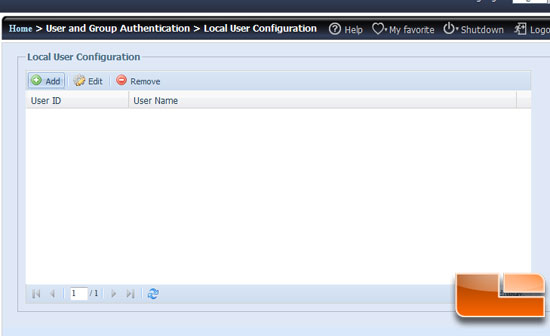
In the Local User Configuration is where the list of users would be; since I have not added any yet the list is empty. To add all you need to do is click the Add button.
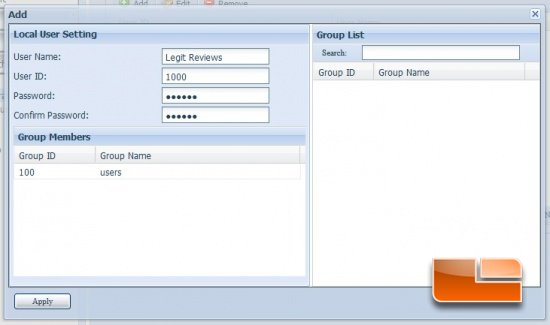
Fill in the blanks and click apply. You will get a pop up that states the addition was successful.

The next step is to set up a share folder, which you can do by clicking the ‘share folders’ icon on the home menu.
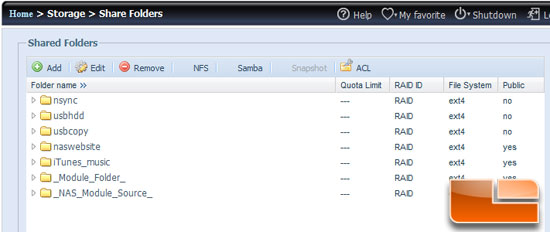
You will then see a list of folders on the system. These are the system generated folders for features like the USB copy and iTunes. To create a folder you need to click the Add button to start the wizard. We created a folder called ‘Testing’.
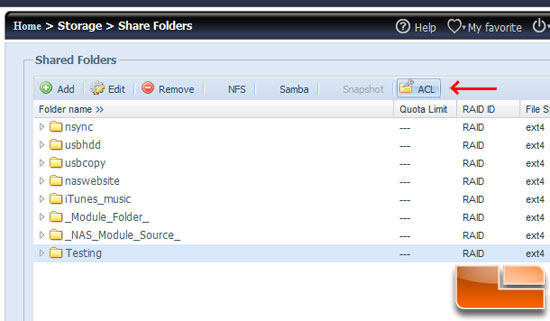
Since we didn’t make the Testing share public we need to assign users access to it. Do this by highlighting the share folder and clicking the ACL button at the top right. Then you pick the user’s name on the left and then the Add or Remove icon for the appropriate level of access for that user or group. The access rights can only be set to the root share folder, and cannot be changed for the subfolders in it.
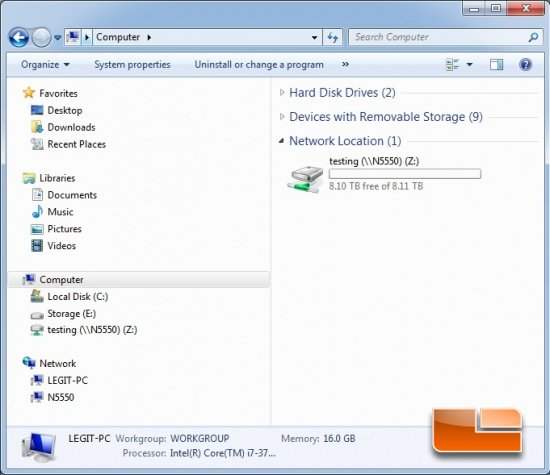
You can then go to the computers in your network and ‘map a new network drive’ by right clicking on network and assinging a drive letter to a folder on the Thecus N5550 for easy access to the NAS.
Now that we have set up the RAID array, user access, shared a folder and mapped the drive, we can get on to testing!

Comments are closed.