The CoolIT Systems RAM Fan Review
The Test System
When looking at pictures of the RAM Fan, I was under the impression that the fan would be level with the motherboard like the Corsair AIRFLOW and OCZ XTC Cooler, but it’s actually pitched at an angle as seen in the picture below.
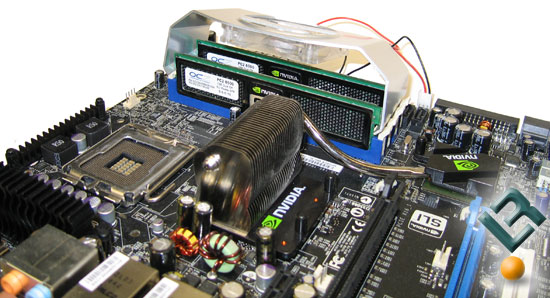
Installation of the RAM Fan was very simple and honestly takes just a few seconds. The ‘hooks’ of the Ram Fan actually seat right above the DIMM slot retention mechanisms and hook into the notch that is present on all DDR1, DDR2 and upcoming DDR3 modules.
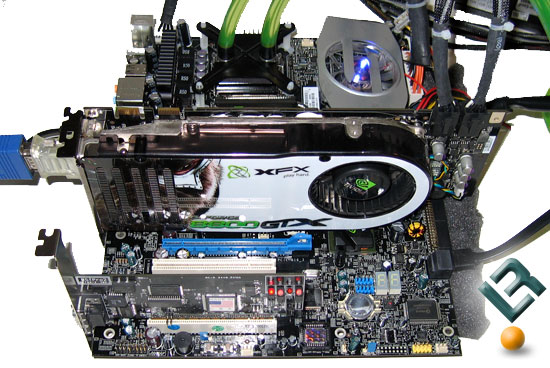
When it came to testing the modules we wanted to show what would happen on an enthusiast system in an overclocked environment. For this we used water cooling on the processor as the air movement around the CPU socket would be great reduced as no fan was used to cool the processor. We also wanted to overclock our memory, so we used an eVGA 680i SLI motherboard and an Intel X6800 processor. I then set the memory to run linked (1:1) at 4-4-4-12 timings at 2.3V, which would give us some hot and toasty 1066MHz C4 memory. How do we make them really hot?
Rather than doing some lame benchmark that doesn’t use all of the memory on a constant basis we opted to use the Ultra-X R.S.T. PRO2 and fully load the base and extended memory on our modules at 1066MHz. With the problem solved on how to heat up the modules we then had to figure out how to measure the temperature of the modules. We ended up using our infrared digital laser pyrometer to find out the temperature.
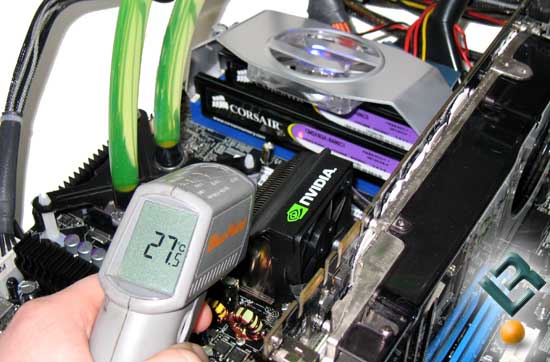
This specific model has a temperature range between 0-500 degrees F with an accuracy range of plus or minus 3 percent, and includes a laser pointer to make sure you know what you’re taking the temperature of. If you look closely at the picture above you can see the red laser dot on the center of the outside memory module. For our testing we will record the temperature on the outside and inside module.
Comments are closed.