Spire Verticool III CPU Cooler Review
Installing the cooler

To mount the cooler you first have to get the right bracket for your CPU socket type, unfortunately none of the mounts are marked. Easy enough though, just match up the bracket that matches the hole pattern in your board. Now that you have your mount brackets they need to be attached to the base of the Verticool III with 4 real small screws. Now if you’re like me and have sausage links for fingers and tend drop small things, might want to do this over a towel so the screws wont bounce off into the carpet or the black hole of an AC vent.
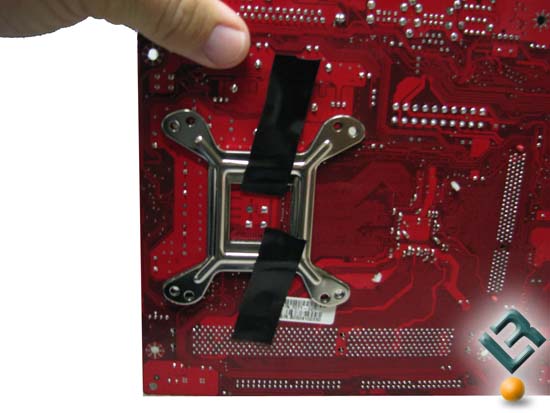
Now installing the cooler onto the motherboard can be an adventure; you have to hold the back plate, the cooler and the board in a way that you can install the 4 screws that thread from the back plate side of the board into the CPU cooler mounts. Now unless you have a third arm or a buddy handy, break out a roll of electrical tape and tape the backing plate in place. This will allow you to hold the cooler in one hand and screw in the mount screws in with the other. Trust me this will save you some time.
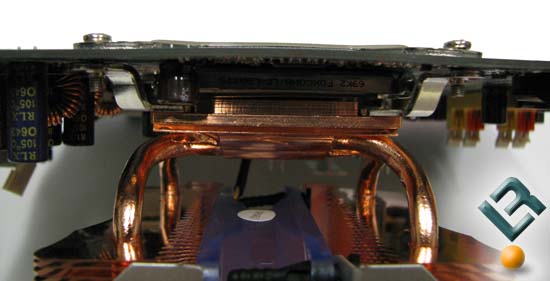
As you tighten the mounting screws, tighten evenly in an X pattern. I mention this for the same reason that Spire mentions it in the manual, not done properly and you will bend if not break the board. If youre not careful and pay attention you can do some damage. To show this I have the cooler installed on a dead motherboard and tighend as far it could be. In the above image you can see a slight curve to the baord. Although it is not extreme, but it is still bent.
Comments are closed.