How To Enable BitLocker With Intel PTT and No TPM For Better Security
How To Enable BitLocker With Intel PTT
Most desktop motherboards have a pin header on them that allows users to buy a Trusted Platform Module (TPM) for enhanced security. Most laptops have a module already included, but it is an ‘extra’ option on most desktop boards. The good news is that for under $20 you can pick up a TPM 2.0 module for your existing desktop board that will allow you to take your system security to the next level by enabling whole-disk encryption!

BitLocker by Microsoft is one of the most common ways to secure data with a TPM. Once enabled your drive will be secure even if it is removed from the system. This is because the TPM has a microcontroller on-board that generates and stores keys, passwords, and digital certificates. Each TPM chip has a unique and hidden RSA key burned into it during production making each one truly unique. Once enabled, any changes or attacks to low-level (root) system assets should be caught and not allowed to run. This optional hardware-based solution takes a bit of time and effort to get enabled, but it is preferred by many as it separates your security infrastructure from the host system, making it very difficult to spoof, tamper or defeat.
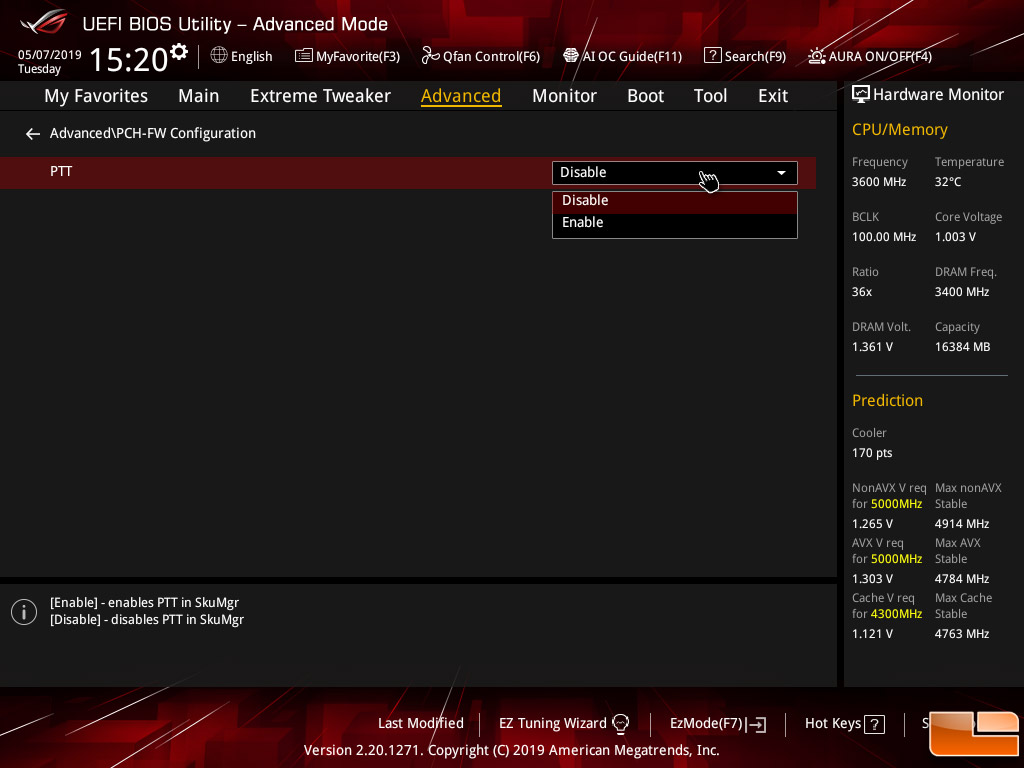
There is an alternative though and you do not have to have a TPM to enjoy BitLocker in Windows. That is because you can use Intel Platform Trust Technology (Intel PTT) which was introduced back in 2013. Intel PTT is basically the firmware alternative to a the hardware based TPM. Intel PTT works on pretty much every processor/chipset since 4th Gen Core (Haswell) processors were introduced and it even supports BitLocker. This is because Intel PTT supports all Microsoft requirements for firmware Trusted Platform Module (fTPM) 2.0. So, you get enhanced drive security without the having to buy TPM Modules like you had to in the past. It should be noted that BitLocker is available on most versions of Windows 7, 8, and 10. Windows 10 has an additional feature called “Device Encryption”. This is not the same as BitLocker.
While Intel PTT has been around for roughly six years it is only now starting to get mainstream attention as motherboard makers have begun removing TPM pin headers from their boards to reduce costs and to free up motherboard surface area for other features. For example the ASUS ROG MAXIMUS XI EXTREME is one of the flagship Intel Z390 boards at $572.99 shipped and it doesn’t have a TPM header on the board. The ASUS ROG MAXIMUS X APEX (Intel Z370) did include a TPM header, so this is a change that has just recently taken place.
To enable BitLocker for full-disk encryption on a PC without an option for a TPM you’ll need to need to use Intel PTT. The first thing that you need to do is to go into your desktop boards UEFI (BIOS) and enable the feature as it is likely disabled by default.
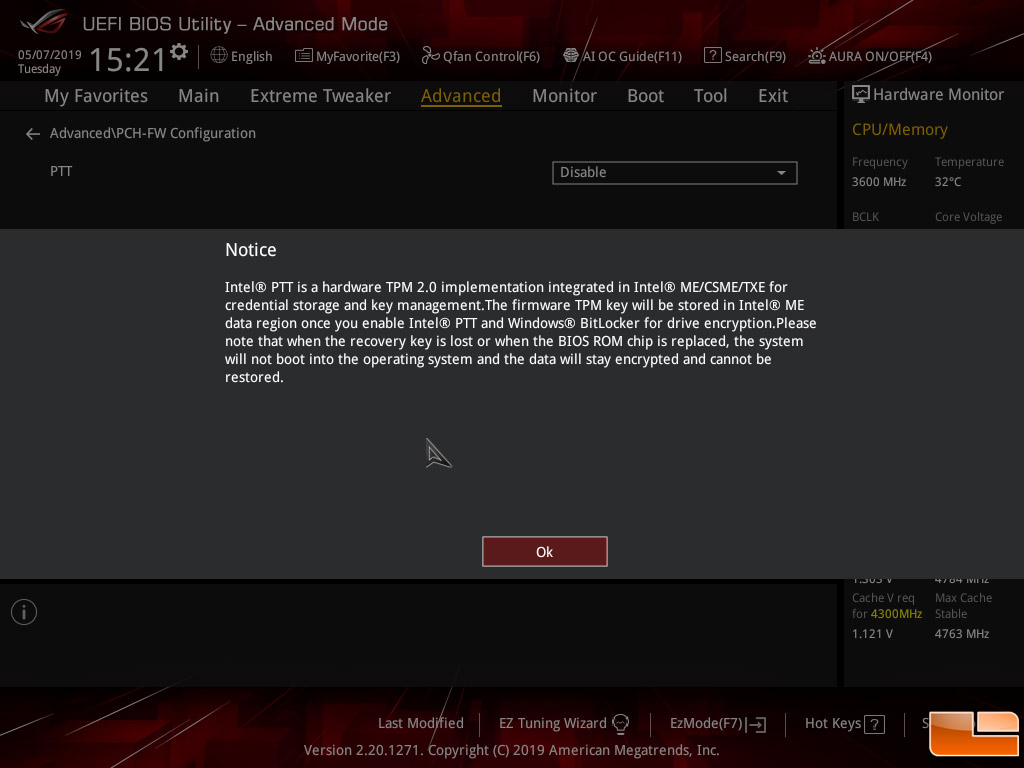
Once you select enabled you are hit with a warning that lets you know if the recovery key is ever lost or if the UEFI/BIOS chip is replaced that the encrypted drive cannot be restored. This also means that a motherboard failure resulting in a board replacement might cause a major headache.
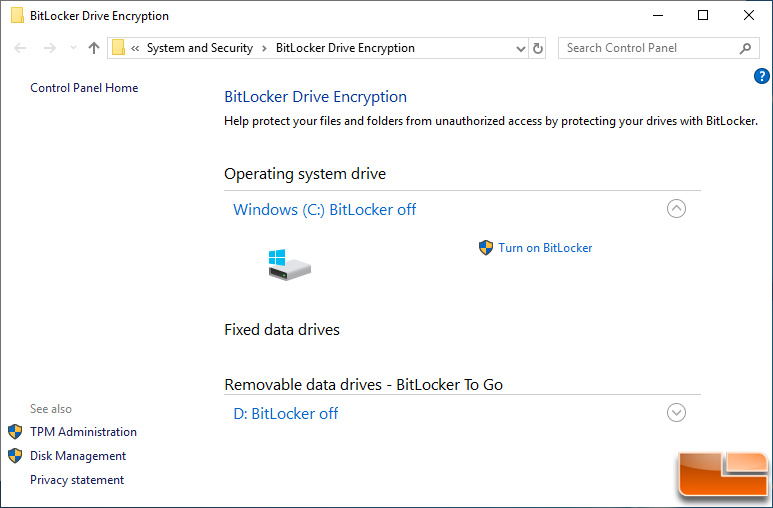
From here you can load Windows like normal and go to ‘Manage BitLocker’ in Control Panel. Click ‘Turn on BitLocker’ next to the drive that you are wanting it enabled on.
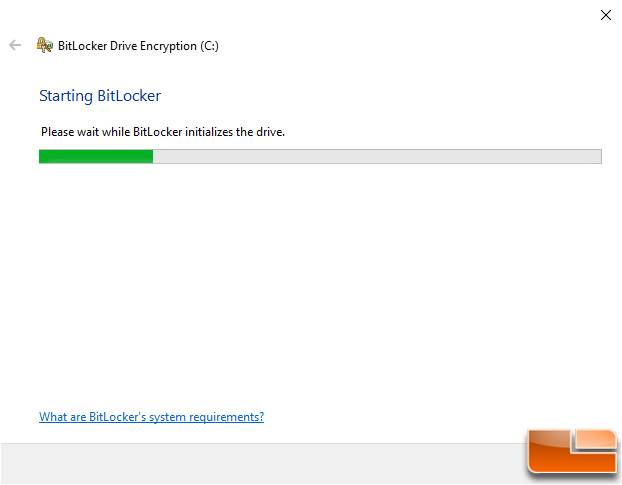
BitLocker will then begin by initializing the drive as you can see in the screenshot below.
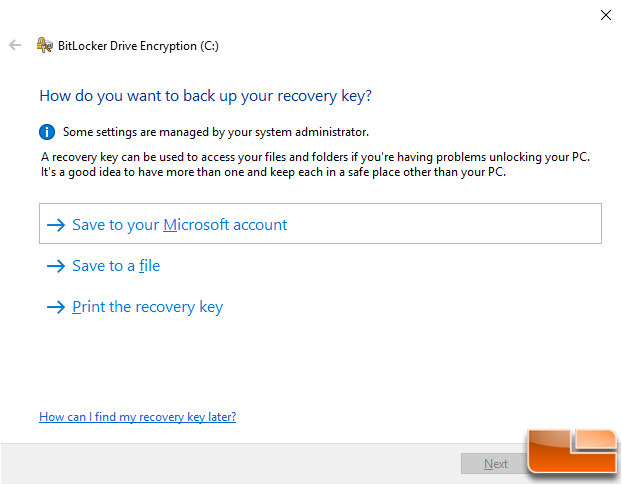
Once that completes in a few seconds you’ll be asked how do you want to back up your recovery key. When using Intel PTT you are given the option to save it to your Microsoft account, as a file on a different drive or printed out. We picked the options to save a file to a USB drive and also print a recovery key. That way we have two different backup methods that can be stored in different places.
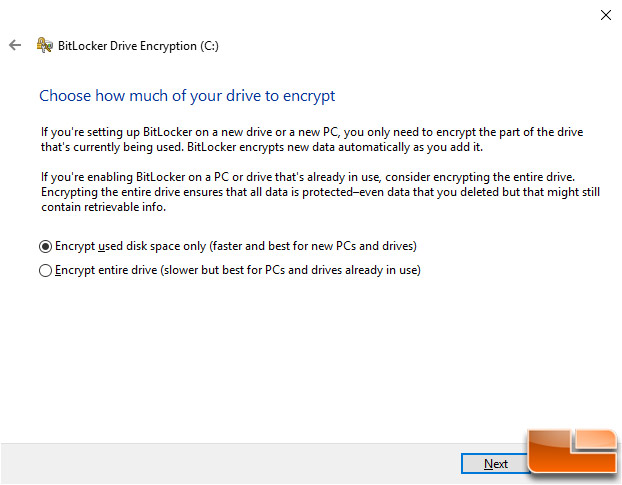
After your recovery key is backed up the next button will be available to click and you can move onto how much of the drive that you’d like to encrypt. The default setting here is to encrypt used disk space only, but the slower and better option in our opinion is to encrypt the entire drive.
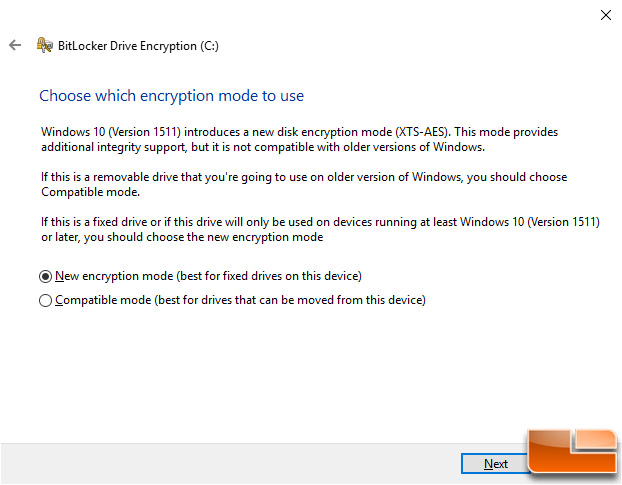
Once you have figured out how much of the drive you want encrypted you as asked what encryption mode that you’d like to use. When Windows 10 (version 1511 or codename ‘Threshold 2’) came out on November 10, 2015 it came with a new disk encryption mode (XTS-AES). Using this new encryption method won’t work on older Windows builds. So, if you are enabling BitLocker on a removable drive that will be used on a wide variety of systems then you’ll want to use compatible mode. Since our drive isn’t going to be removed and we are using Windows 10
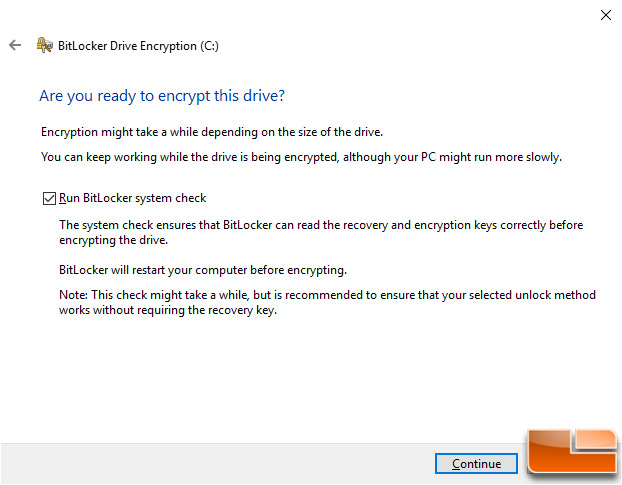
At this point in time BitLocker will ask you one last time if you are ready to encrypt the drive you selected.
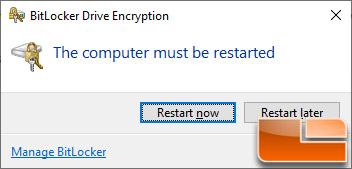
Once you click continue a notification will pop up letting you know that the PC must be restarted for encryption to begin.
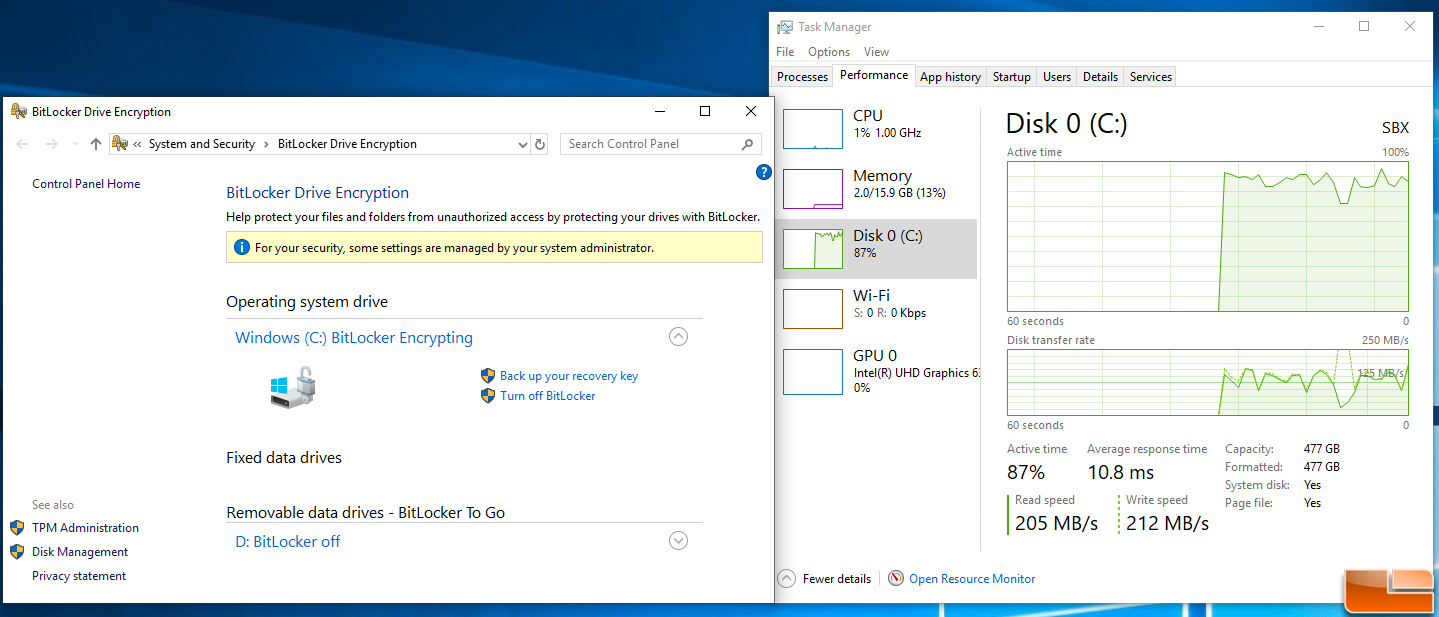
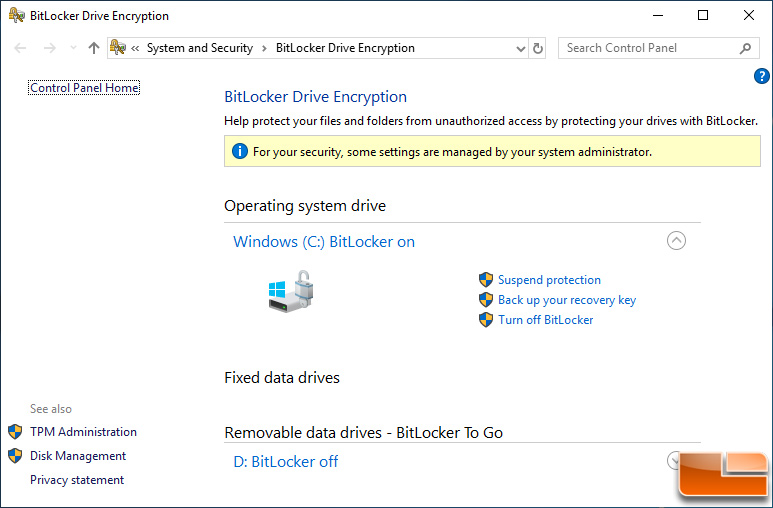
When the system restarts everything will look normal on the desktop, but rest assured the drive you wanted encrypted is being encrypted in the background. If you pull up BitLocker in ‘Control Panel’ it will show the drive is encrypted. You can also open up Task Manager and under the performance tab view the load on the disk being encrypted. This process will take some time and heavily depends on how much data is on the drive and of course the speed of the drive. Our system had a MyDigitalSSD SBX 512GB M.2 PCIe NVMe drive that had only about 32GB used and it took about 15 minutes to complete. When the drive is done being encrypted it will simply say ‘BitLocker On’ instead of ‘BitLocker Encrypting’ in the BitLocker menu.
Can I Disable Windows BitLocker?
If for some reason you want to disable BitLocker down the road you can easily do so by clicking ‘Turn Off BitLocker’ on the BitLocker panel that you’ve been using in Control Panel.
Once you turn it off the encrypted drive will need to be decrypted and this once again will take a bit of time to complete.
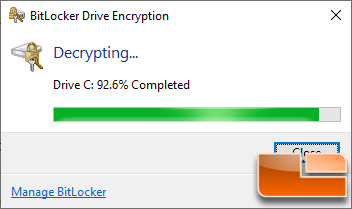
Turning off BitLocker is very simple, so it isn’t a big deal to turn this level of security off.

How to Enable BitLocker without Intel PTT or a TPM
If you don’t want to buy a TPM or have a board that doesn’t support Intel PTT you can still enable BitLocker.

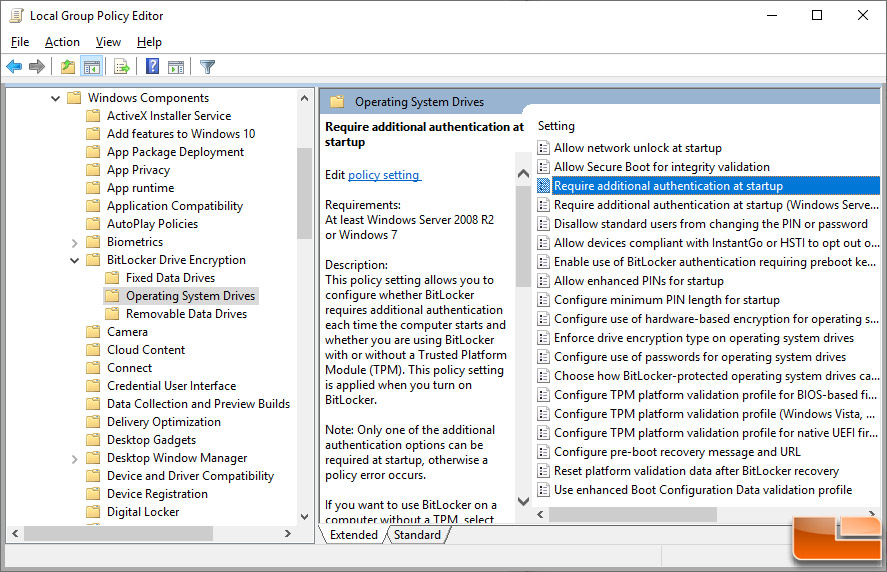
The first step to enabling BitLocker on a system is to go into the Windows systems Local Group Policy Editor and making a few changes. To quickly access the Local Group Policy Editor you can press Windows+R on your keyboard, type gpedit.msc into the Run dialog box, and press Enter. This brings up the Local Group Policy Editor and from there you can navigate to Local Computer Policy > Computer Configuration > Administrative Templates > Windows Components > BitLocker Drive Encryption > Operating System Drives. Next you need to double-click the Require additional authentication at startup option in the right pane.
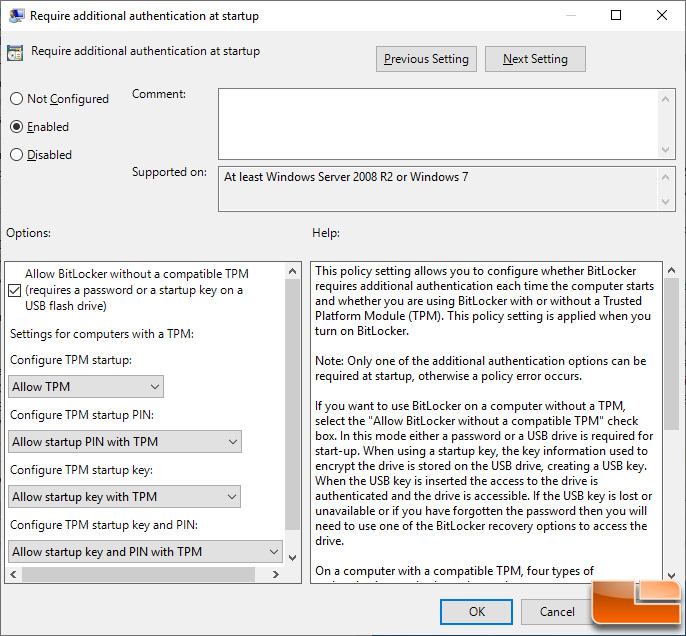
Change the checkbox from Not Configured to Enabled for the operating system to require additional authentication at startup. It will automatically check a box to Allow BitLocker without a compatible TPM (requires a password or a startup key on a USB flash drive). Click OK and you can enable BitLocker without a system restart.
You can then turn on BitLocker and begin the drive Encryption process like we already talked about. The only difference is that without a TPM you’ll be asked to create a strong password that is needed to unlock the drive each and every time the system is turned on.

Hopefully this ‘how to’ guide helped you out and please feel free to ask any questions below in the comment section!