EVGA nForce 680i SLI 775 A1 Motherboard Review
Bundle and BIOS
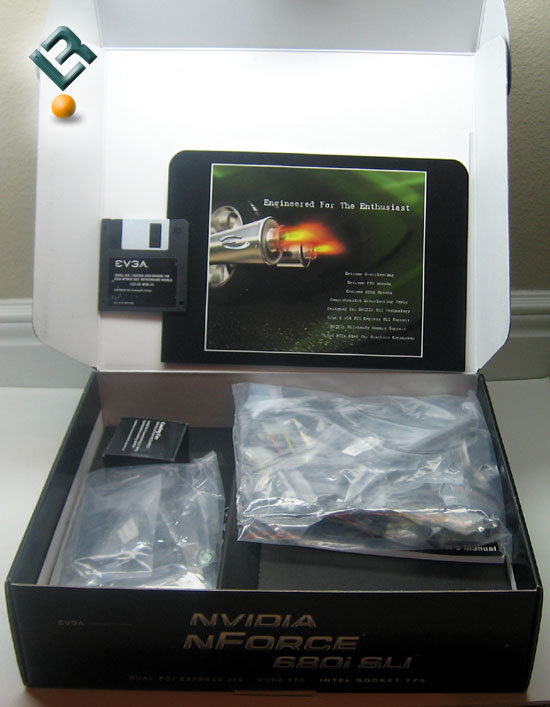
The EVGA 680i board comes with a pretty complete bundle. It has everything you need for your setup. The manual, quick start and driver floppy are located on the lid of the box. Everything else was wrapped in plastic, which was actually nice and helps to keep everything together.
In the bag, you get your IDE, floppy and SATA connectors. You also have a couple SATA power adaptors. In a smaller bag, you have your USB, firewire and Com port headers. The Northbridge fan comes unassembled and in a box. Not sure why you would NOT use it, but it is not hard to connect. Also in the box is your backplate for your case.
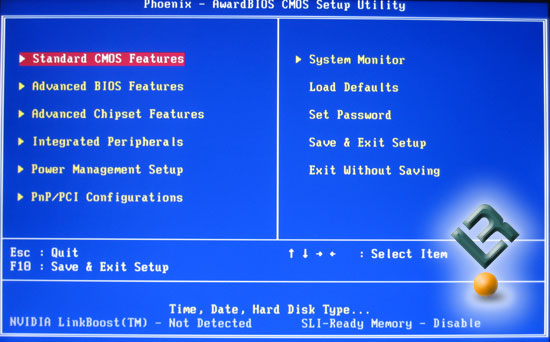
EVGA uses the AWARD bios, which has been a standard on the Nvidia 680i and 650i boards that we have looked at.
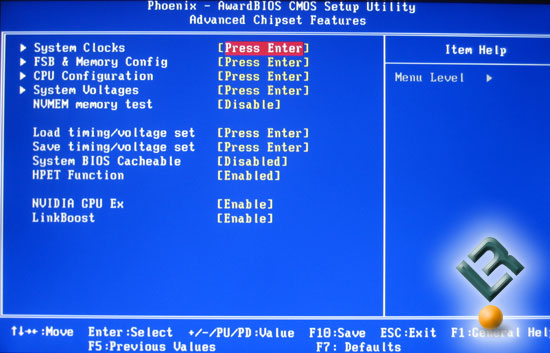
The Advanced Chipset page is where we will find most, if not all of the areas that we need to tweak and overclock this board. There are quite a few things to tinker with in the EVGA bios, which makes it very nice for those that like to constantly mess with and dial in their boards.
Let’s take just a little closer look…
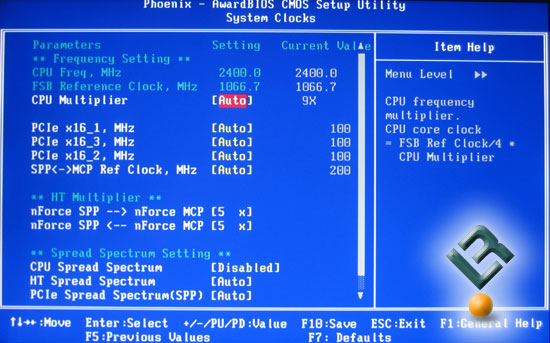
The System Clocks page is where we find our CPU multiplier, as well as settings for our PCIe cards, HT multipliers and Spread Spectrum settings. It is nice to have a CPU multiplier, as a few of the boards we have looked at recently do not have one.
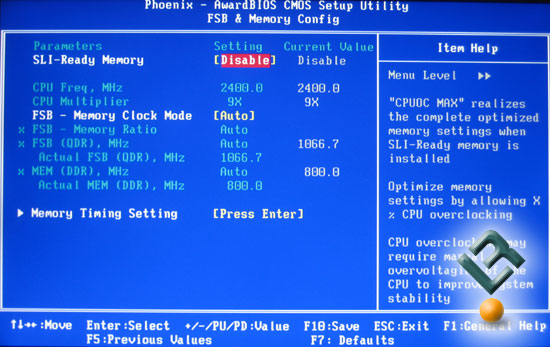
The FSB And Memory Config page is where we can set our DDR2 to run in SLI mode, and also…
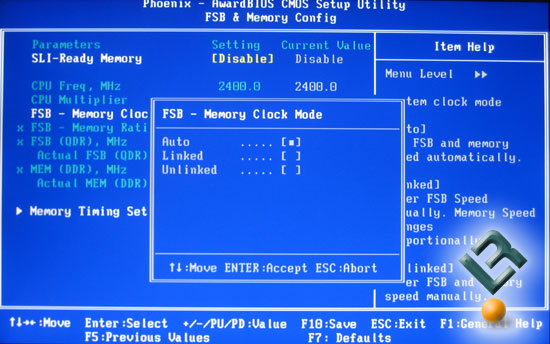
It is where we can set the DDR to run Linked, Unlinked or Auto, allowing us to run separate timings not related to the FSB speed. This has been a nice tweaking option for those with ram that may not be up to snuff with their CPU or for a number of other reasons that would call for independent settings.
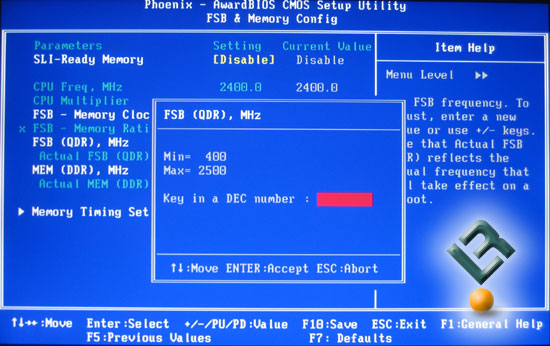
FSB settings go all the way to 2500 (625). This is nice!
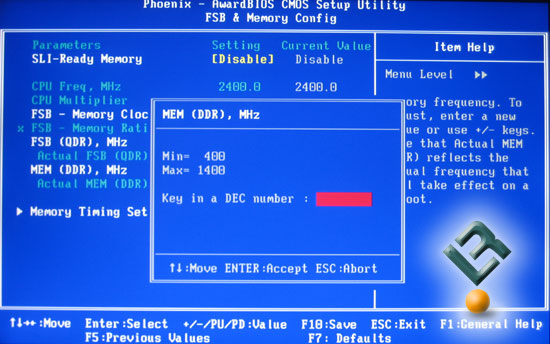
You ram can run at speeds up to 1400… way to go EVGA!
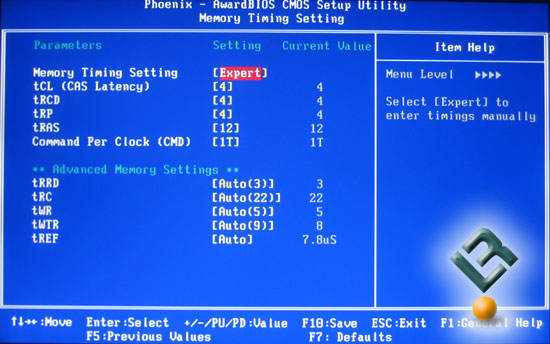
Our mem timings page may not be as thorough as we have seen on some boards in the past, but for most, these are more than enough settings to be happy with. Let’s look at our voltages!
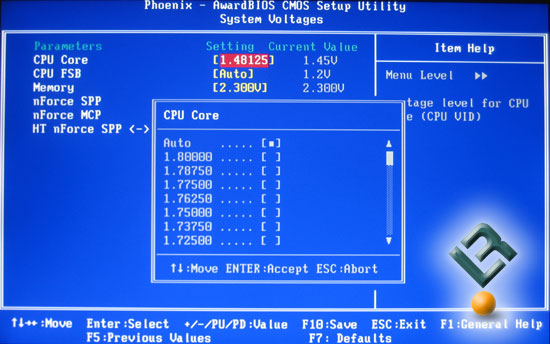
Vcore goes all the way to 1.8v, which is great!
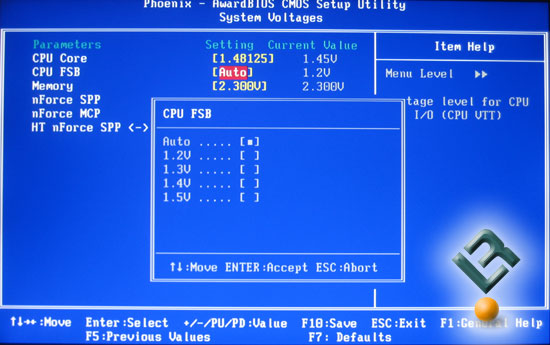
CPU FSB voltage goes up to 1.5v.
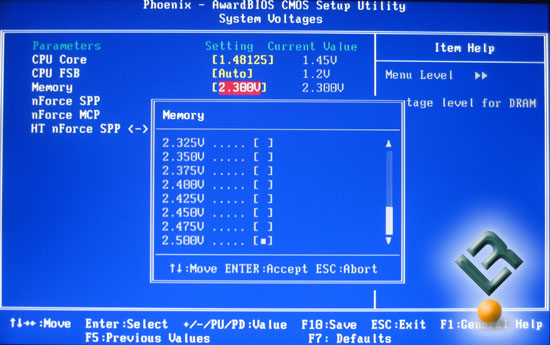
Vdimm has options up to 2.5v, which is nice to see.
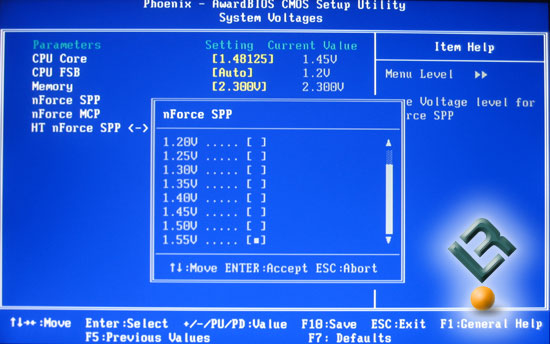
SPP voltage has up to 1.55v available.
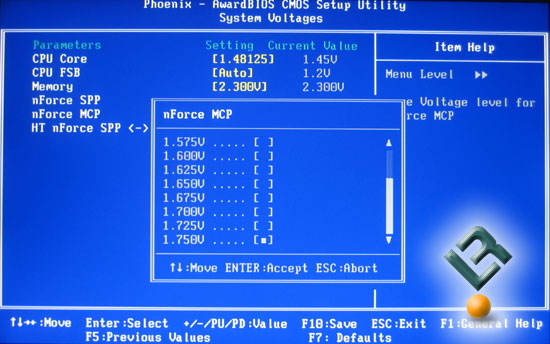
MCP goes up to 1.75v.
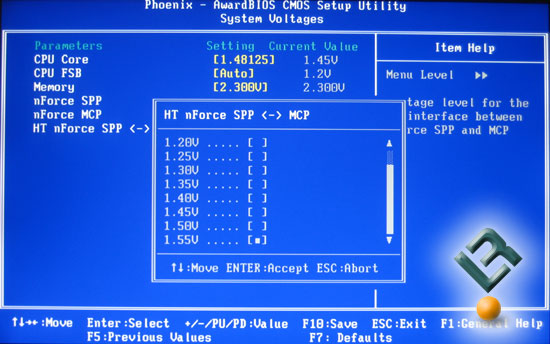
HT has options to 1.55v.
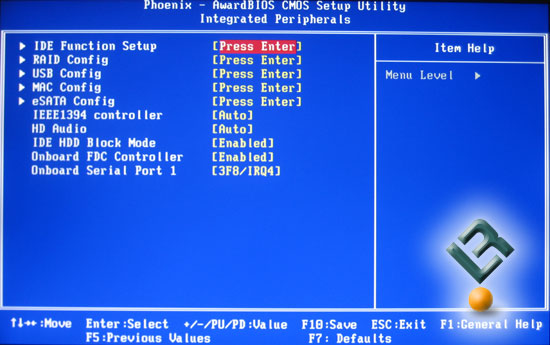
Not much interesting on the Integrated Peripherals page, but this is where you will set up most of your connected devices.
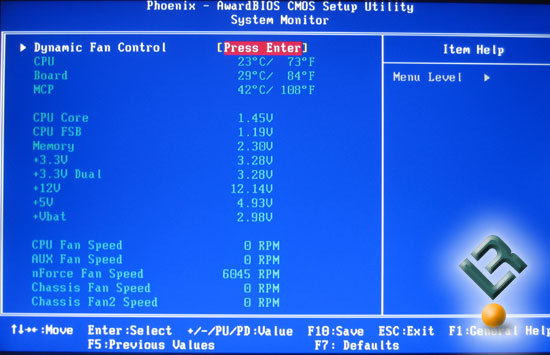
Our SystemMonitor page has a wealth of information for us, and is actually fairly thorough.
Alright, let’s move on!
Comments are closed.