ECS PN2 SLI2+ (680i SLI) Motherboard Review
Board Layout
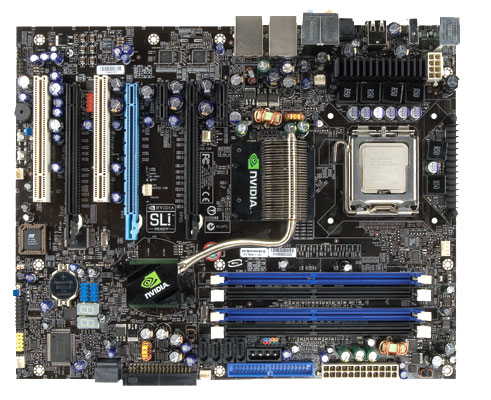
As you look at the board, you can see from first glance that the design is attractive and simple. The color scheme does not scream “LOOK AT ME,” but has a simple elegance to it using the blue and black scheme. As you look at the board, you can also see that there is a lot of stuff on the board, which makes for some tight fits that we will see as we look at each area of the board.
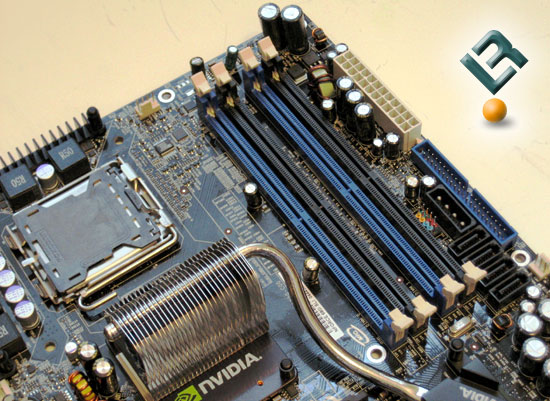
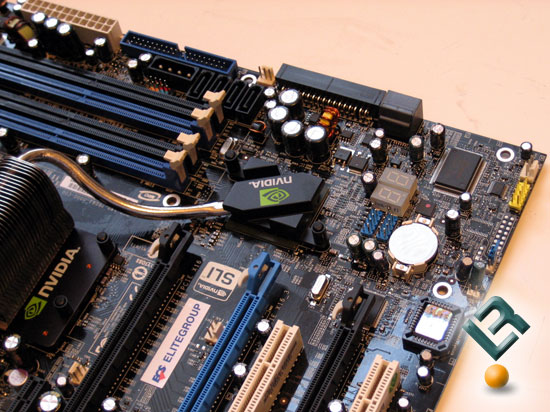
The top right of the board is where we find our Dimm slots. This board supports Dual-channel DDR2 memory architecture up to 8 GB, at speeds of DDR2 800/667/533/400. To the right of the dimm slots, we actually see quite a bit crammed in. You have your 24-pin power connector towards the top. An IDE connector is located just under that. To the left of the IDE connector is a 4-pin molex power connector, which adds stability to the board when running in an SLi configuration. Just under the 4-pin molex connector we find our four SATA connectors. These connectors are powered by the Nvidia chipset, and are SATAII compliant. They also support running RAID in 0, 1, 0+1, 5 and JBOD.
One other thing crammed in here, which is hardly visable in the pic above are the front panel connectors. Take a closer look…
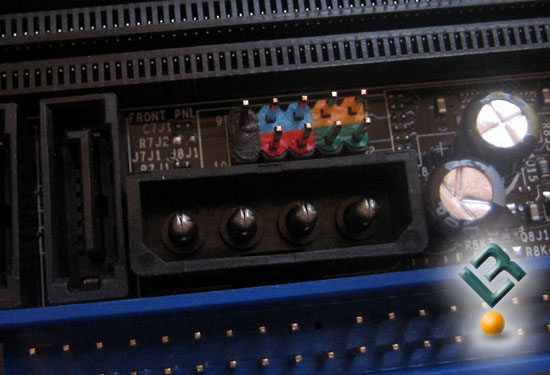
Yup, there they are. They are color coded, which is nice. But with all of these things located in this area of the board, I cannot help but think that this will be very tight and hard to work with; especially if you are using the 4-pin molex power connector and running SLi, while running 3 or 4 SATA drives.
The bottom right of the board gives us our first peek at the cooling for the north and south bridges. ECS has gone with a passive cooling setup for the southbridge, which seems just fine as it did not even get hot during our testing. The battery and bios are on this part of the board, as well as an assortment of IEEE1394 and USB headers. This area of the board actually houses a couple other very interesting things that ECS has included on this board. Let’s take a little closer look and see what we have.
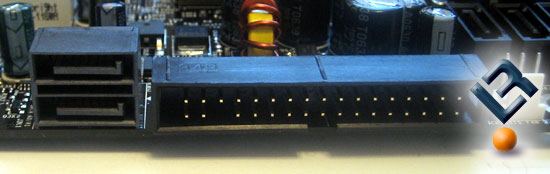
On the outer edge of the board, we have the floppy connector as well as two more SATA connectors, giving us a total of six SATA connectors on the board. This is a unique design, and to be honest, we will have to reserve judgment on the placement of these SATA connectors for a later time, after we have used the board and seen other’s results. To me, they look very fragile and easy to break once you have a SATA cable plugged in. We will have to see!
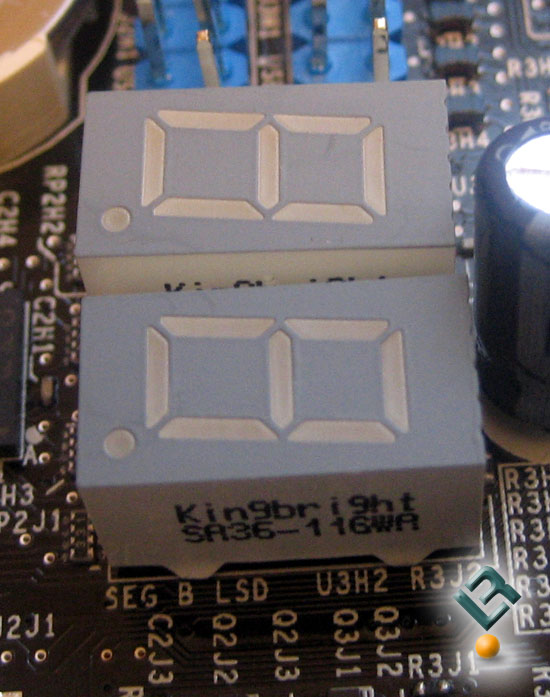
ECS also includes a diagnostic LED display to help with troubleshooting the board. This is a nice touch, and certainly a feature that one looks for in a higher end board.
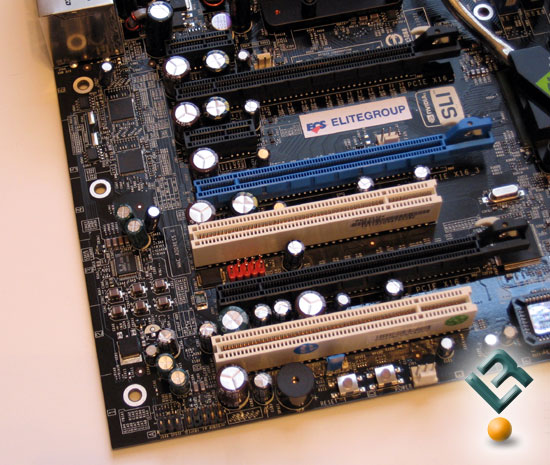
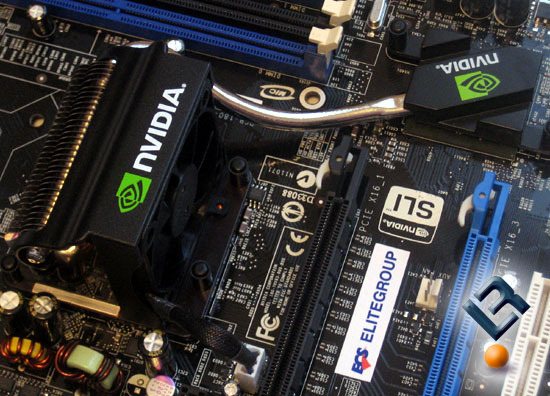
The bottom left of the board is where we will find our add-in card slots. The PN2 SLI2+ has a total of 7 expansion card slots for use. It includes two legacy pci slots, 2 x1 pci-e slots, and 3 x16 pci-e slots. The two black pci-e x16 slots are fully 16x speed slots. These two slots are also the ones to use for running SLi. The third (blue) x16 pci-e slot will run only at 8x speeds, and will allow for future add-on for your rig (like Physics cards).
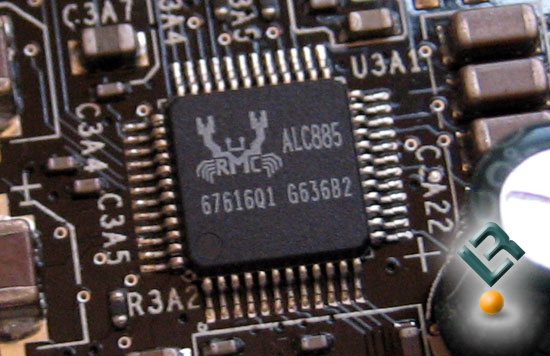
Sound on the PN2 SLI2+ is powered by the Realtek ALC885, and supports Intel 8-channel HD Audio.
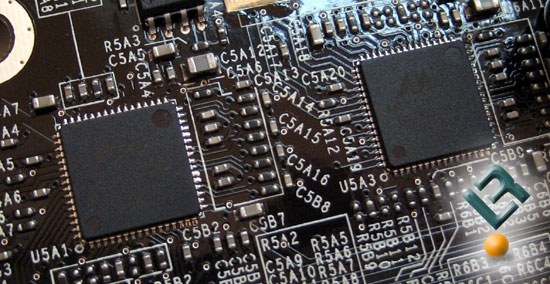
The dual lan is powered by two Marvell 88E1116 Gigabit Fast Ethernet chips.
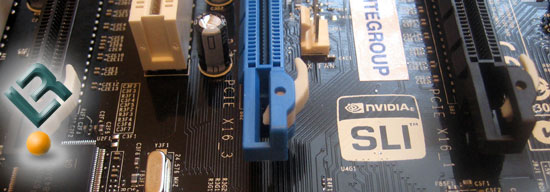
One thing that is a little irritating on ECS boards is their choice to continue to use pci-e clips that are just nearly impossible to get to once you have a card installed. There are certainly better choices out there, and we sure wish they would find their way to ECS boards!
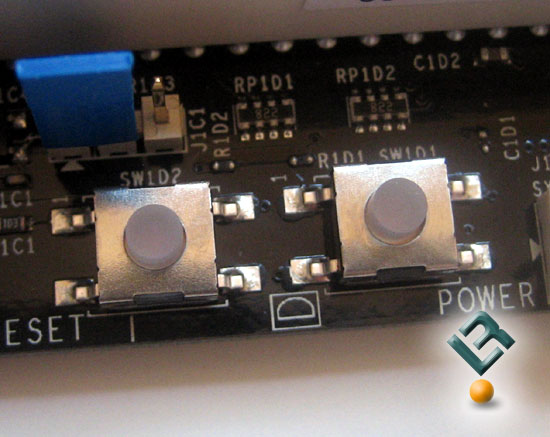
I absolutely love the addition of power and reset buttons on the board. This makes a reviewers (and many enthusiasts) life a little easier. They would be hard to get to if you full the bottom pci slot. A better position would have been to the bottom right edge of the board.
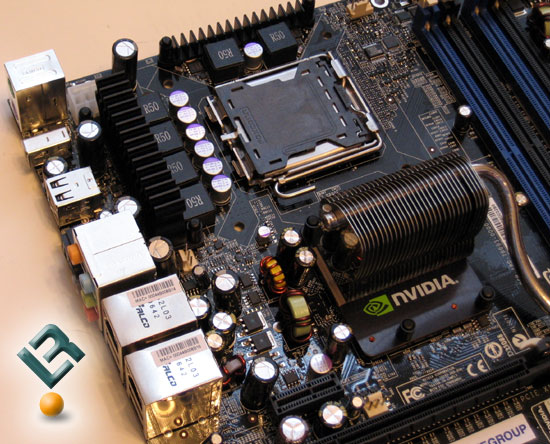
The top right of the board houses our CPU socket, which is nice and clear of any obstructions, or anything that would even come close to hindering the installation of a HSF or any other means of cooling. You can also see the 8-pin power connector tucked in right behind the I/O ports, just above the heatsink.
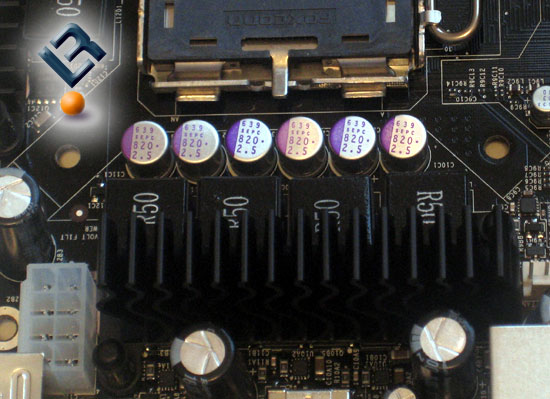
There are many heatsinks placed over the power area of the board. It is nice to know that ECS was thinking about cooling, which means to me “overclocking.” These did get warm when running the rig, but that is their purpose isn’t it?
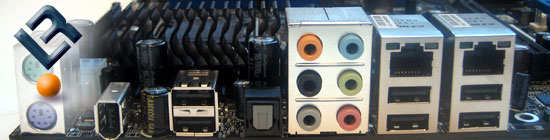
The back I/O port has your usual suspects, such as your ps2 mouse and keyboard connectors, your firewire and six USB ports and your audio jacks. We also have our dual gig-lan and SPDIF out for our audio. I actually expected to see an e-SATA port, as many of the new boards are coming with that option, but it is not there.
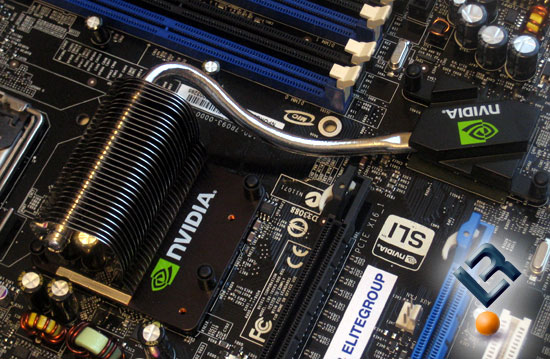
One last thing I would like to mention is the northbridge fan that ECS includes. I am not sure why it is not connected by default, but I am sure thankful that ECS includes this fan in the package, as these chipsets seem to produce some serious heat! The above pic shows – NO FAN FOR YOU! Below, we see the fan assembled.
Alright, that is all we need to look at here. Let’s take a look at the bundle and the bios.
Comments are closed.