Crucial Ballistix 8GB DDR3 2000MHz CL9 Memory Kit Review
Test system, installation
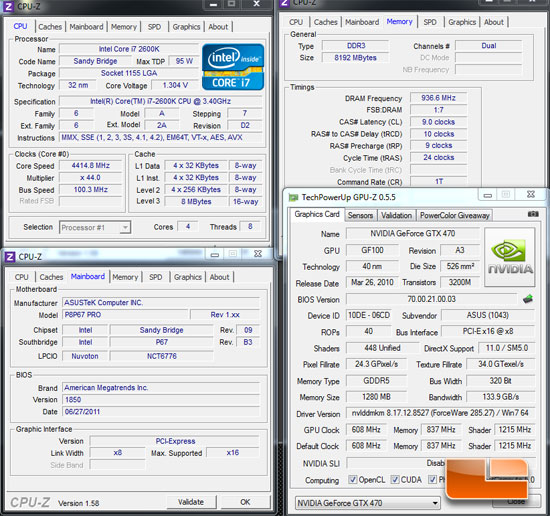
Before we look closer at this memory, here is the test system that we will be using for all memory reviews. All testing was done on a fresh install of Windows 7 Professional 64-bit running with the fewest existing processes as possible. Our memory test system contains an Intel Sandy Bridge i7 2600K CPU on the ASUS P8P67 Pro motherboard using the Intel P67 chipset. We used the latest beta BIOS version 1850 from ASUS because this version introduced some stability enhancements compared to the previous BIOS version. BIOS version 1850 has performed properly and has remained stable in all of our daily use and testing.

Our 2600K CPU is overclocked to 4.4GHz for all of our tests by raising the CPU multiplier to 44x from within the P8P67 Pros UEFI BIOS. Enhanced Intel SpeedStep Technology (EIST) is enabled, but Turbo Mode is disabled. All other CPU and chipset options are left at their default values unless indicated otherwise in the tests that follow.

Our reference memory kit is a very standard DDR3-1600 kit made by Kingston. It is the Kingston HyperX Genesis KHX1600C9AD3K2/4G, which runs at 1600MHz at 9-9-9-24 timings. Memory is run in dual channel mode throughout our testing.
|
Memory Test System |
||
|
Processor |
Intel Core i7 2600K (4.4GHz) |
Live pricing
|
|
Motherboard |
ASUS P8P67 Pro |
|
|
Memory |
Kingston HyperX KHX1600C9AD3K2/4G |
Live pricing
|
|
Video Card |
2x Nvidia GTX 470 in SLI |
Live pricing
|
|
Hard Drive |
96GB OCZ Vertex SSD |
Live pricing
|
|
Cooling |
Corsair H50 |
Live pricing
|
|
Power Supply |
1000W Kingwin MK-1000W |
Live pricing
|
|
Chassis |
LanCool Dragonlord PC-K60 |
Live pricing
|
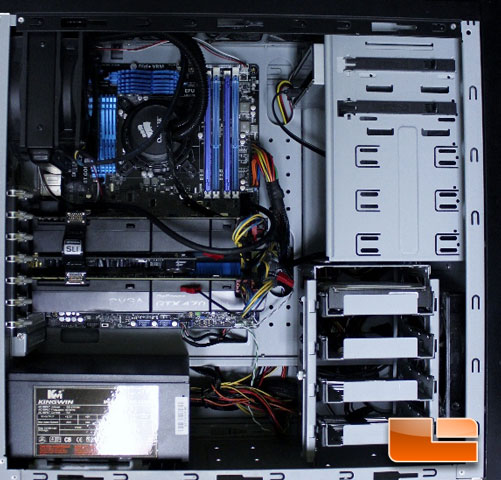
Upon first installing the BallistiX, our test system failed to post properly. Several reboots, power on/off cycles, and BIOS resets did not fix the problem either. At that point we were afraid our ASUS P8P67 Pro would not be able to properly configure this RAM for operation at its proper speed. However, after studying the ASUS manual, we discovered that ASUS recommends running dual channel RAM in slots A2 and B2. Lesson learned: read the manual.
Once the RAM was properly installed, the P8P67 Pro correctly detected the timings and 1.65V default voltage for our RAM when we selected the X.M.P. overclock settings. However, the BIOS limited the speed of the modules to DDR3-1866MHz by default instead of the 2000MHz speed at which these modules are designed to run. The ASUS manual warns us that this phenomenon is a function of the Sandy Bridge test system: Due to CPU behavior, DDR3-2000MHz memory module (sic) will run at DDR3 1866 MHz frequency. This is due to a limitation with Intels Sandy Bridge architecture. Since any significant BCLK overclocking is essentially impossible due to the integrated So, we immediately tried to force a speed of DDR3-2133MHz. Unfortunately, that speed setting was not stable, and the motherboard could not post properly. Thankfully, the ASUS MemOK functionality provided a quick solution. Simply holding down the MemOK button causes a sort of mini BIOS reset, forcing the RAM into a fail safe mode based on SPD values, and reboots the PC. After booting into Windows, we verified the RAM was running at its proper timings but was only running at the limited 1866MHz frequency.

We tried to force the Ballistix default 2000mhz memory speed by using the 1866MHz divider and bumping up the BCLK to 107MHz, however that resulted in the PC shutting off completely. So, while we were a bit disappointed to do so, we reverted back to the 1866MHz setting. In the back of our mind, we hoped there was some headroom for setting tighter timings, which we found to be true, as will be discussed in the Overclocking section later in this article. So, all of our tests will be performed at the 1866MHz setting at the default 9-11-9-27 timings.

Join us on the next page as we begin testing this kit.

Comments are closed.