Case Labs MAGNUM M8 Case Review
By
Options, options, options
As we said in the introduction the Case Labs MAGNUM M8 was built to have options and in fact has so many this is the first case review that required a separate page just to try and cover some of them. As crazy as it sound you could spend more time trying to figure out how you want to configure your case than actually picking out components to put in it! We STRONGLY encourage you to contact Case Labs before selecting your options because there are several that block a part of the case or are not compatible with other ones. While we are going to highlight a few of these options this list is by no means all inclusive, for the complete list visit Case Labs directly.
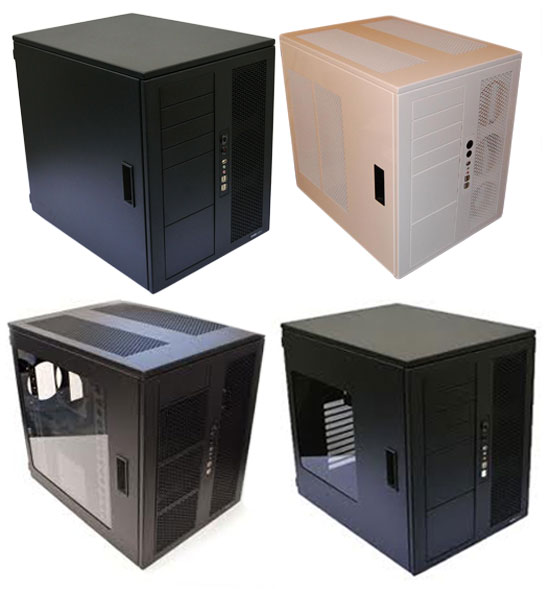
This image shows several of the options for the MAGNUM M8 exterior. Starting with the door the default is the double vented vertical panel shown on the white case top right, but you can choose a solid door (top Left) as a no charge option or pick the standard (bottom right, $15.00) or XL (bottom left, $20.00) window option. If you choose a windowed door you also can pick one of six colors for the window including clear.
The top of the case comes with the standard dual ventilated top (bottom left) or you can select a solid top for no additional charge. If you want even more room on the top of your case you can select a 64mm high ($25.00) or 85mm high ($35.00) extended top in either ventilated or solid versions. The extended top gives you enough room for a monster radiator, like a XSPC RX360 at 60mm, while using push / pull fans and still keep everything inside the case for a really clean look.
The front left side of the MAGNUM M8, or the Flex Bay as Case Labs calls it, comes with solid panels standard or you can order ventilated single or triple panels. The triple slot panels support mounting of a 120mm fan and are further upgradeable by mounting a 4 drive hard drive cage onto the bracket if you want your disks on that side of the case. When ordering the case you can actually select the default HDD cage location on the right or pick a Flex Bay mount for no additional charge. If you utilized all of the Flex Bay mounts and PSU side mounts for drive cages you would be able to install an amazing 24 hard drives.
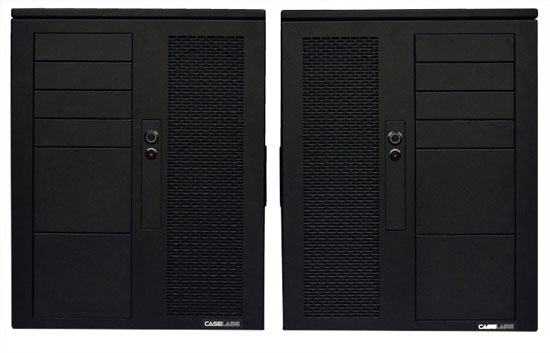
Another interesting option is the ability to order the case reversed ($20.00) for those that want the motherboard on the right side with the GPU’s at the top of the case. This also switches the Flex Bay to the other side of the case.
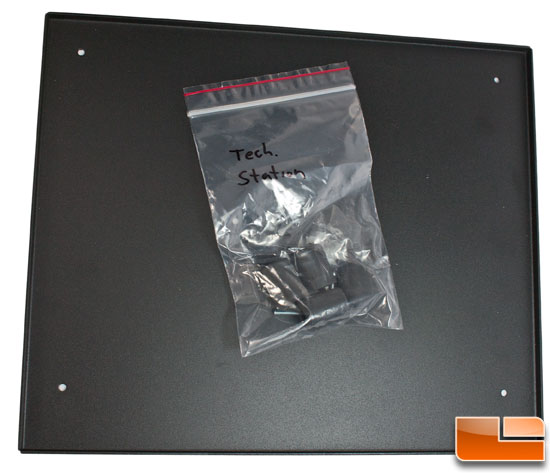
Case Labs included this optional tray and long rubber feet that you can attach to the back of the removable motherboard tray to turn it into a tech station. This is a standard feature on the TH10 and MH10 but can be added to the other cases when you order. If you are looking to build your system and test it before you install everything into your case this is pretty cool. If you do not want to use the feet you can just mount the plate on the back of the tray to cover up the processor hole for a cleaner PSU side look.
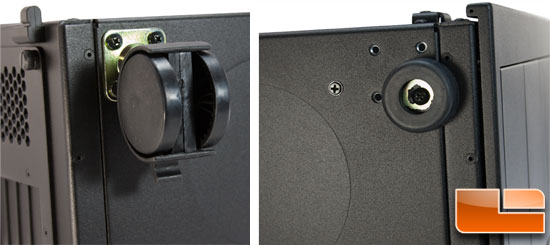
Moving back to the bottom of the case and those four screw holes provides you with two options. You can either use the standard rubber feet that come with the M8 or you can opt for the heavy duty caster kit ($12.95) like we received on our sample. If you are going to place the MAGNUM M8 on the ground full of heavy water cooling gear and dual PSU’s, these very smooth casters sure make it easy to move your case around. This is one option that we think is a must have!
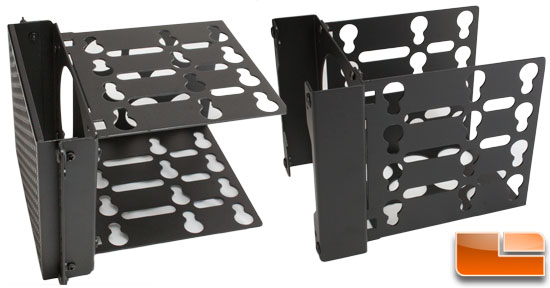
The cage on the left is the optional Flex Bay HDD cage with the one on the right the default version that mounts on the PSU side of the case . Due to the size difference between the two sides of the MAGNUM M8 the cage orientation changes from vertical on the PSU side to horizontal for the Flex Bay mounted on the motherboard side. Both support a 120mm fan mounted between the case and the HDD’s.
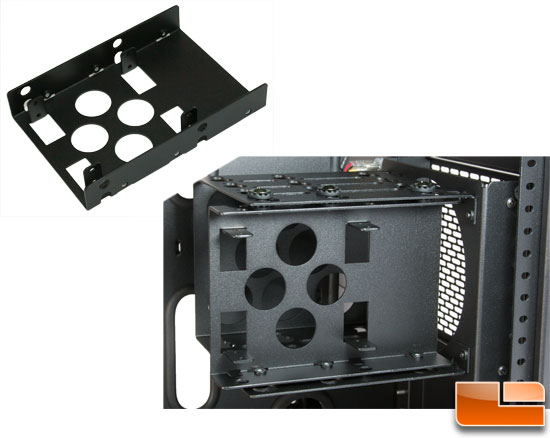
For those that would rather go the SSD route, Case Labs offers the optional SSD tray ($7.95). This tray supports a pair of SSD’s stacked and simply mounts in one of the four slots of a HDD cage. This gives each HDD cage the ability to hold 8 SSD’s for a potential total of 48 SSD’s if you are so inclined to fill the case.
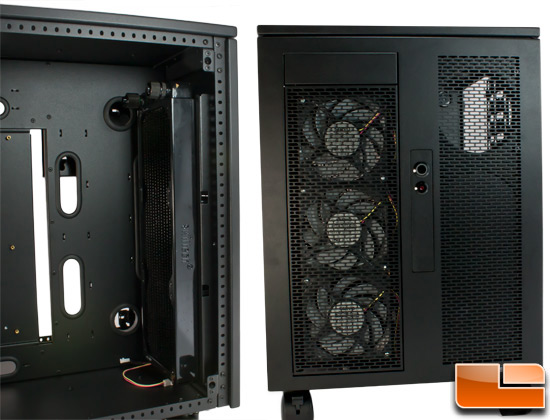
What do you do if your MAGNUM M8 is under a desk and you want to have a front mounted radiator on the intake? Case Labs thought of that too by creating a 360mm Flex Bay Radiator Mount ($34.95) that allows you to mount a vertical 360mm radiator in the front of the case. These also come in 120mm and 240mm versions so you don’t chew up all your 5.25″ bays as you can see from the shot above that the radiator ends block the top 5.25″ port from being used.

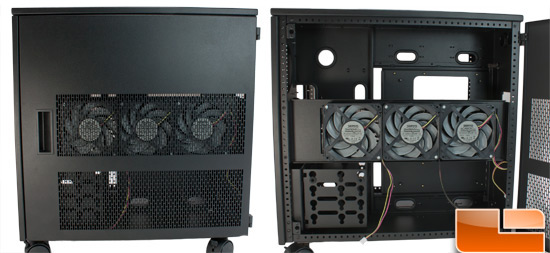
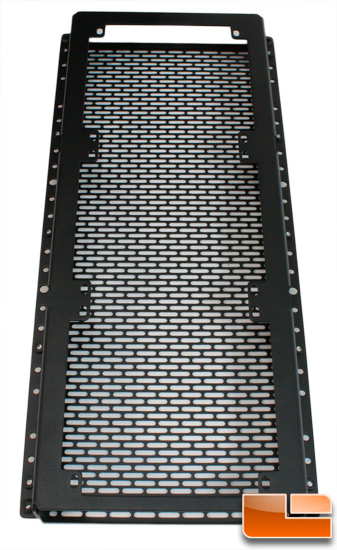
If you find there still isn’t enough places to mount your 360 radiator (or just 3 fans for increased airflow), you can add on the 360 Radiator Side Mount ($19.95). Be aware you can only use one of these on the MAGNUM M8 as the bottom door latch and the single PSU you would install blocks the lower vent. One improvement we thought of for this door might be for the vent mesh to just run from top to bottom the size of the XL window so you can position the bracket where it works best instead of trying to line it up with one of these horizontal slots.
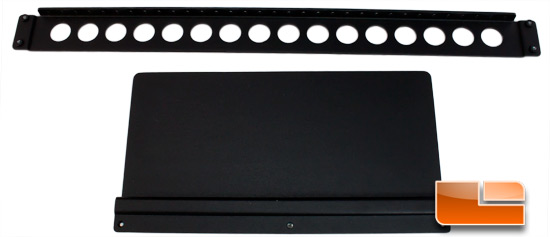
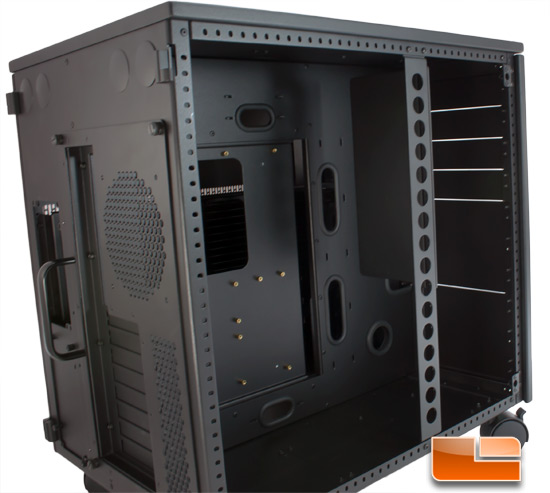
The last option Jim included with our Case Labs MAGNUM M8 sample was a Vertical Accessory Mount ($12.95) and a Large Attachment Plate with .75″ offset ($11.95). These do not have to be used together but to highlight how modular the Case Labs MAGNUM M8 is we combined them and mounted them on the motherboard side as a possible place to mount a tube reservoir, multi-fan power distribution block, or a few additional SSD drives as possible options. The Attachment plate comes in both small and large sizes with or without the .75″ offset. They also have plates with a 120mm hole to place additional fans just about anywhere in this case. While we are showing the vertical mount in this configuration, they also have a horizontal but they both cannot be used on the same side at the same time for obvious reasons.
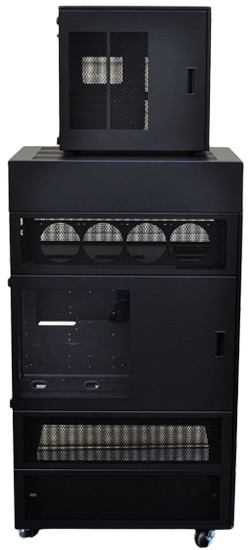
If you need more space for your MAGNUM M8 or any of their other cases they do have optional pedestal base in addition to the optional 85mm top. If that still doesn’t meet your needs you can grab a TX10 fully loaded, pictured here with the M8 on top. We would love to know what you are building if you need to go that extreme.

Comments are closed.