Building A Whitebox Notebook: Part 3
Graphics Card Driver Tweaking
The ASUS M6N series notebooks are powered by ATI Mobility 9600/9700 visual processing unit (VPU). These are very capable VPU’s and can even handle the latest gaming titles such as DOOM 3 as we have showed previously in our DOOM 3 Notebook article. To help get the most performance out of our ATI Mobility graphics card we found that using the official and correct driver from ASUS was not the best driver to use. We found that by modifying a desktop ATI CATALYST driver we could gain a couple frames per second or more depending on the benchmark.
If you are wondering how we installed CATALYST drivers on our notebook you will need to download a simple program called DH Mod tool V2.0b. Without the mod program, when you try to install a CATALYST driver onto a notebook it will give you an error prompt saying INF not found. That’s where the mod tool comes in. Simply run the mod tool and point it to the install files and it will modify them to install on your notebook.
|
|
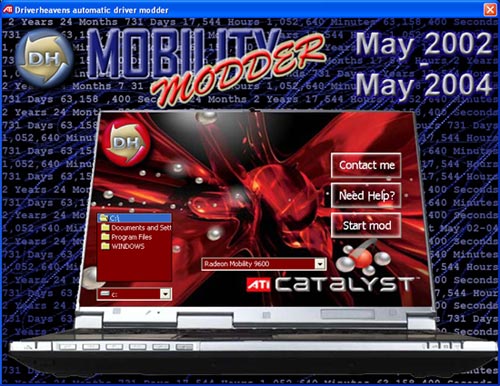
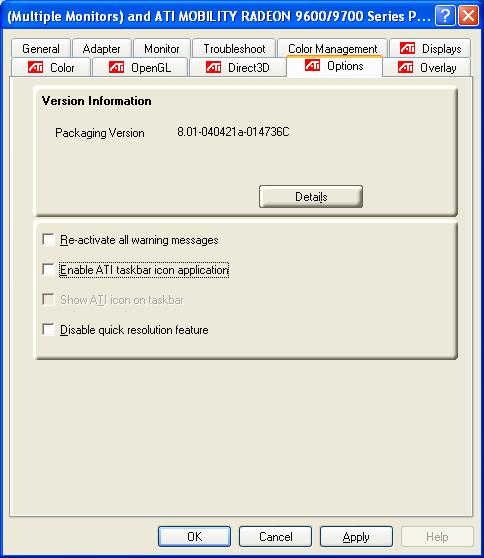
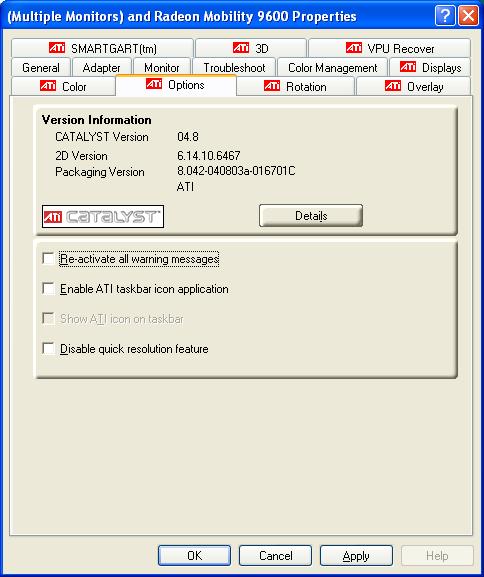
The image above is what the Mobility Modder looks like in action. The below screen captures show the video card properties with the original ASUS driver on the left and the recently released ATI CATALYST 4.8 driver on the right after we installed them via the mod tool. We do not advise using CATALYST 4.9 Beta since it doesn’t support wide screen resolutions on our test ASUS M6N notebook. Always try to stick to the WHQL certified drivers for your notebook.
|
|
|
Making Sure You Have Full Power
What many consumers don’t understand is that the lower clocked Intel Pentium-M processor is a very well designed mobile processor. Intel launched the Pentium-M processor with something called Enhanced Intel SpeedStep technology. This technology helps to optimize application performance/power consumption, and Deeper Sleep Alert State, a dynamic power management mode, adjusts voltage during brief periods of inactivity even between keystrokes for longer battery life. While this technology is great for the business traveler and the average consumer the power user may want to turn this technology off and run his notebook at full speed.
|
|
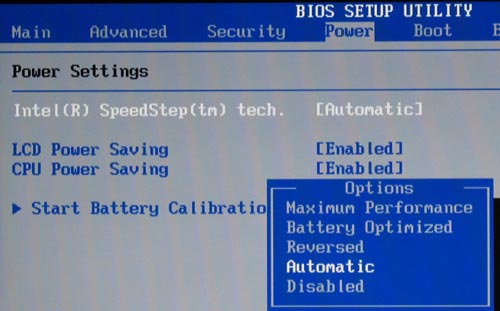
To adjust the Intel SpeedStep technology menu you will have to enter the BIOS (hit F2) when your system it booting. Once in the BIOS you just need to go to the “Power” tab and the first setting you will see is “Intel SpeedStep Tech.” The default setting for SpeedStep is “Automatic”, which will allow for the CPU speed to change depending on usage. For someone who uses their notebook for gaming they may want to change it to disabled so their processor is running at its rated frequency. If you are looking for getting the longest battery life then by all means leave it on auto!
|
|
|

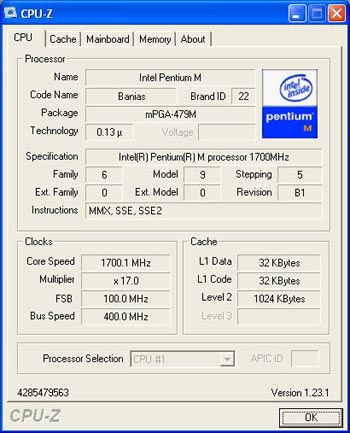
All Centrino notebooks are able to save power (battery life) by changing the CPU speed. It does this by changing the CPU multiplier and/or the Front Side Bus (FSB) of the Pentium-M processor. Not only is this technology very useful, it is awesome for the consumer. For users who travel and do office work on the go, SpeedStep technology is the only way to go. Leave it on auto and it will adjust to what you are doing. With CPU-Z running you can see the processor speed change when you are typing and slow down when you are not. This technology is a huge leap forward for the mobile platform user and may even be something we see on future desktop processors with its success in the mobile market.
If you don’t like messing with BIOS settings, or want to control the power setting from the Windows desktop keep reading!
Comments are closed.