BitFenix Shinobi XL Full Tower Case Review
Installing the System
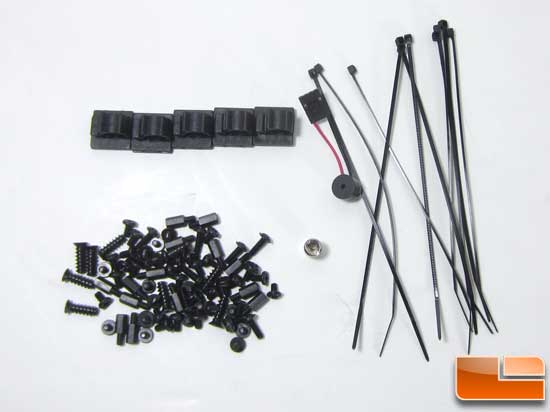
BitFenix provides a nice range of mounting accessories. Stand-off installer tool, mother board stand-offs, screws, wire ties, and stick-on wire clamps.
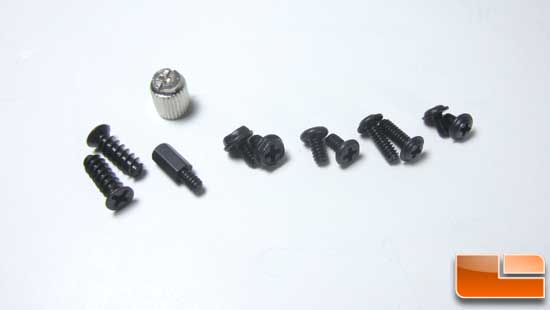
There are 5 different types of screws included for fans, motherboard hold down, power supply, optical drives, and HDD screws. Also included is a nice tool that slips over the motherboard stand-off for tightening them.
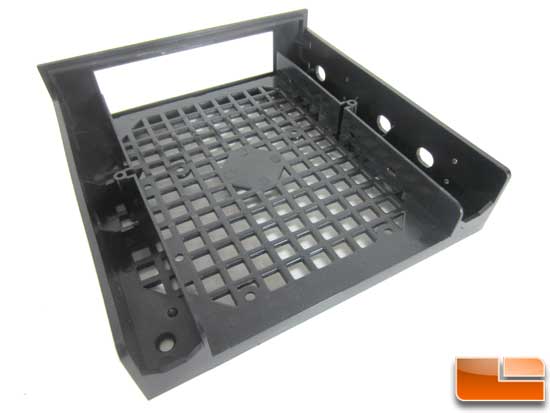
Bifenix also includes a 5.25 to 2.5/3.5 bay adaptor. This has a removable 3.5 faceplate that is also coated in the SofTouch material. The hard drive mounting holes are in the bottom of the tray.
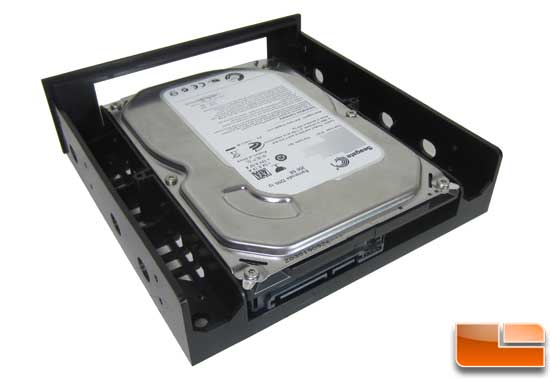
If you remove the main drive cage from the case to make room for water cooling you can mount your hard drive to the adaptor and mount it in a 5.25 bay.
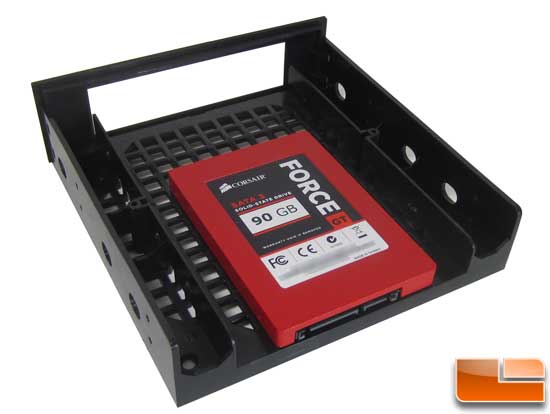
Same for a 2.5 drive.
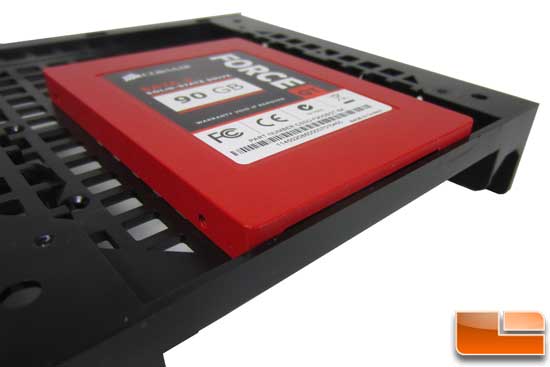
The way the mounting pattern is in the tray it looks like you could mount both a 3.5 and 2.5 drives. I tried it, you would have to break out the Dremel to cut some of the tray away. It would have been nice to have the ability to mount both.
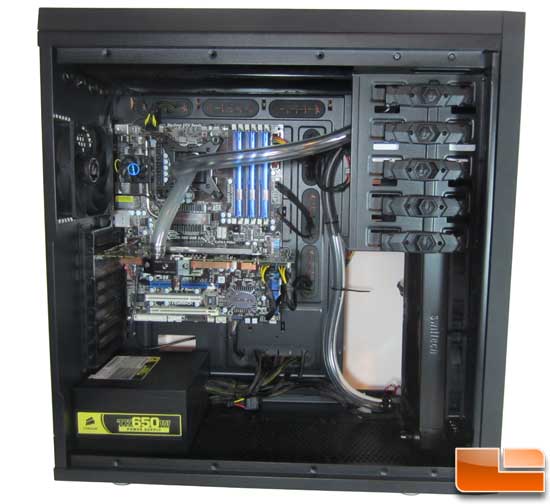
After some trying different radiator placements I settled in on a triple radiator in the top and the Swiftech H20-220 Edge HD kit up front. I wasnt able to fully finish the loop as I need some different fittings, and I was out of tubing. I have enough built to show there is tons of room in the Shinobi XL.
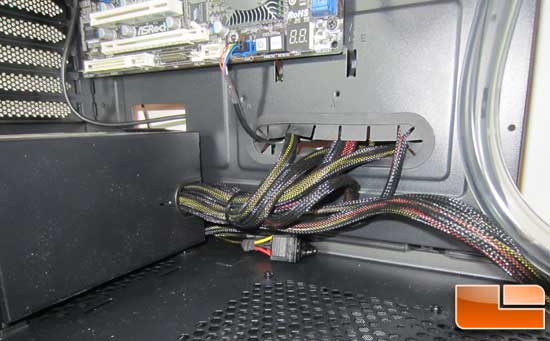
At the bottom of the case there is space to tuck wires in between the case and the power supply body. This was handy as the power supply I have for this system is not modular. Also you can see the USB2.0 pigtail reaches from the wire routing hole up to the header on the motherboard easily. The USB3.0 plug is wire tied to a tie point on the other side.
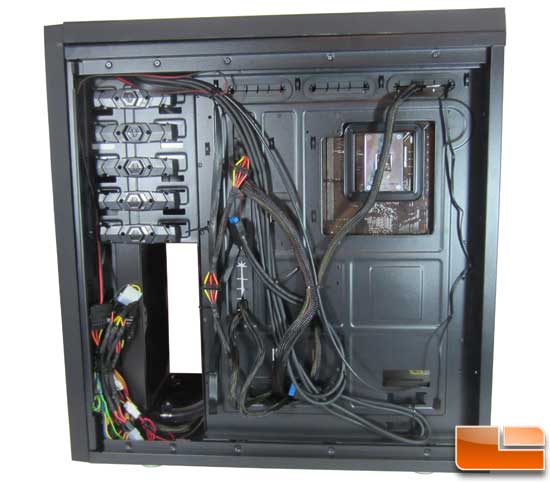
Moving around to the back of the case we can see the rest of the wiring. There was ample room for all my wiring. Even with the non-modular power supply I did not have to hunt for a place to stash wires for a clean look.
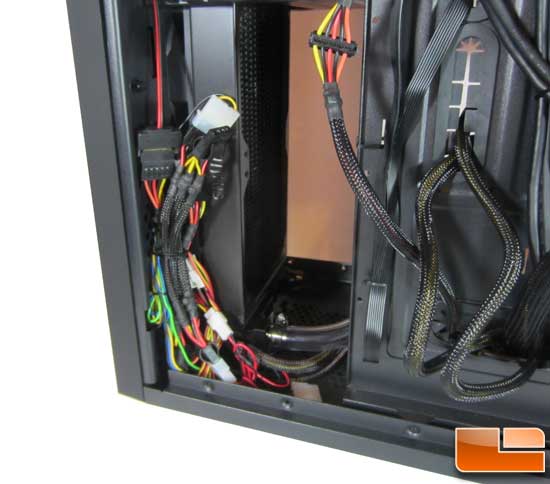
I was able to hide a bulk of the wiring between the radiator and the side panel and wire tied it to the front grill to keep it out of sight.
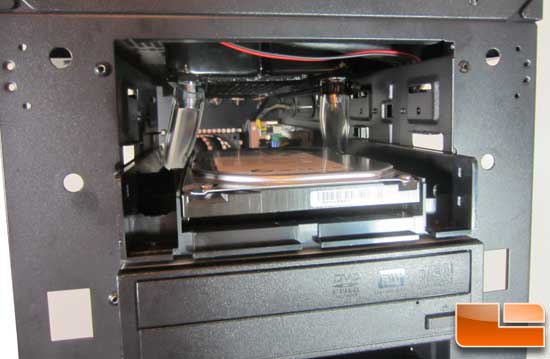
In the 5.25 bay area, I found that I needed to get some different fittings to help clear the drives better. This also shows how quick the drive bay space gets eaten up. I have the radiator mounted straight to the case frame. With the straight fittings I have it starts getting tight.
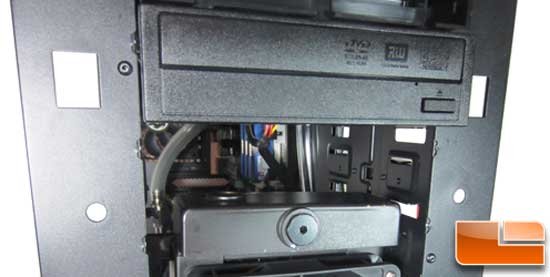
Under the optical drive there is some space, but not enough to allow for a drive to be installed here. If I was using a standard dual 120 radiator I wouldnt have the clearance issues. Which at some point in the near future, the HD Edge kit will get pulled out and replaced with a standard dual radiator. This will allow for drives to drop down, better clearance to the top triple radiator for push/pull configuration. It is impressive to get all that I have in the Shinobi XL with no modding what so ever, and the best part it was easy.

Comments are closed.