ASUS Striker II NSE Motherboard Review
Board Layout
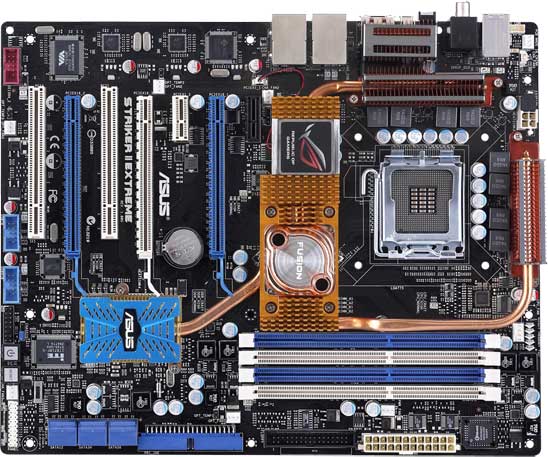
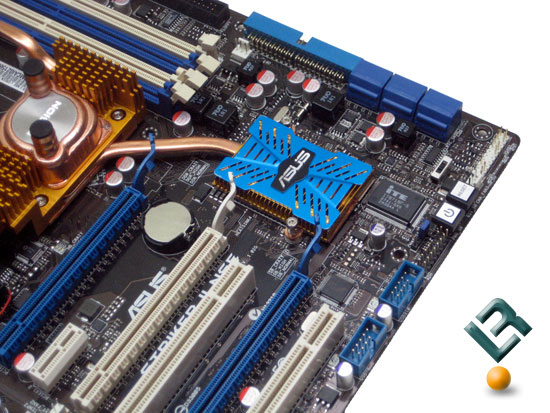
The Asus Striker II NSE sports an attractive black PCB and very little color compared to many other boards. The black color lends to the overall classy feel of the board. With the first glance at the board, it is hard to miss the Fusion block system that cools the board. Asus has decided that hard core enthusiasts would like to cool off the North Bridge using their water cooling setups, and provided an easy way to do that by placing a water block on the North Bridge. We will take a little closer look at this…
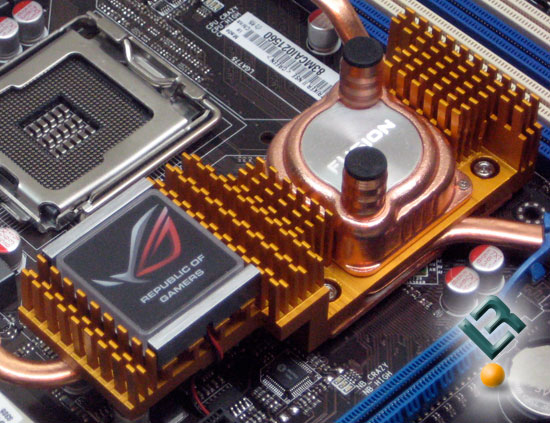
The water block that covers the north bridge has quite the mass to it! The block extends to the left and has The Republic of Gamers Logo that lights up when the board is on. The board is all set for 3/8 connections, and the bundle includes adaptors for those using 1/2 and 10mm fittings. It is cool for Asus to include the adaptors!
The South Bridge is covered by an unusually designed heatsink that is passively cooled.
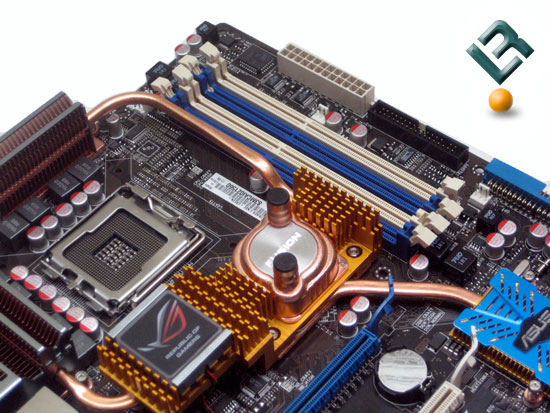
The top right is where most of the fusion system is located. Right next to it are the four dimm slots. The Asus Striker II NSE supports up to 8GB of DDR3 memory at speeds of 1600/1333/800DDR in dual channel configuration. 1600DDR is at overclocked settings.
We also have the 24pin power connector, as well as the floppy connector.
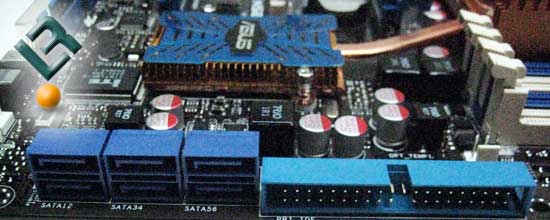
The bottom right of the board is where the lone IDE connector is located. We also have the six onboard SATA connectors here. The IDE and onboard SATA connectors are all powered by the south bridge. Take a closer look…
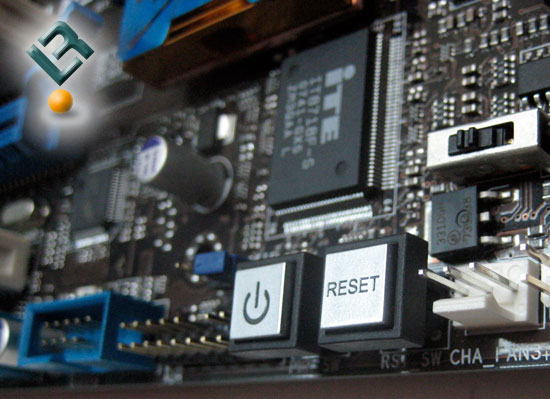
One of the features I love the most is these two buttons. It is great having a reset and power button right on the board. It makes the test bench a lot easier to use. The switch that you see just above these two buttons is also very cool! When switched on, it allows you to clear the CMOS from the button that we will see on the back I/O ports. This is a great feature for those that do a lot of tweaking!
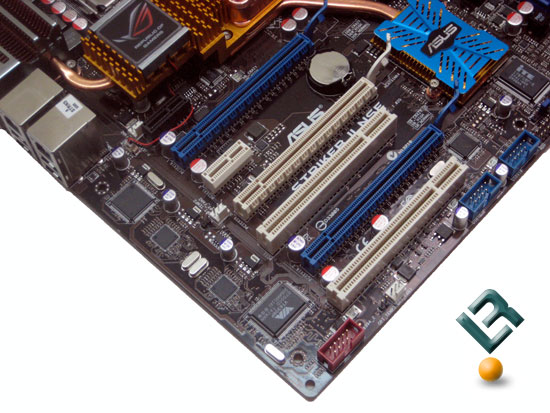
At the bottom left of the board, we see two legacy PCI slots, two x1 PCI-E slots, and three x16 PCI-E slots. The two blue x16 slots are PCI-E 2.0 compatible and support SLI. The white PCI-E slot is NOT 2.0 compatible, but does run at x16 speeds. All three together can be used for SLI- three way graphics. The top x1 slot is where you will insert the add-on audio card that is included with the board, which you can see in the next picture.
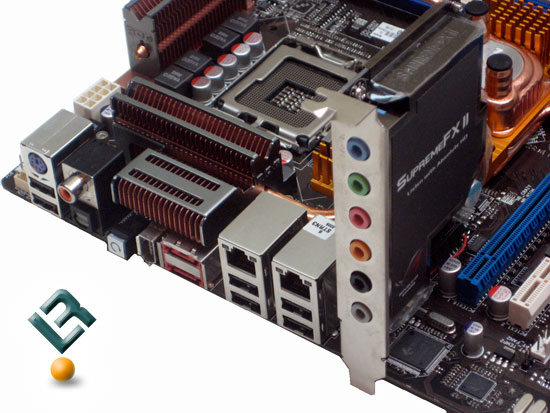
The SupremeFX II audio card sports the ADI 1988B chip and provides 8-channel Hi-Def audio.
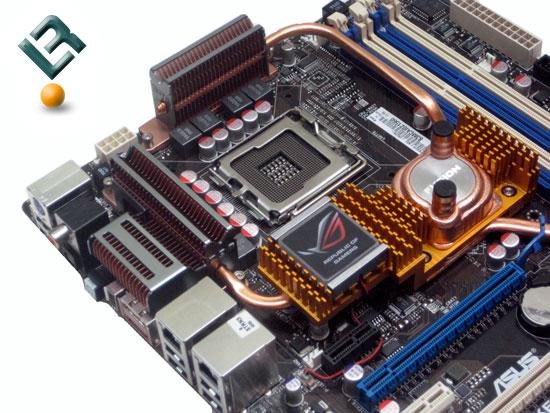
The top left of the board gives us another shot of the Fusion system on the board. The CPU socket is clear of any obstacles, so fitting your favorite air or water cooler should pose no problem at all. The 8-pin 12v power connector is located here at the top of the board, and is also out of the way.
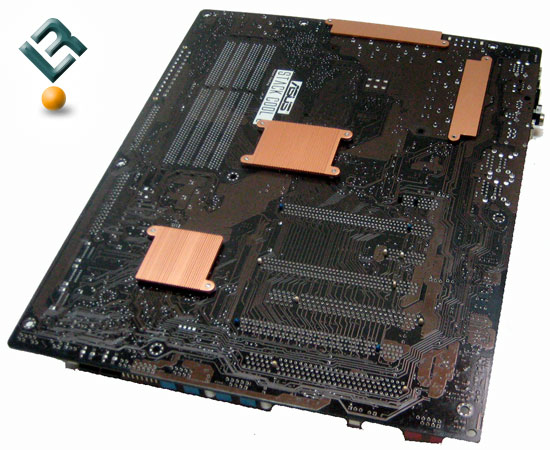
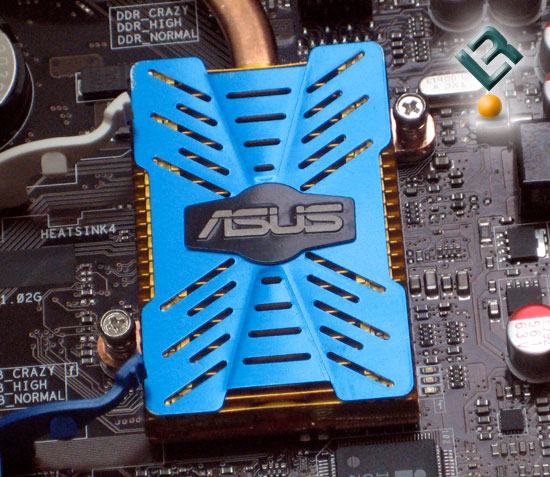
On th bottom of the board we see a few heatsinks that are part of the Asus Stack Cool system. Asus has put a lot of perks into this board on the cooling side!
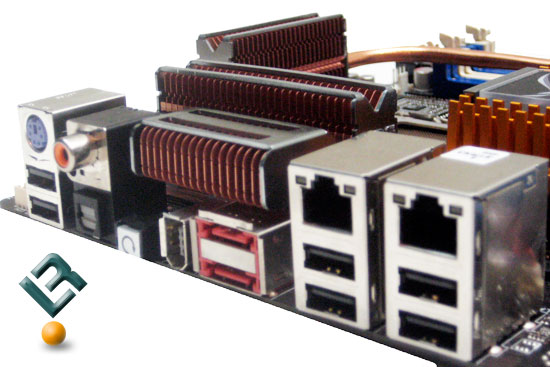
The back I/O port includes one ps/2 keyboard connector, a coax and optical S/PDIF out, two eSATA ports, a firewire port, six USB ports, and the Clear CMOS button that we mentioned earlier. Remember, in order to use this button, you have to have the switch on the board positioned correctly.
Comments are closed.