Asrock AM2V890-VSTA & MSI K9A Platinum Motherboards
A Closer Look: The Asrock AM2V890-VSTA Layout
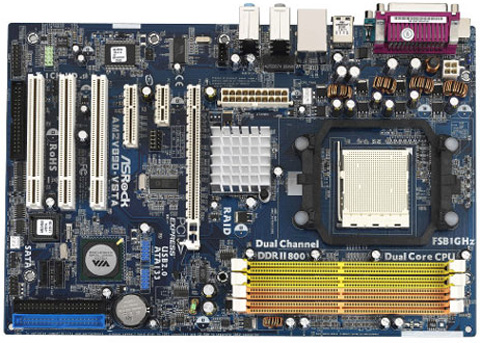
Once again, as you look at this board you can see that it is a smaller board that we are dealing with here. It actually measures 12″ x 8″, so it is a good bit smaller than the MSI that we are also looking at in this review. One look also lets you know that this board is capable of running only one PCIe card, so Crossfire or SLI are not going to be available. The board does have a nice clean layout, with only a thing or two that were considered minor annoyances. Let’s take a closer look.
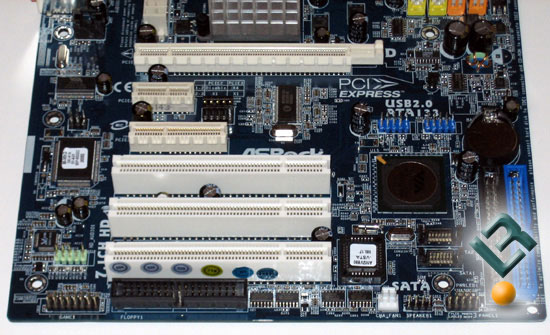
On the bottom-left half of the board, we see our assortment of pci and PCIe slots. We have one x16, one x4 and one x1 slot for the PCIe bus, and three pci slots to use. Right underneath the bottom pci slot, we have our floppy connector. I am not a big fan of this position on the board, but I also no longer use a floppy drive, so it is not a big deal to me. Those that do use floppies will likely find this positioning to be a minor inconvenience at best. Also, on this side of the board we see our Realtek ALC888 sound chip. This chip is capable of 7.1 channel sound and High Definition Audio. This is a pretty nice sound solution for a budget board. Also in this area of the board we have the VIA PHY VT6103, which supplies lan speeds of 10/100 on the ethernet port. Not using a gigbit ethernet chip is one way to cut some costs on a budget board, and is one are that most people looking at this type of board will not mind at all.
On the bottom right side of the board we see another minor inconvenience on this board is that placement of the USB headers. They are right in the middle of the board, which can make it rather tough for cable management. Underneath the USB headers is our southbridge, which is interesting to note that there is no cooling, either active or passive on it. As a note, it did not seem to get very warm during our testing. towards the bottom part of this side of the board we have our SATA connectors. These connections are SATA I compliant, and support RAID (RAID 0, RAID 1, JBOD) and Hot Plug functions. Next to the SATA connectors are the two IDE connectors, which are placed pretty good toward the edge of the board.
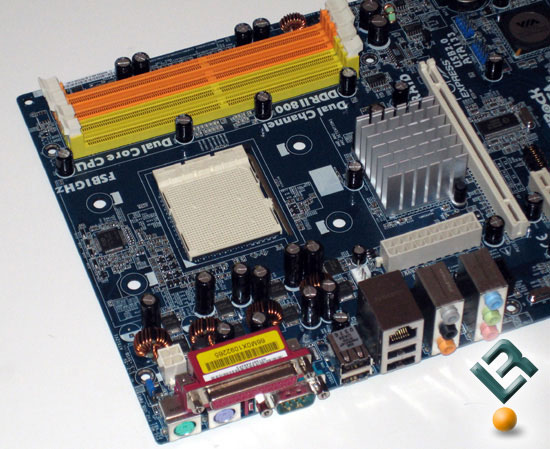
On the top-left part of the board we first off see out I/O ports, which include your typical ps/2 mouse and keyboard, legacy serial and parallel connections, four USB ports, a lan port, and your audio jacks. Just to the left of the I/O ports at the top we have our 4-pin power connection, which is a wonderful placement to keep things tidey in the box. Towards the bottom of the I/O ports, we see the 20-pin power connector. Yes, I said that right, this board only has a 20-pin power connection, which will be nice for those that have not upgraded their power supply to a 24-pin model yet. The placement of this 20-pin power connector is absolutely horrendous. The power connection belongs on the edge of the board to keep that thick wiring cable out of the way.
The last thing I want to point out is the ram slots. As you can see, they are on the far right of the board. These slots support Dual Channel DDRII 800/667/533 memory modules with a maximum capacity of 8GB.

The bundle is nothing terribly impressive. Just enough to get you up and running if you have all typical hardware to install.
That is really all that is interesting on this board, let’s move it along!
Comments are closed.