Amped Wireless REC15A 802.11ac Wi-Fi Range Extender Review
Amped REC15A: Out of the Box & Setup

Amped Wireless ships the REC15A Extender with the removable High-Gain Dual-Band Antenna, a Setup Guide, and a CD that contains the Users Guide and Wi-Fi Analytics Tools. Even though the REC15A has one wired port, there is no Ethernet cable included in the box.
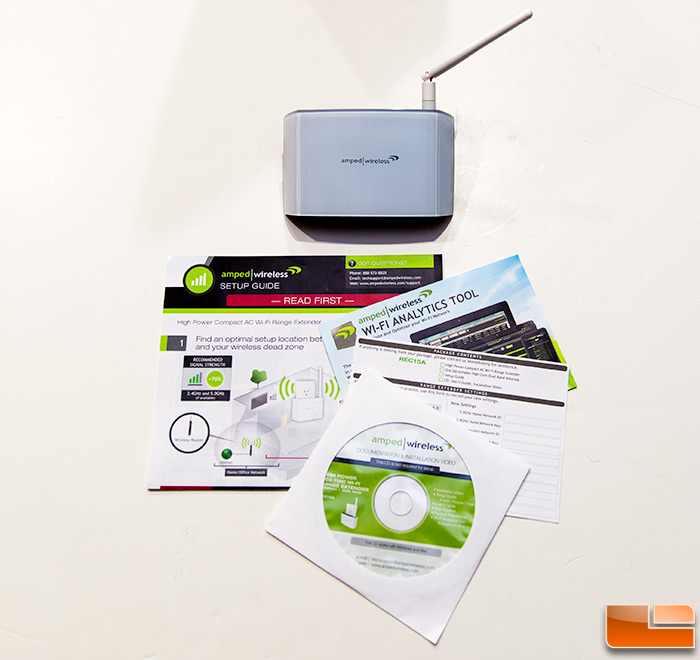 Besides the Ethernet port on the bottom, the Amped REC15A is a device that is the size of a small mobile phone. Without the antenna attached, the unit measures in at just under 5-inches wide, 3-inches tall, and 1.5-inches thick.
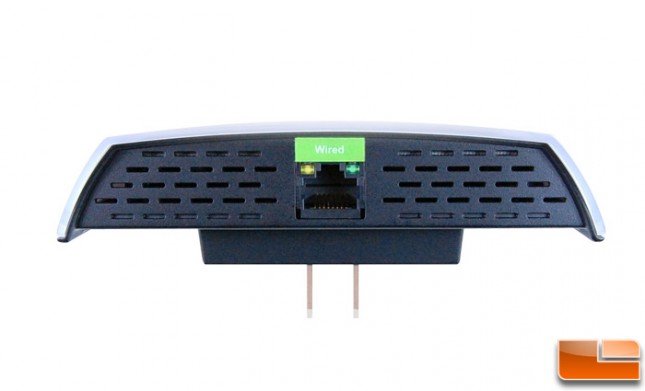
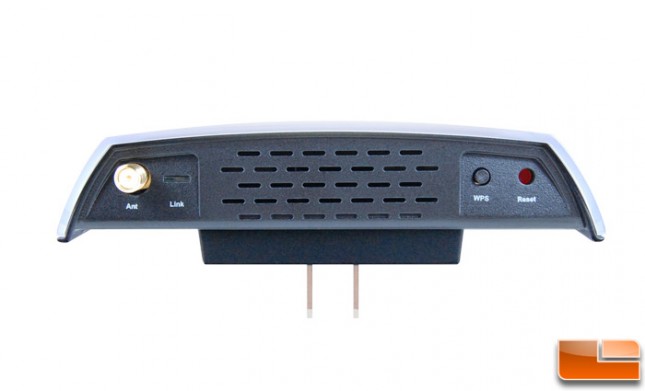
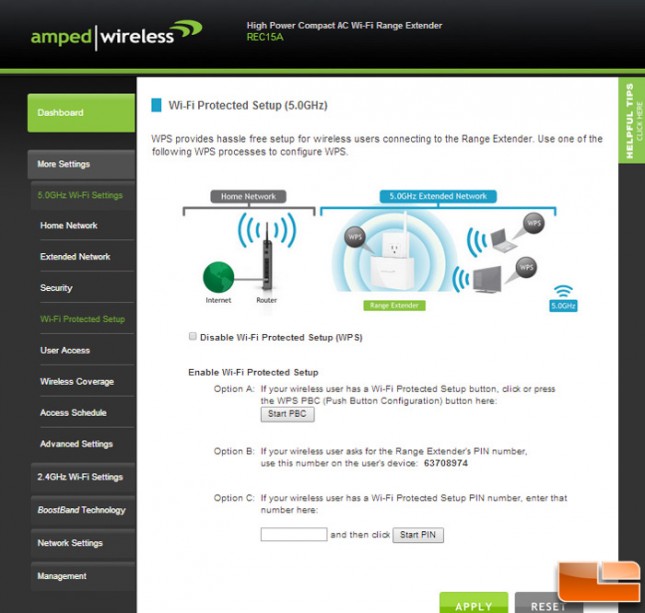
The REC15A unit contains a standard set of Ethernet connectivity and activity (Yellow and Green) LEDs on the bottom. On the top we find a WPS security button and Reset button. The Reset button needs a pin so that you dont push it by accident. Next to the antenna we see another Link LED that reflects the wireless activity.
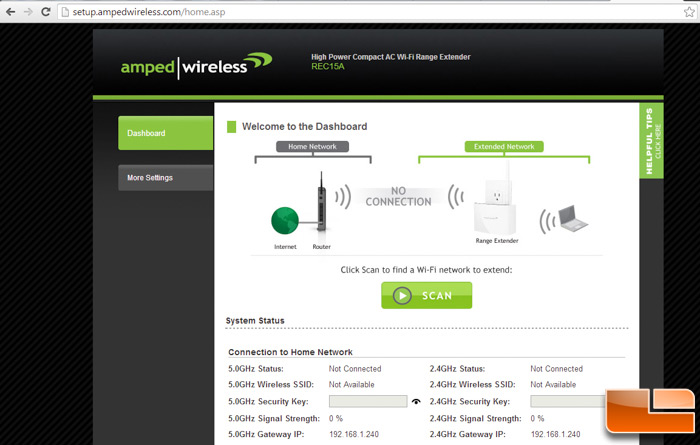
After connecting the antenna to the REC15A, we simply plug the unit into the wall and used our laptop to connected to the default Amped Range Extender Wi-Fi network: Amped_REC15A_2.4 or Amped_REC15A_5.0. After connecting, we opened our browser and navigated to the setup web address: http://setup.ampedwireless.com (or http://192.168.1.240) . From here we can access the Amped Web Menu or Dashboard.
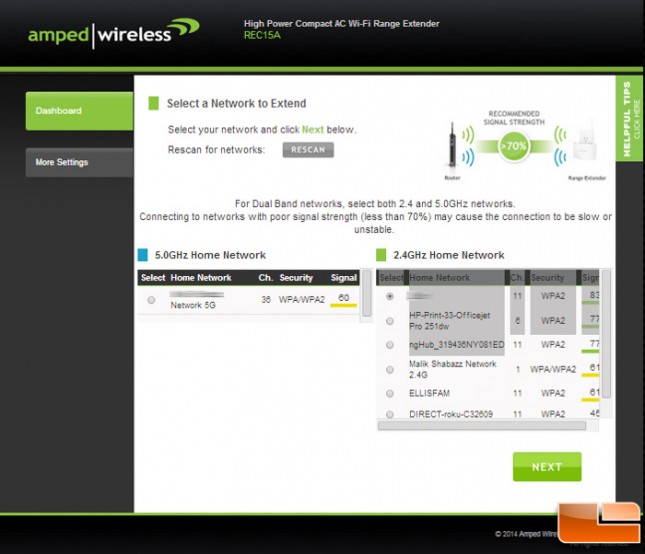
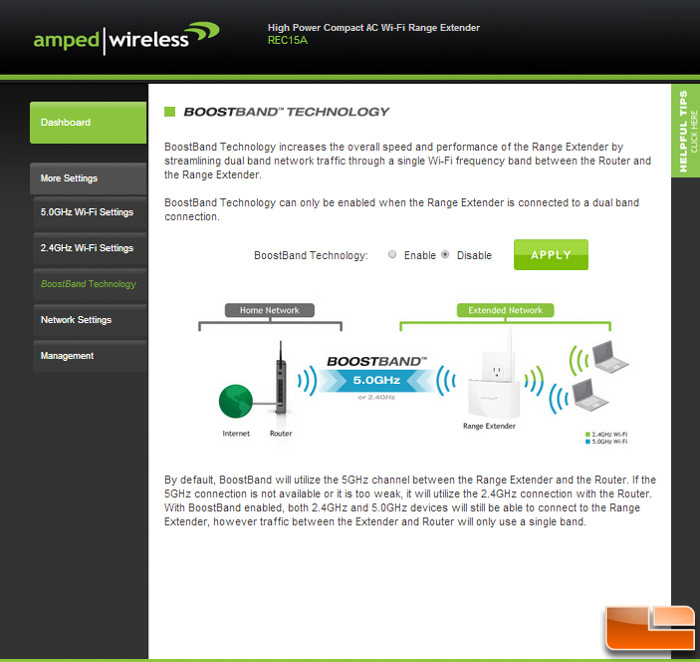
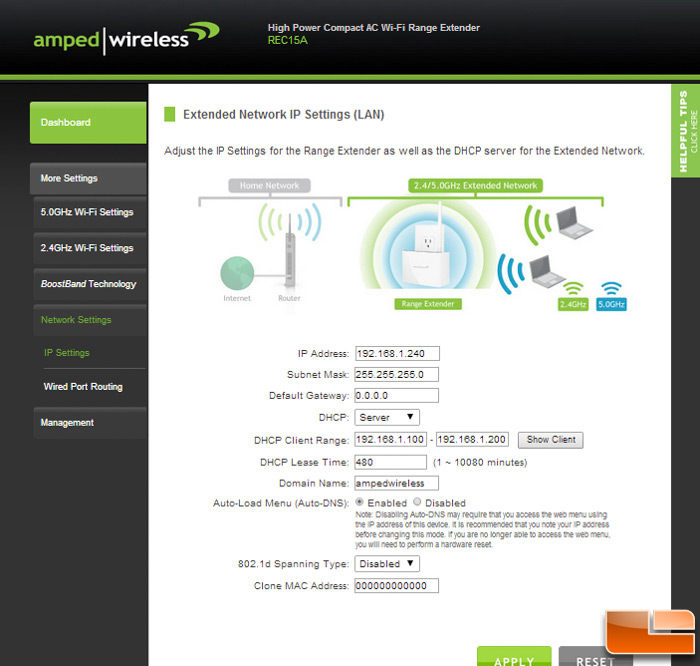
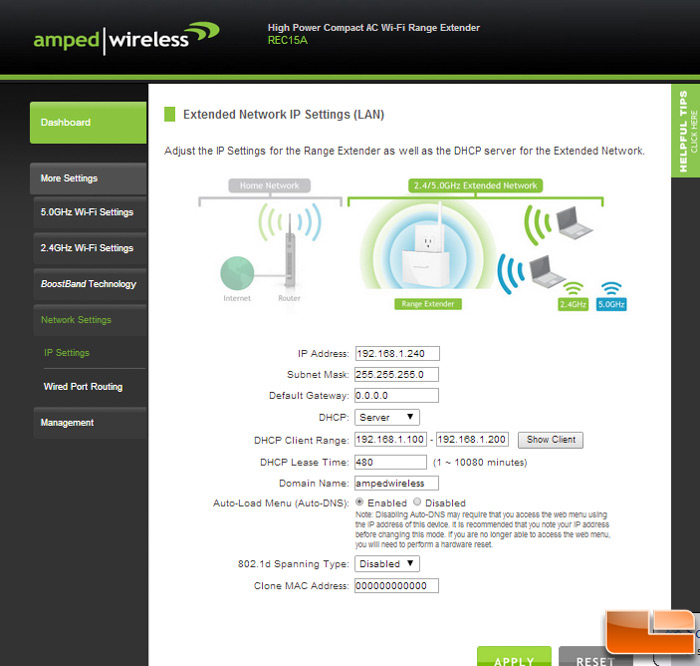
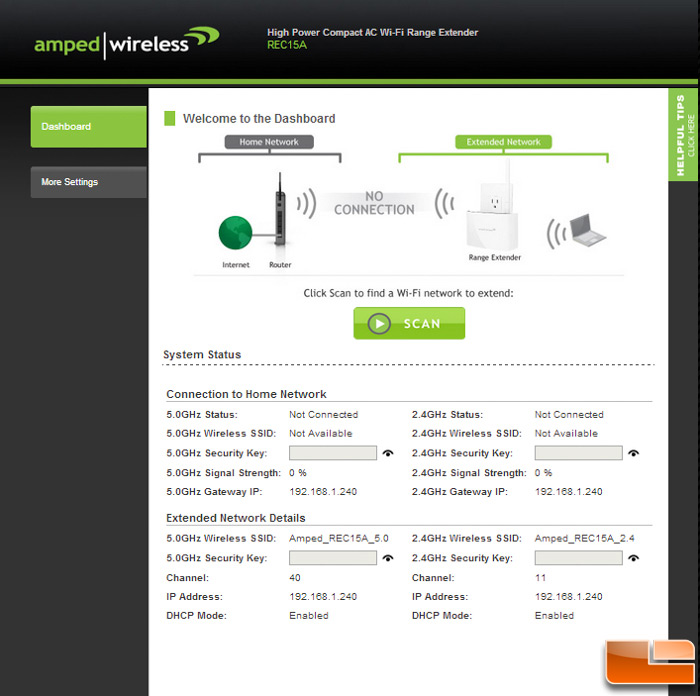
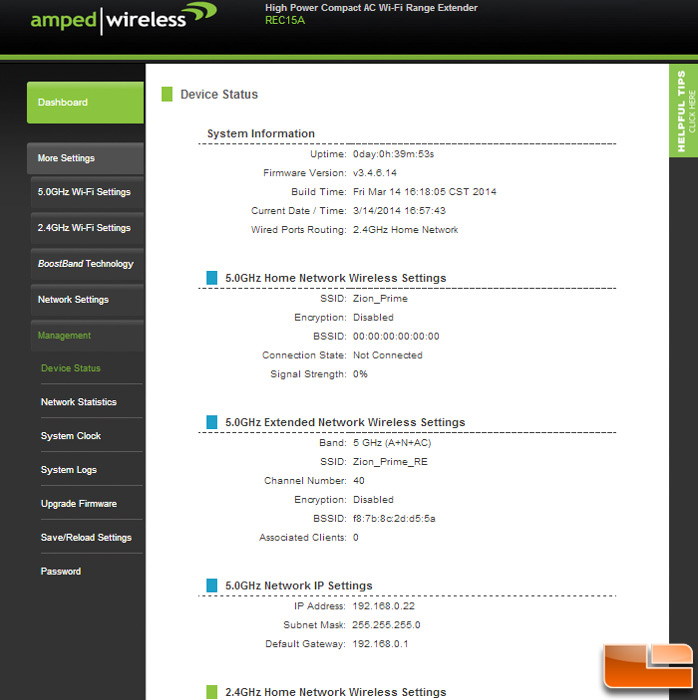
Ampeds REC15A Dashboard shows you the status of your Range Extender and is the place where you do all of your tweaking and configuration.
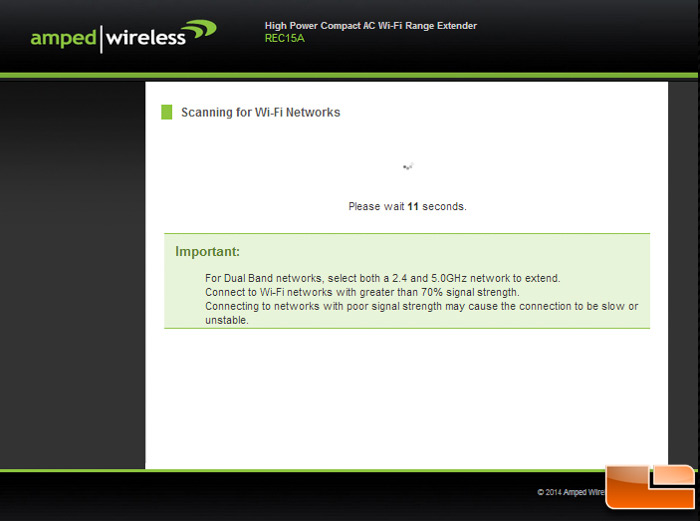
To set up the REC15A for use, we first scan for the network we want to extend. The Dashboard then shows a listing of all the wireless networks in our area. What is nice is that you can see the SSID names of the various networks as well as the channel number, signal strength, and what type of encryption each network has.
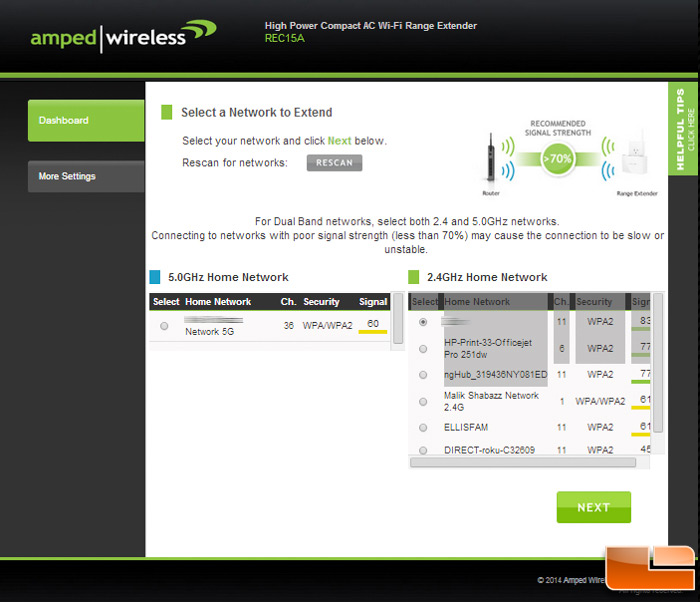
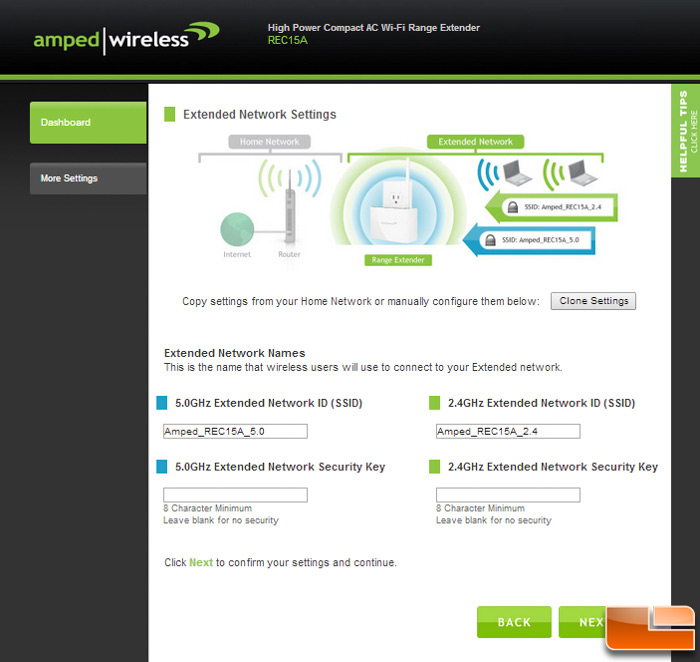

After selecting the network you want to extend, you then enter in the security key if necessary and give your extended network a name. You can simply select Clone and the setup wizard will copy the SSID and security key of your network. Doing this, your Extended Network will have a _RE at the end of the SSID name. Of course you can manually enter the network name and security key.

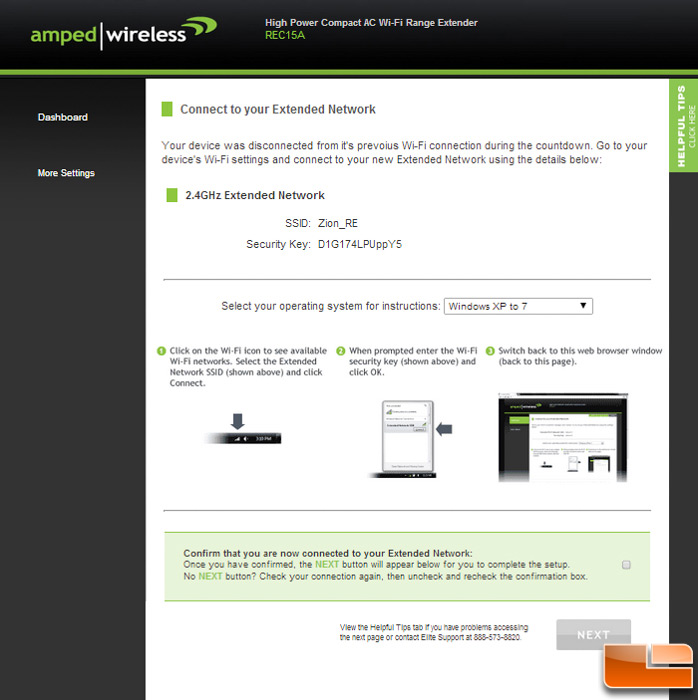

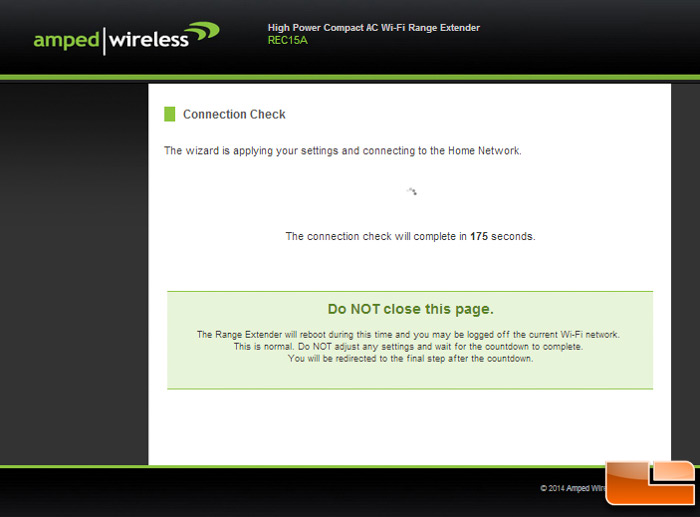
After applying all of the initial settings, you apply them and wait for the REC15A to restart. After the unit powers back on, you will need to select a wireless network to connect to. Here you should see the new Extended Network.
For us, we are mainly interested in extending our Wireless-AC network so lets see just how good the Amped Range Extender work for our 802.11ac network.