Thermaltake Level 10 M Advanced RGB Mouse Review
Thermaltake eSports Command Center Software
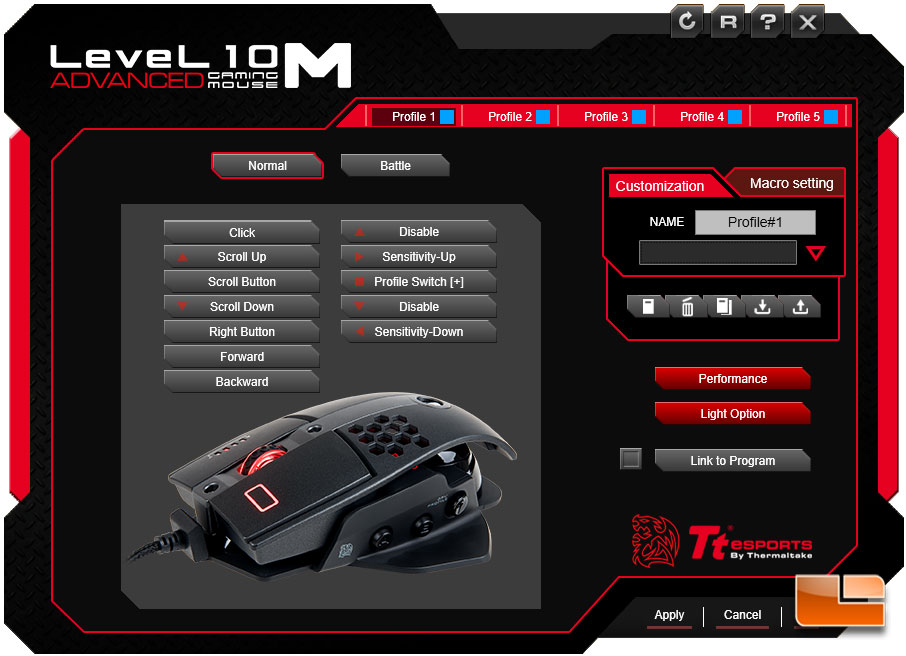
The new Thermaltake eSports Command Center software is laid out in a manner to make it easy to do what you want. The main screen provides many of the key functions. Here you can assign each of the main buttons any number of functions, select the profile you want to modify (there are five profile options), save your profile, create macros, adjust performance settings, and change the RGB color options.
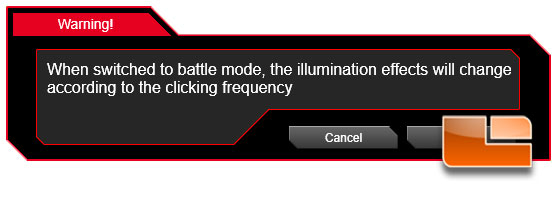
One of the options is to set the mouse in either Normal or Battle mode. Normal mode, the lights act as you have them configured. While Battle mode, the LED lights will change depending on how often you are clicking. So what exactly does that mean? I had the mouse profile set to Red static, then I enabled Battle mode. The LED’s switched to Blue pulse, as I clicked the mouse button faster the color changed from Blue to Teal, Green, Yellow, and finally Red (I don’t know if there’s any further changes as I couldn’t click any faster). Switching back to Normal mode, the LED’s went back to Red Static.
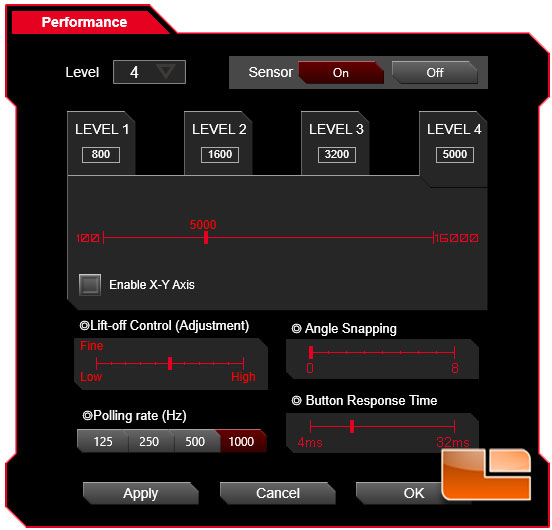
The Performance options available to the Level 10 M Advanced allow you to change the four DPI settings per profile from a minimum 100dpi all the way up to a 16,000 dpi. The “Lift-Off” settings, allowed me to adjust the sensor’s ability to detect and ignore imperfections in the work surface. Angle Snapping is good for the mouse helping you move in a straight line. Polling Rate is selectable from 125, 250, 500 and 1000 Hz, it’s up to you to determine how responsive the mouse is. In addition, the Button Response time can be adjusted from a minimum of 4ms up to 32ms in 1ms increments. So the actual performance of the mouse is really up to the user to determine
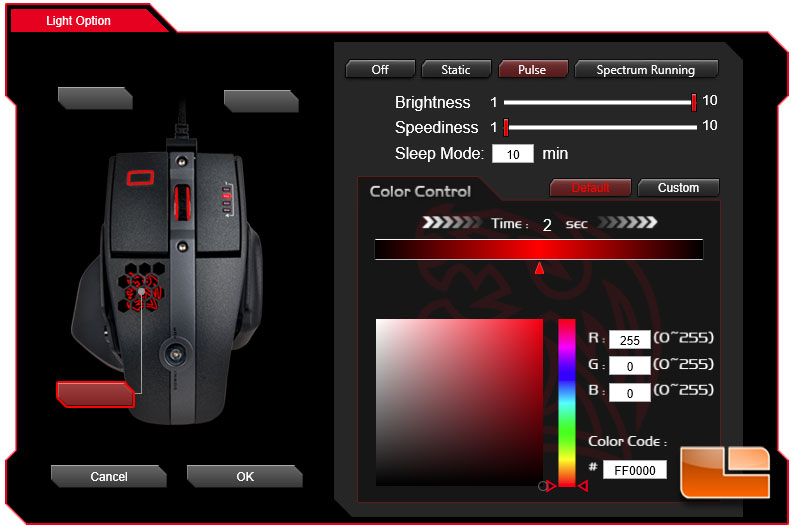
Now for the whole reason to get an RGB mouse, the color options. There are three LED zones that can be customized individually. The TT eSports dragon behind the hand vent, the left button LED, and the scroll wheel LED. They can be customized with three lighting functions, Static (always on), Pulse (aka Breathe effect), and Spectrum Running (cycle through a rainbow of colors). If you select Pulse, you get another function built into it, you can add up to eight Pulse color stops, you can make it cycle through the colors of your choice; ie with four color stops Blue, Red, Green, White, it will roll through those four colors and then repeat the sequence. Selecting the color option you have three main ways to select it, the large color hue square controlled by the vertical rainbow color selector, enter the RGB code, or the Pantone color code. If you would like the opportunity to see the three color modes in action, Thermaltake has a nice tool on their product page to let you play with the Static color pallet, see the Pulse and Spectrum Running modes in action.
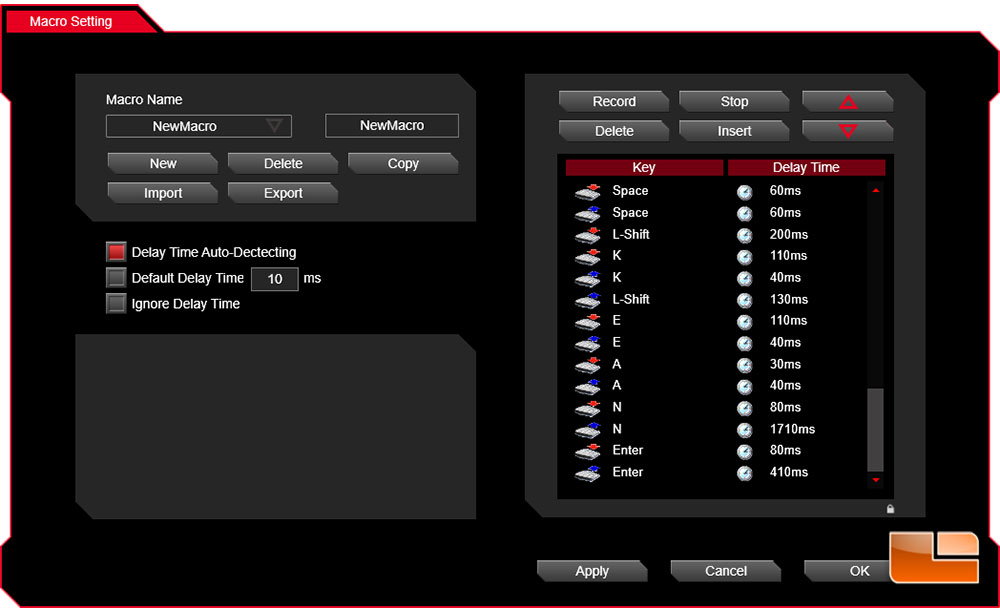
The macro capability of the Level 10 M Advanced is pretty typical. There are limitations on the length of macro, and a few little quirks to be aware of, but overall it is one of the easier macro build tools. You simply give it a name, hit record and type what you want; when you are done you click on Stop. From there you can manually adjust the delay time, re-order the keystrokes, delete or insert keystrokes. I did my typical email signature block of “Thanks, Steven Kean(enter)” which turned out to be the limit on key strokes (23 keystrokes). 23 keystrokes is pretty short, I have seem others reach up to around 60 keystrokes. If the mouse can handle up to 50 macros, at 23 keystrokes each, allow us to create longer macros, but reduce the available number we can do, when memory is filled we can no longer create macros.
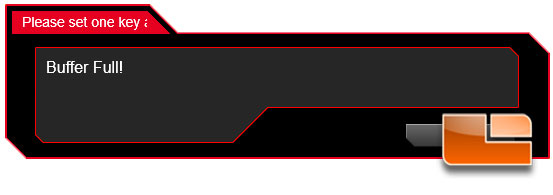
When you hit that 23 keystroke limitation, Thermaltake notifies you with a pop-up window saying “Buffer Full”. Many of us will know what that means, but I think it should say “Macro Buffer Full”, “Macro Length Limit Reached” or something along those lines.
-
- Thermaltake Level 10 M Advanced Software Button Assignement
-
- Thermaltake Level 10 M Advanced Software Button Assignment

-
- Thermaltake Level 10 M Advanced Software Button Assignement

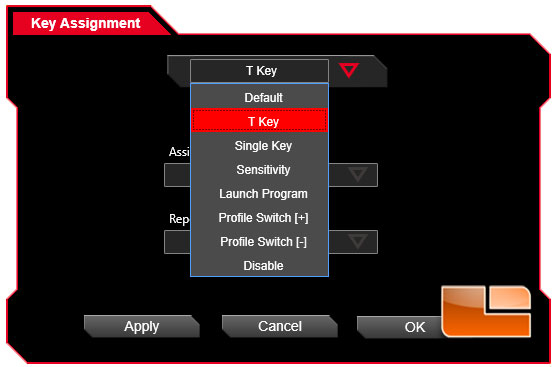
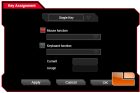
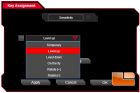
One other feature of the Level 10 M Advanced that is provided within the software is the ability to customize the buttons on the mouse. By selecting the button you wish to customize on the main screen, you are provided a wide range of options. You can assign macros, single keys, launch programs, change profiles or even disable the selected button. It is all laid out rather well and makes it easy to customize the buttons. There is one little thing to be aware of, in the software, Thermaltake doesn’t list Macro as an option for button assignment, but you can create macros. Well, that is because Thermaltake calls the button assignment option T-Key.